Build log: Threadripper Pro 5975WX Linux workstation on the Asus Pro WS WRX80E-SAGE SE WIFI
On Christmas day I was trying to install a second GPU in my Threadripper 2990WX workstation and I managed to break the motherboard. Pro tip: Do not yank some cards out of your workstation while you’re in a hurry… I need this machine for work so it is time to build a new one!
Rationale
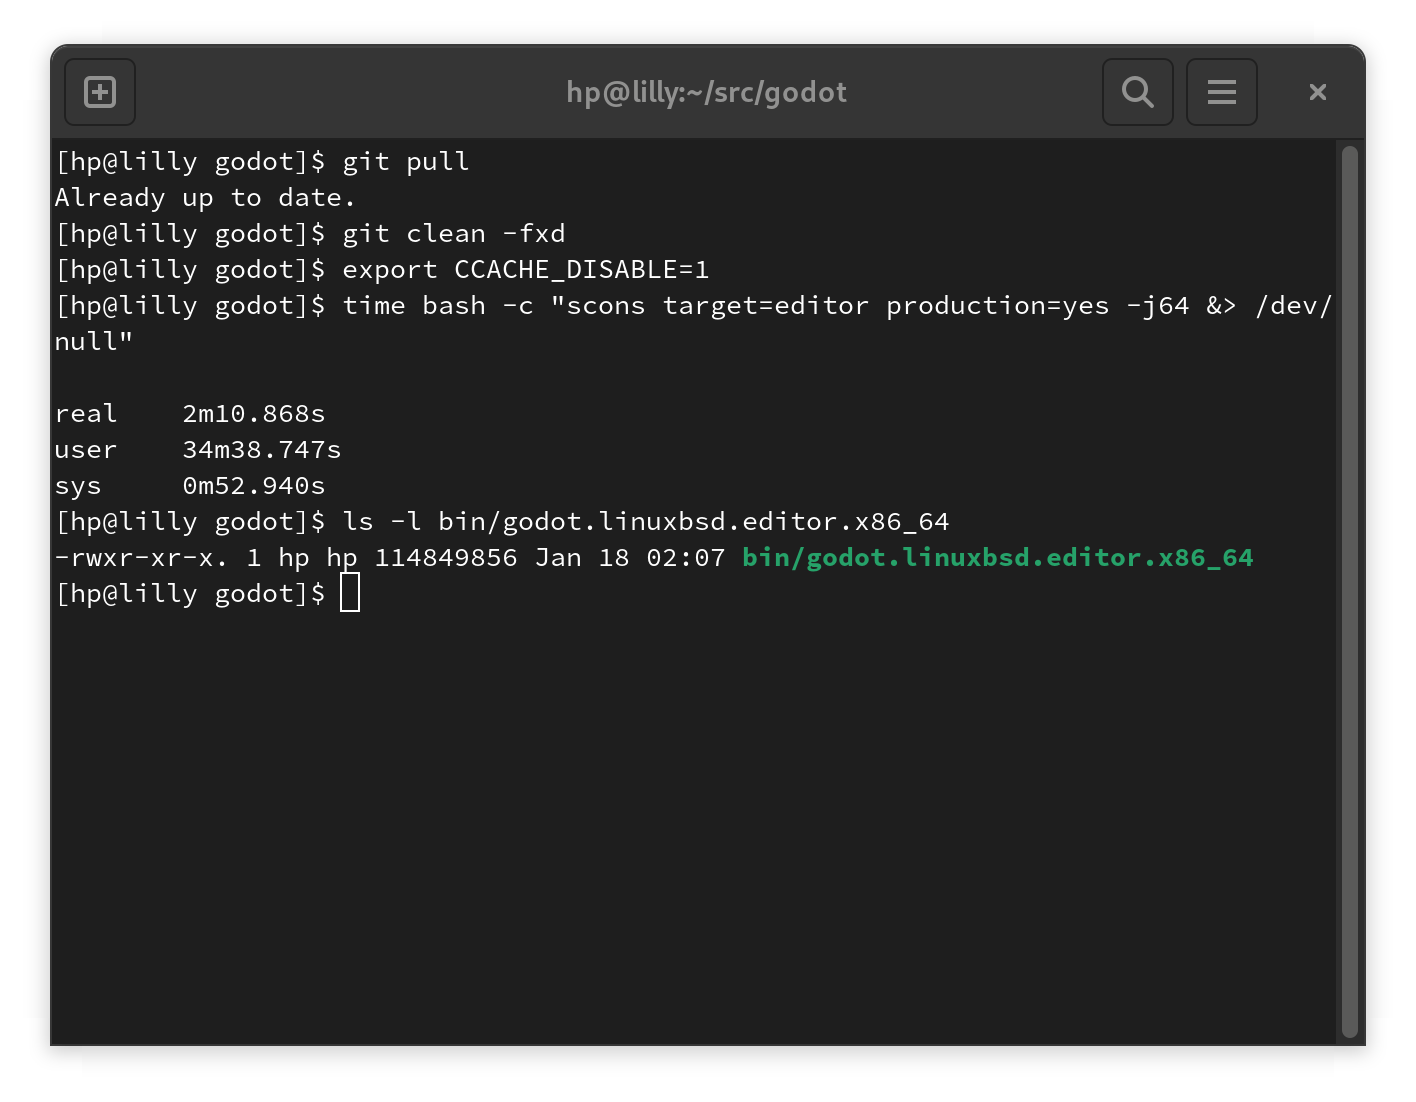
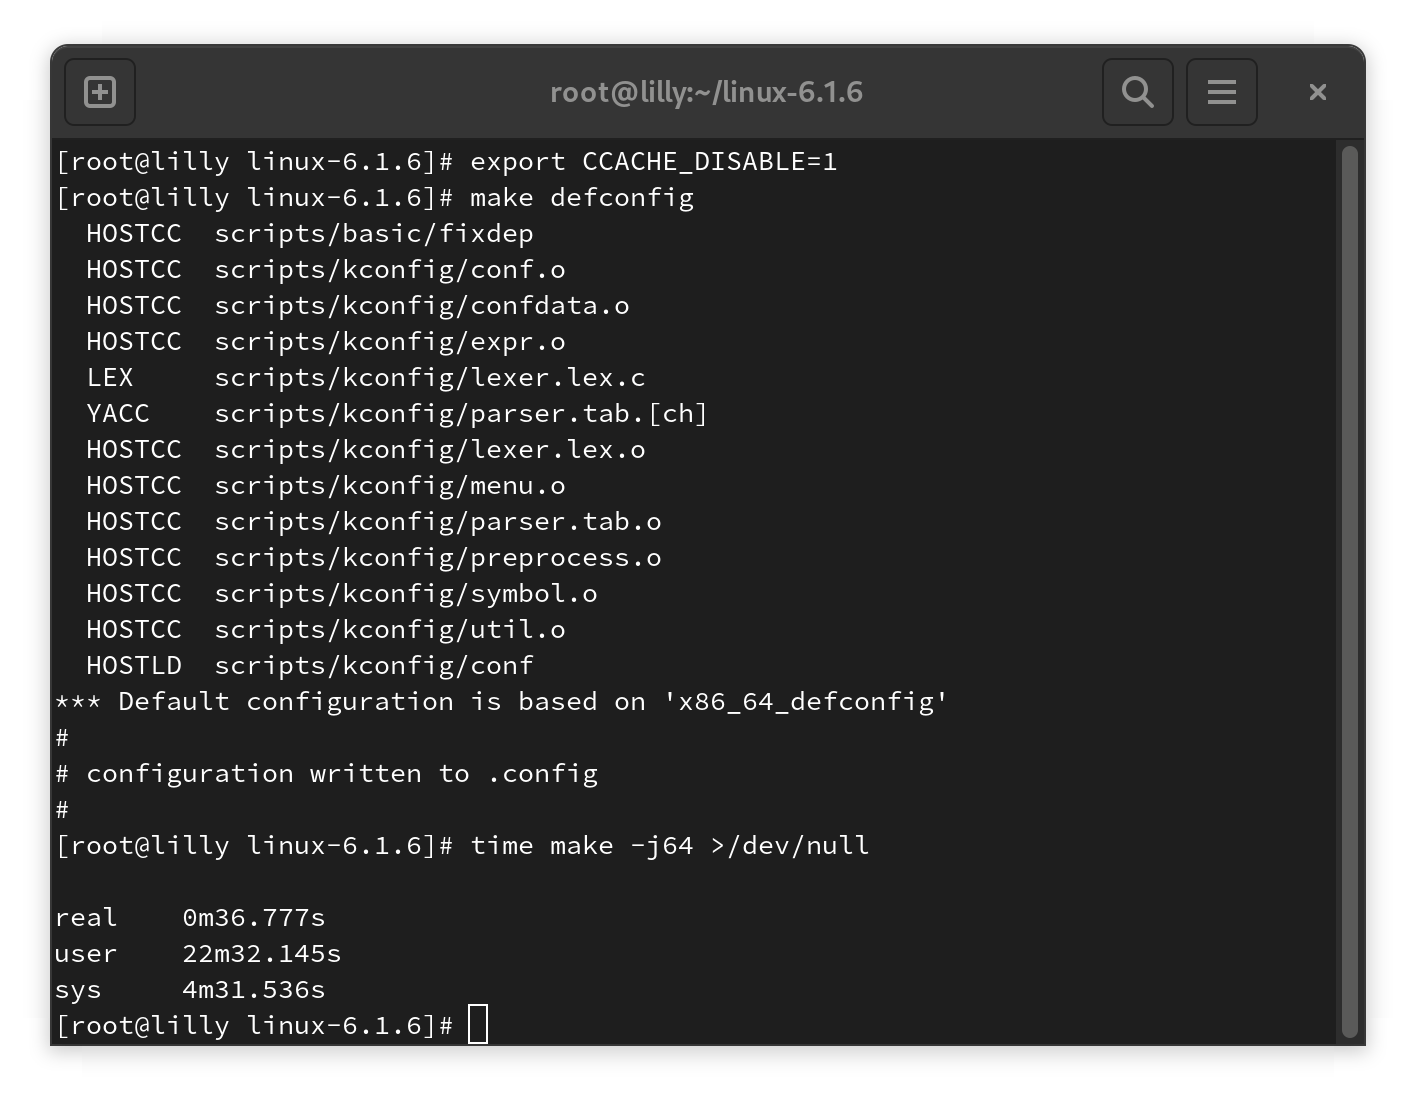
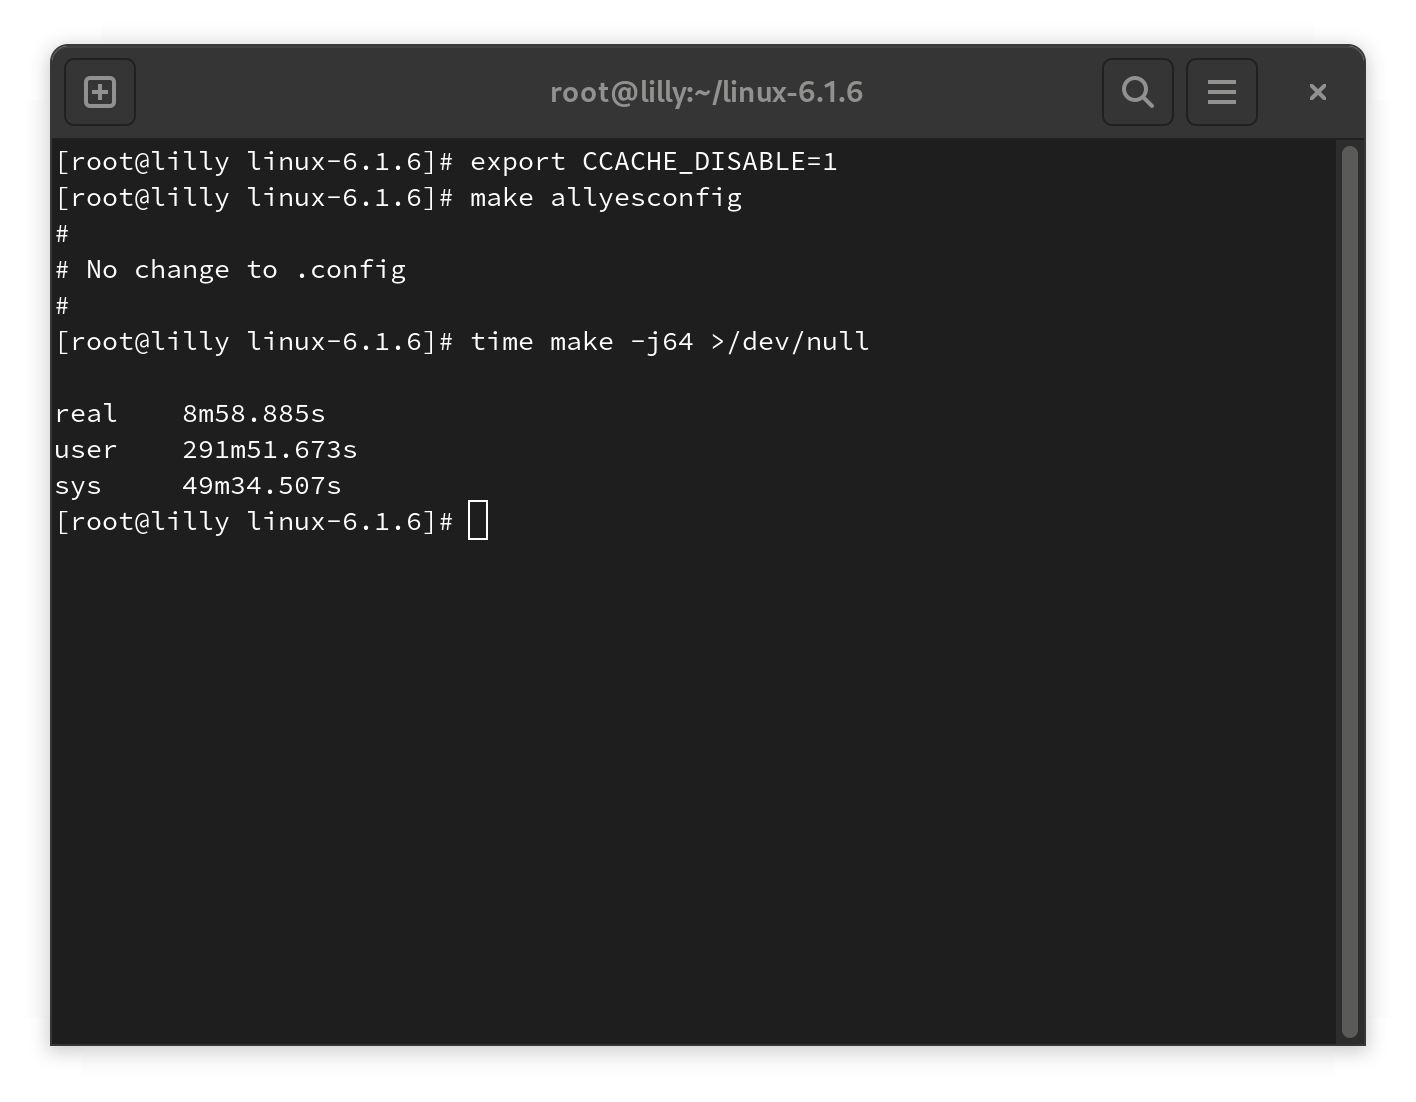
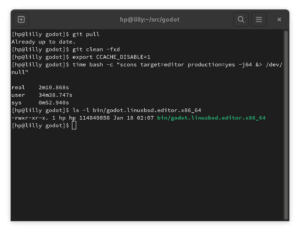
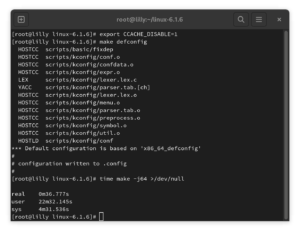
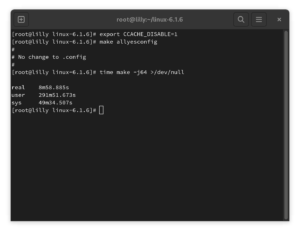
For my work at Prehensile Tales I frequently have to build the Godot engine to debug problems. Godot is a large C++ code base which can take quite a while to compile. Due to the problems I work on I, often end up having to do a full rebuild.
Aside from work for my company, I also help maintain the Godot buildroot and Godot build containers. Both of these also have me build massive amounts of code. Both the buildroot and the containers require having to build things like gcc, glibc, mono, and other heavy dependencies. Often times for multiple CPU architectures and multiple operating systems.
It is not uncommon for me to need to test Godot, the containers, or the buildroots on various platforms using virtual machines. Godot being a game engine, I need to be able to run a VM with a dedicated GPU as a virtual GPU generally doesn’t cut it. This all boils down to the following list of requirements:
- As many CPU cores as I can get for building software.
- Fast storage for building software.
- CPU frequencies need to be somewhat in line with consumer CPUs (for performance testing).
- At least two GPUs, one for the primary system and another one for use with virtual machines.
- A reasonable amount of storage for virtual machines.
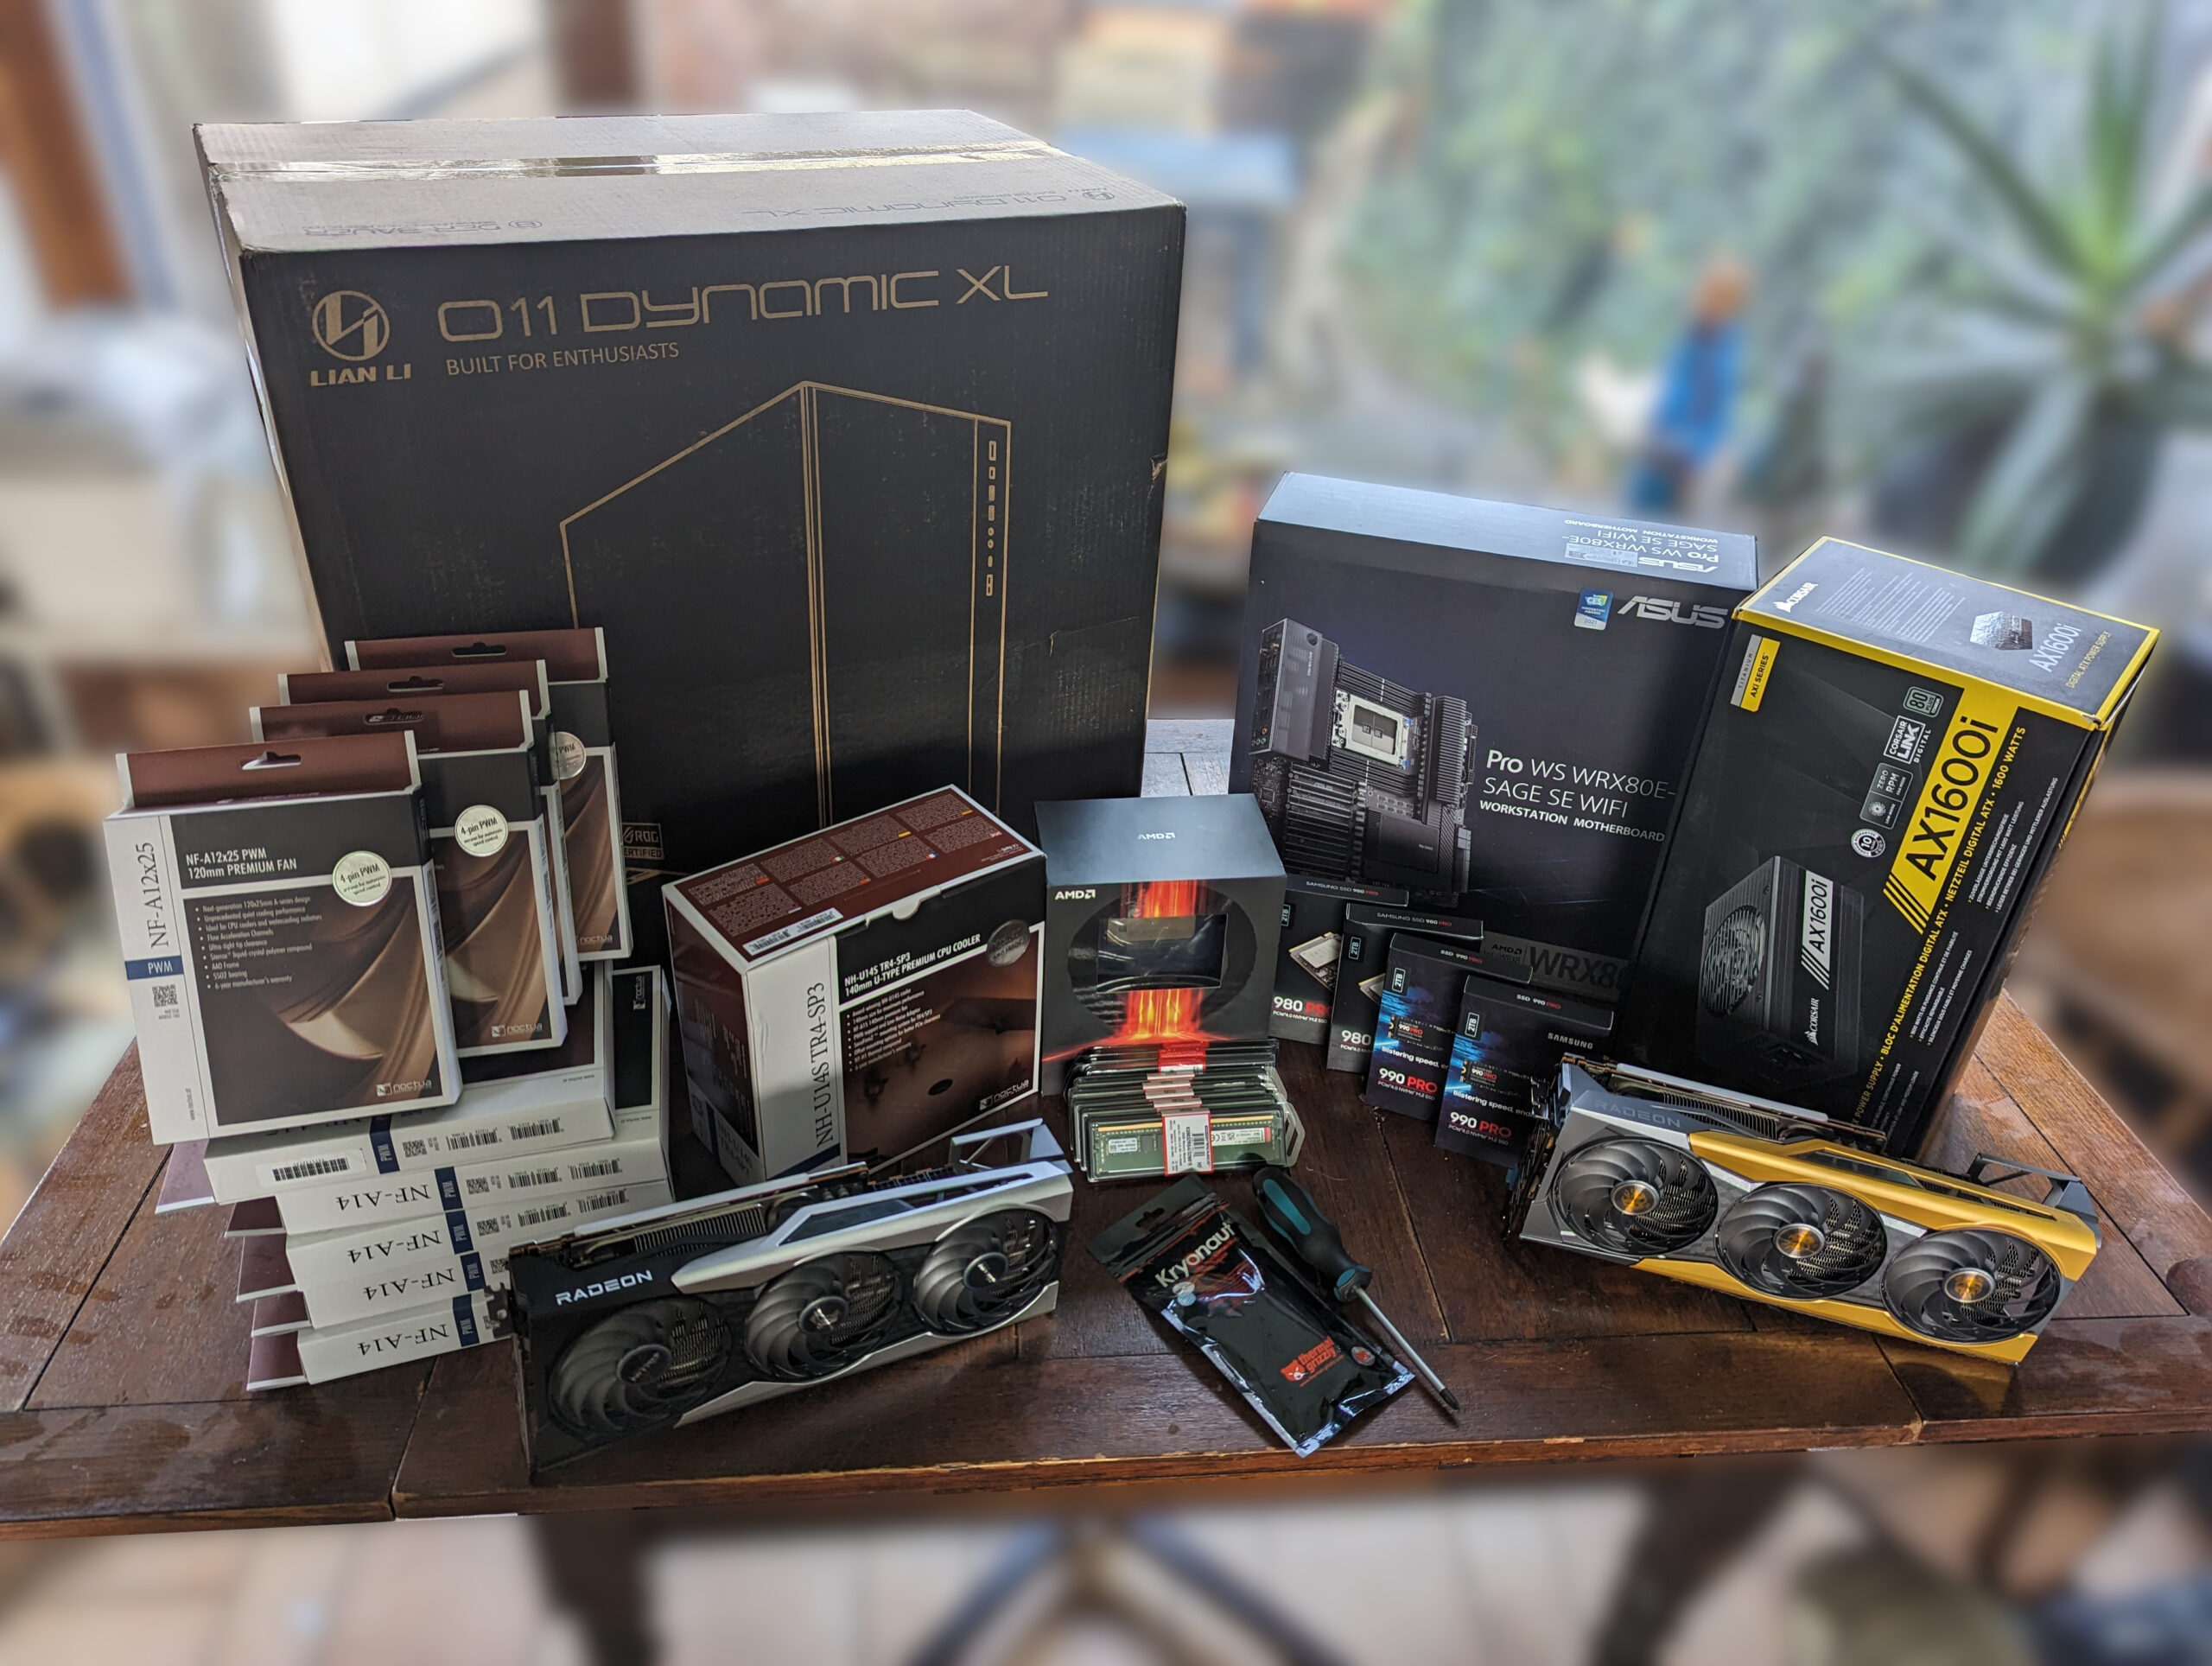
Parts list
After some careful consideration I picked the following parts:
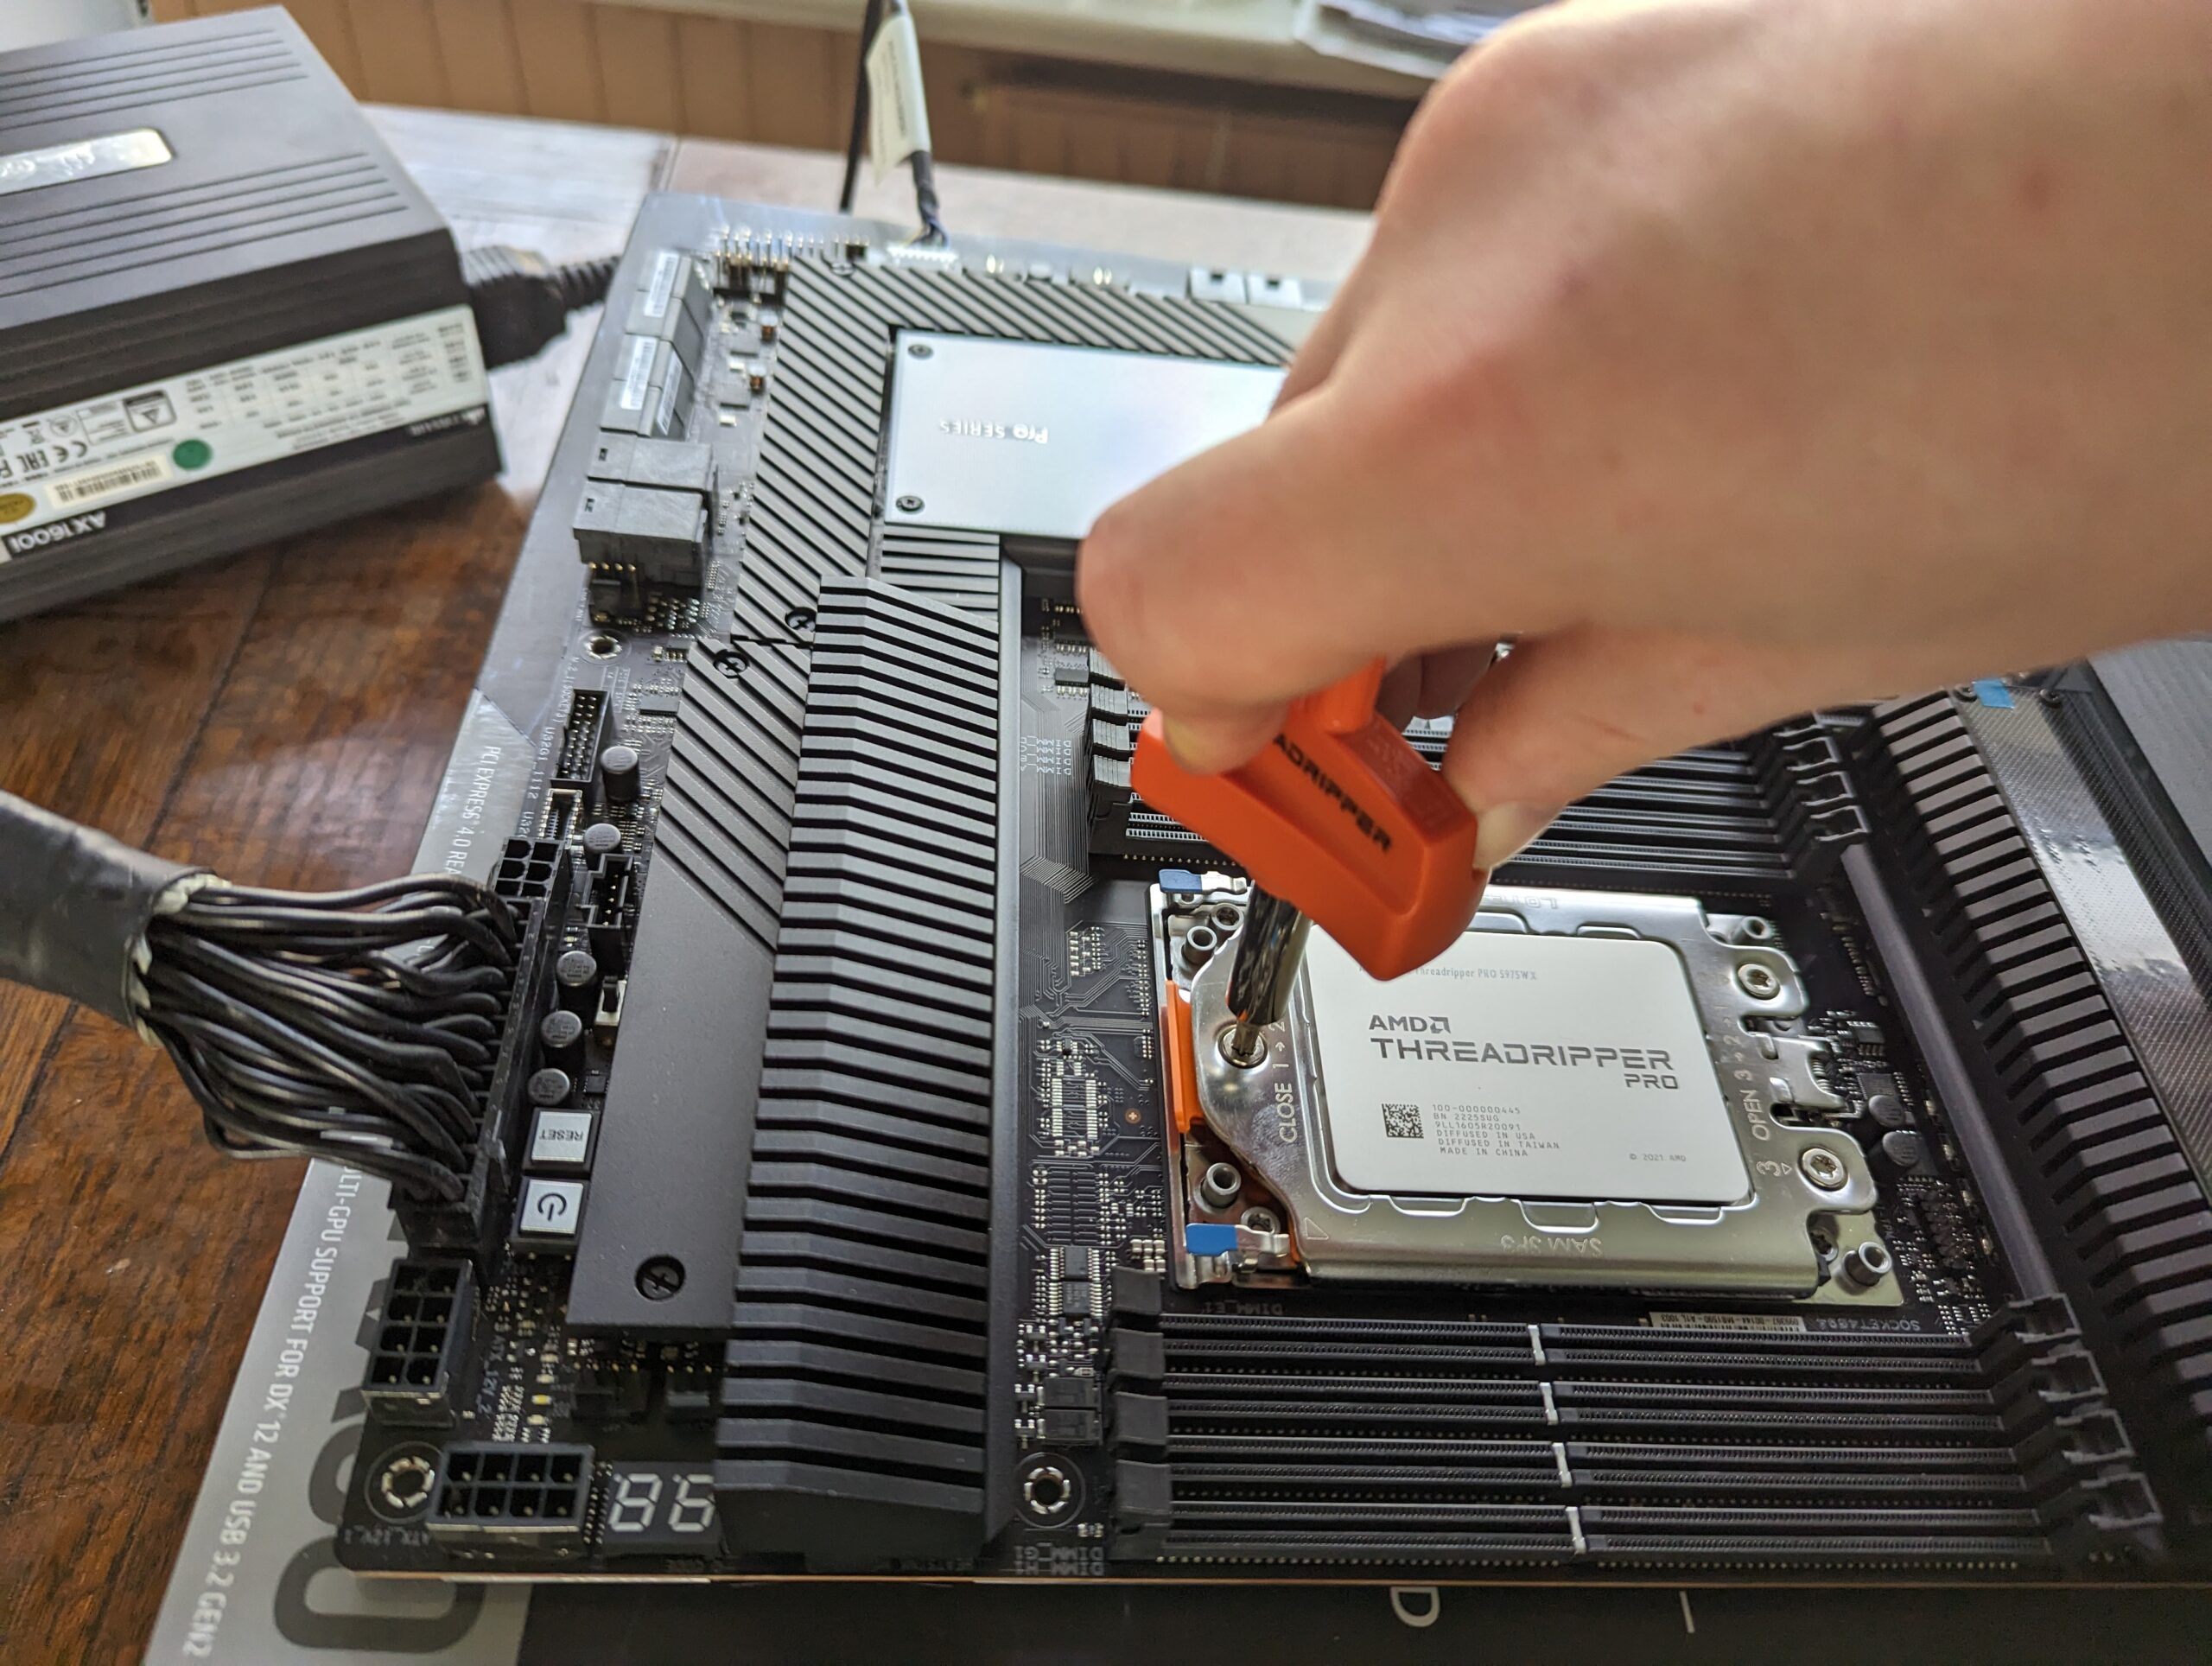
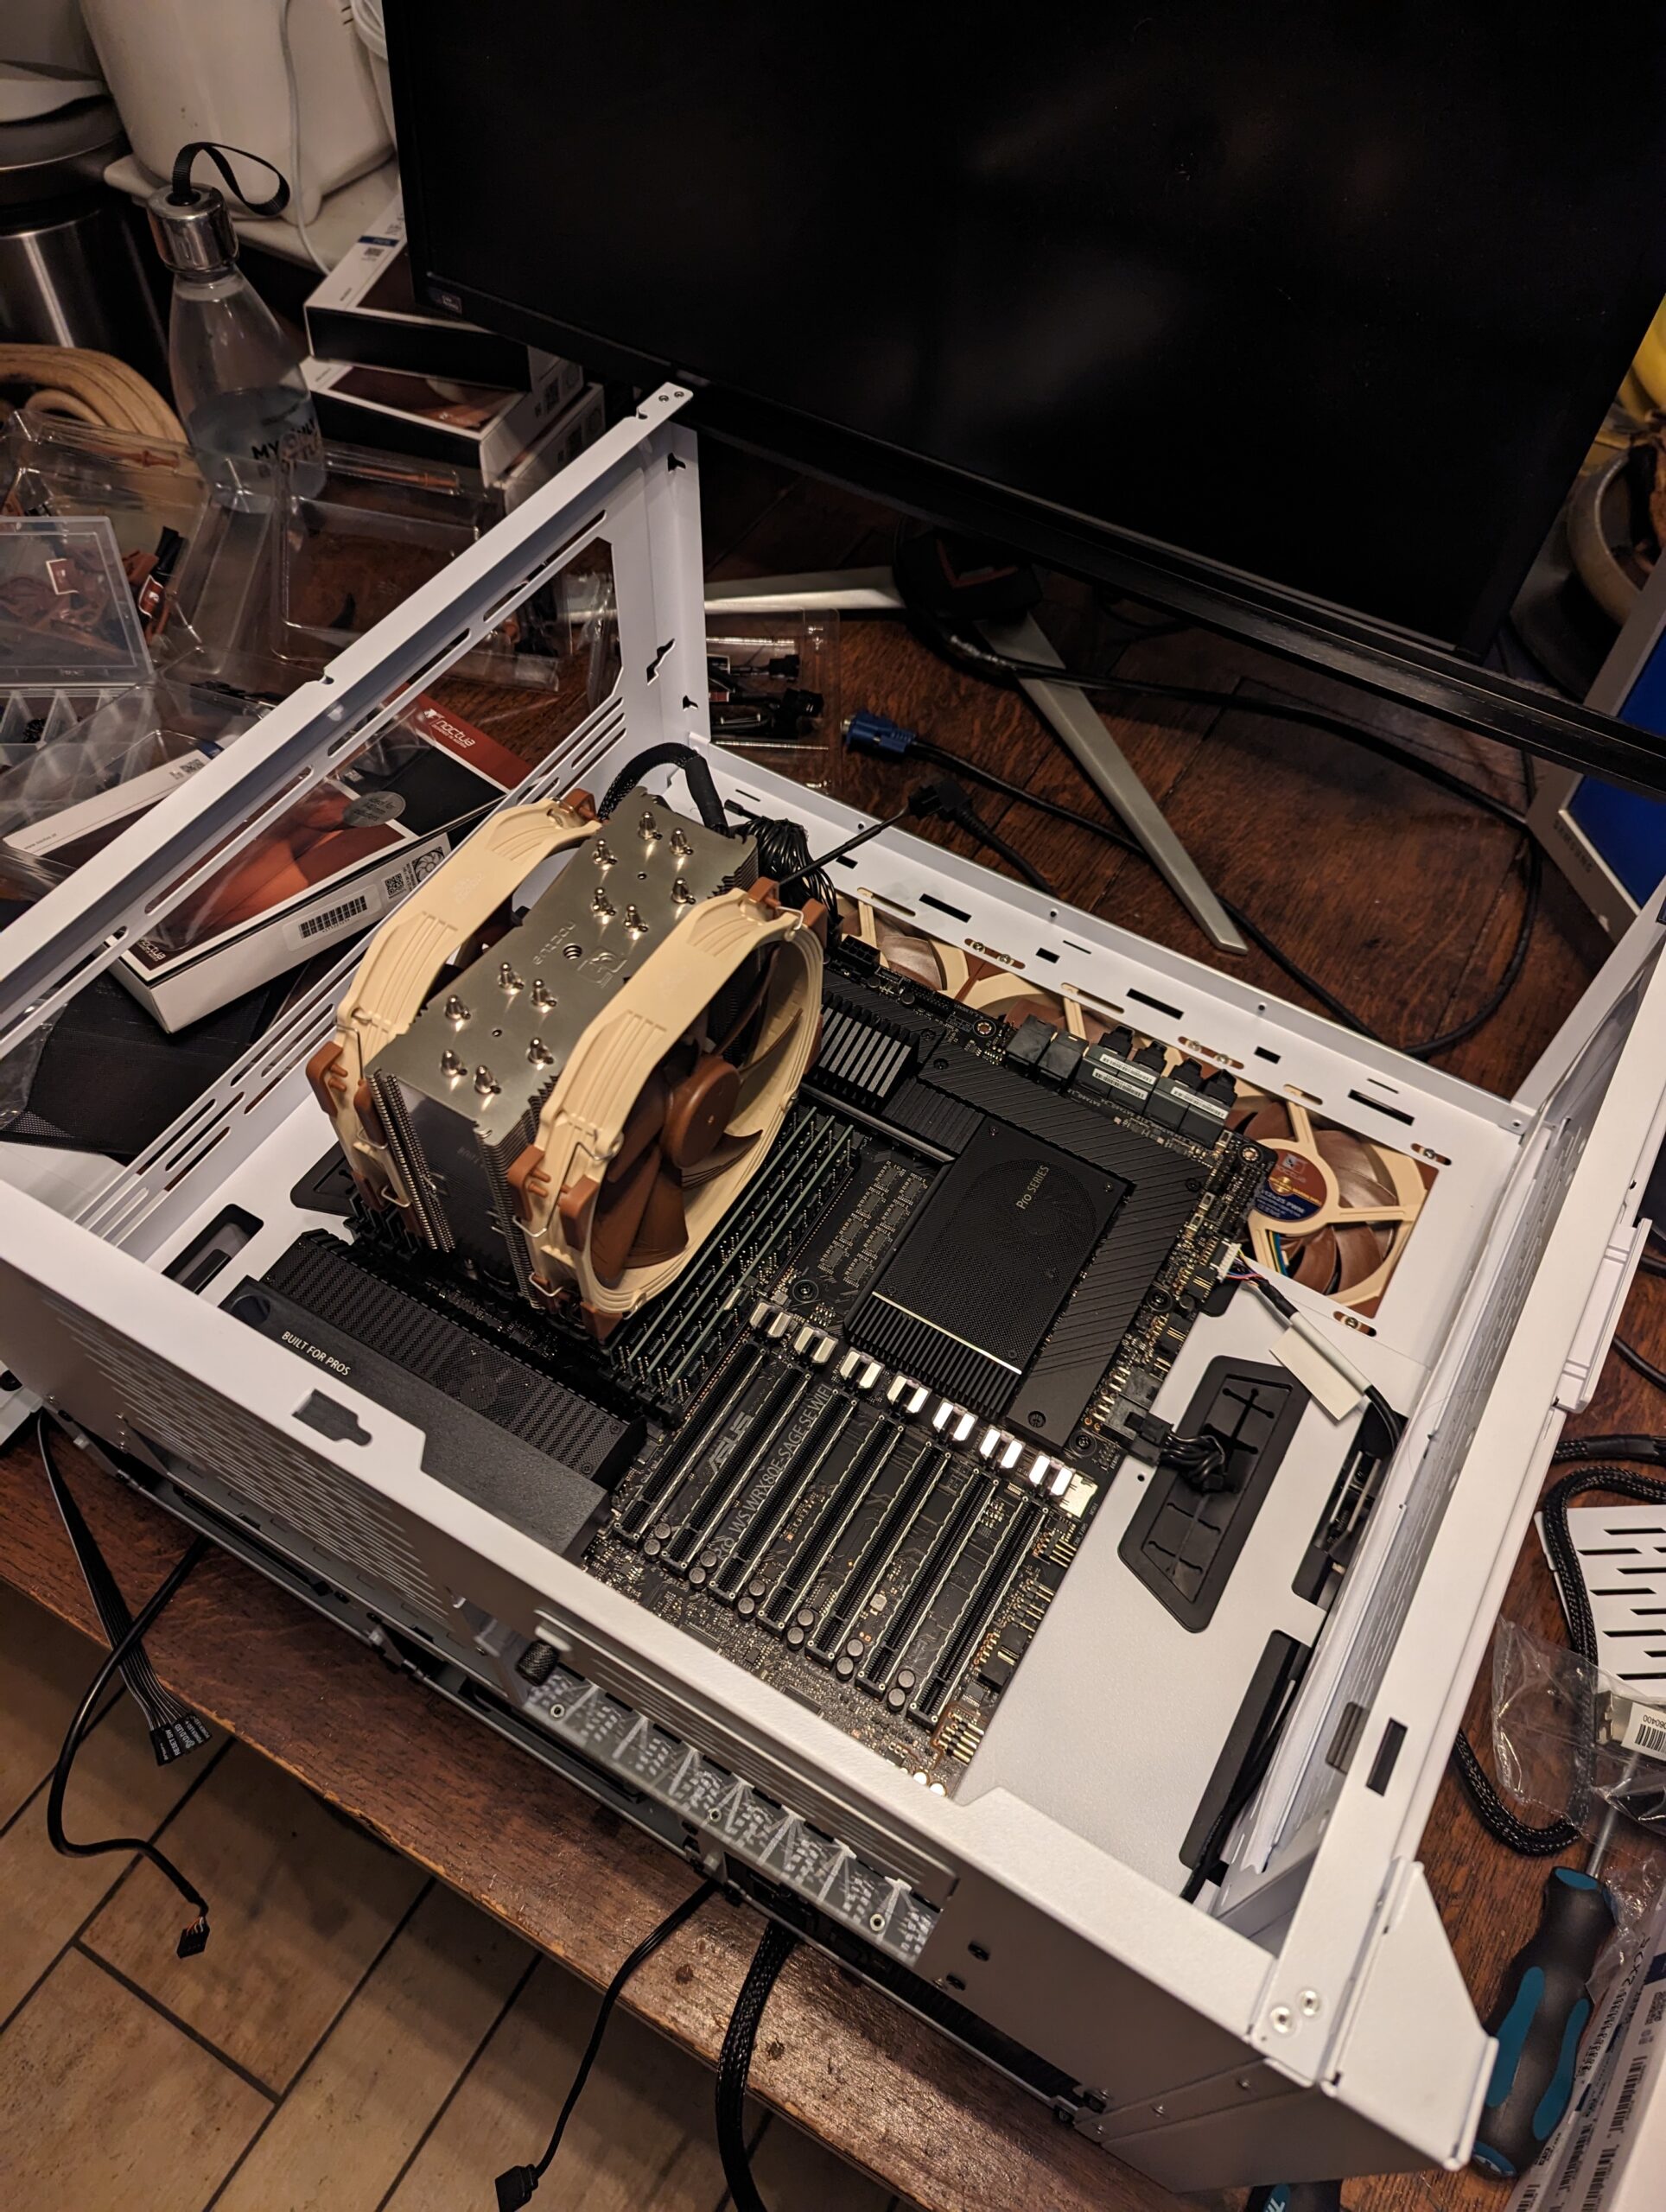
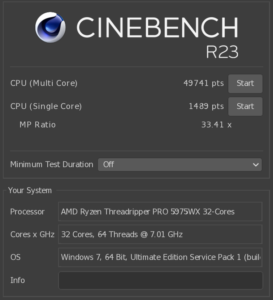
- Processor: AMD Ryzen Threadripper PRO 5975WX [Link]
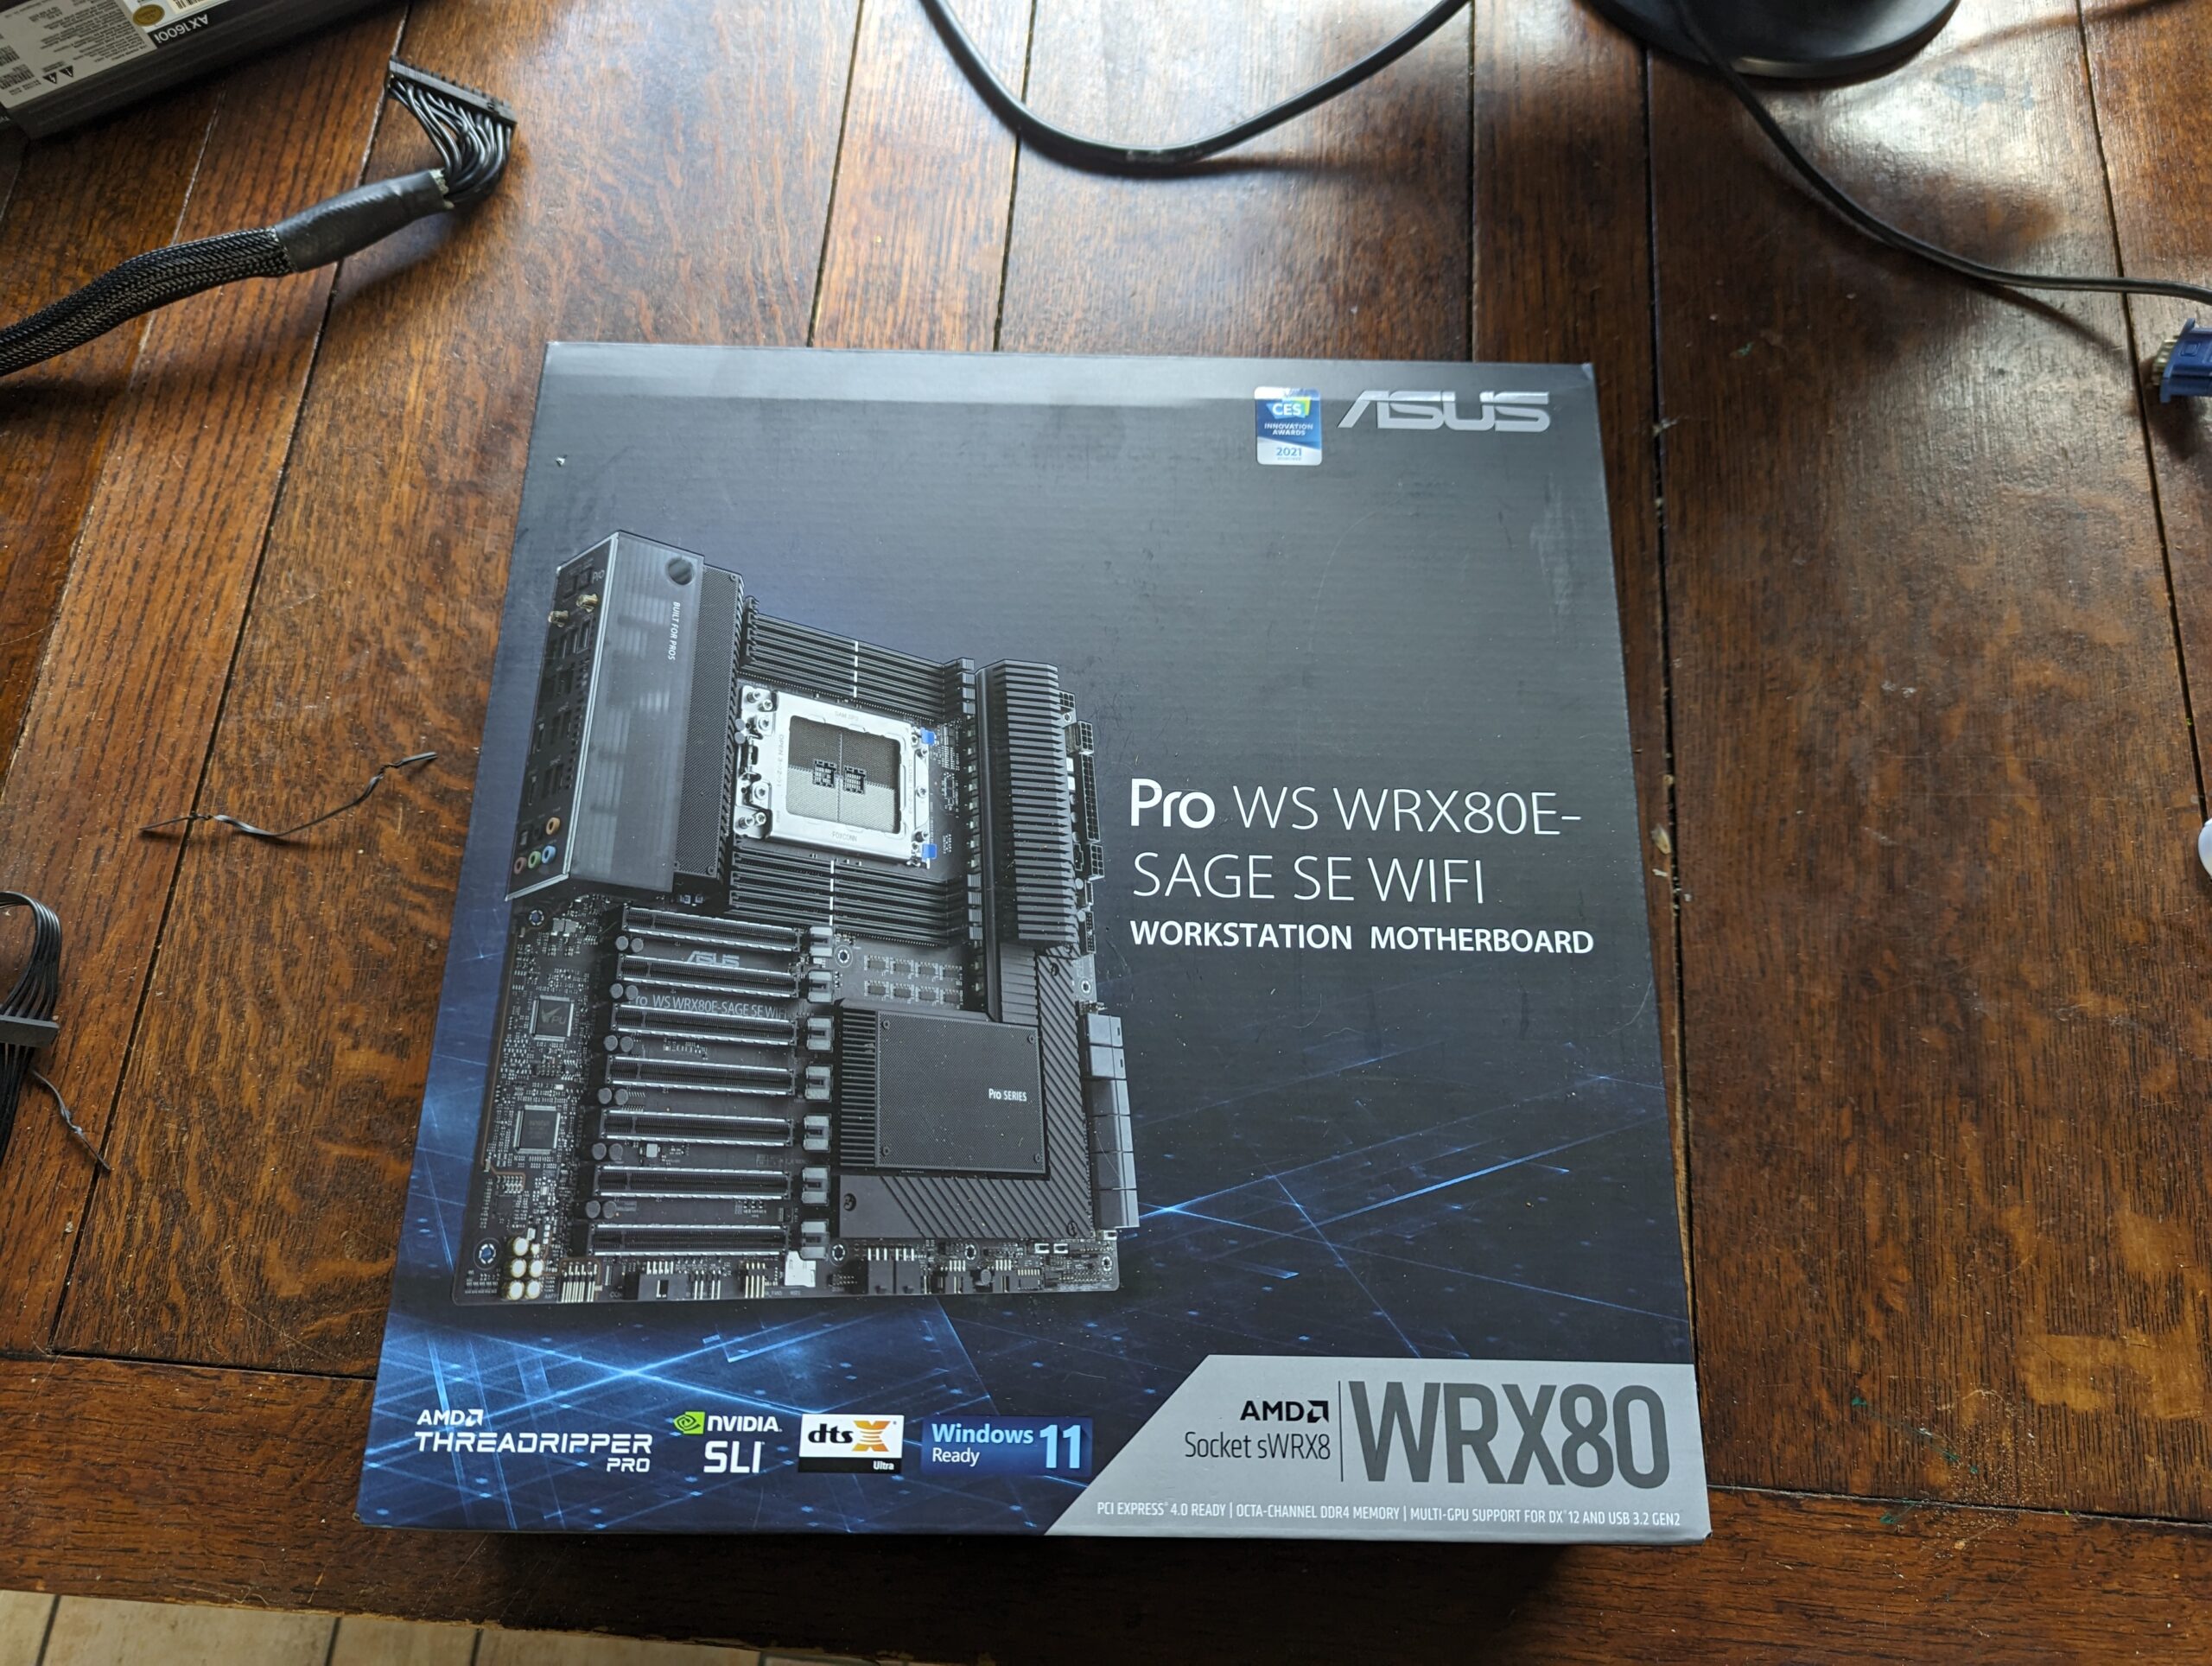
- Motherboard: Asus Pro WS WRX80E-SAGE SE WIFI [Link]
- Memory: Kingston KSM32RS4/32HCR (8x, ECC) [Link]
- GPU1: Sapphire NITRO+ AMD Radeon RX 6950 XT [Link]
- GPU2: Sapphire TOXIC AMD Radeon RX 6900 XT Air Cooled [Link]
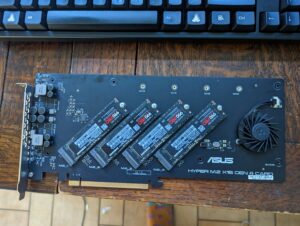
- Storage: Samsung 990 PRO PCIe 4.0 NVMe M.2 SSD 2TB (4x) [Link]
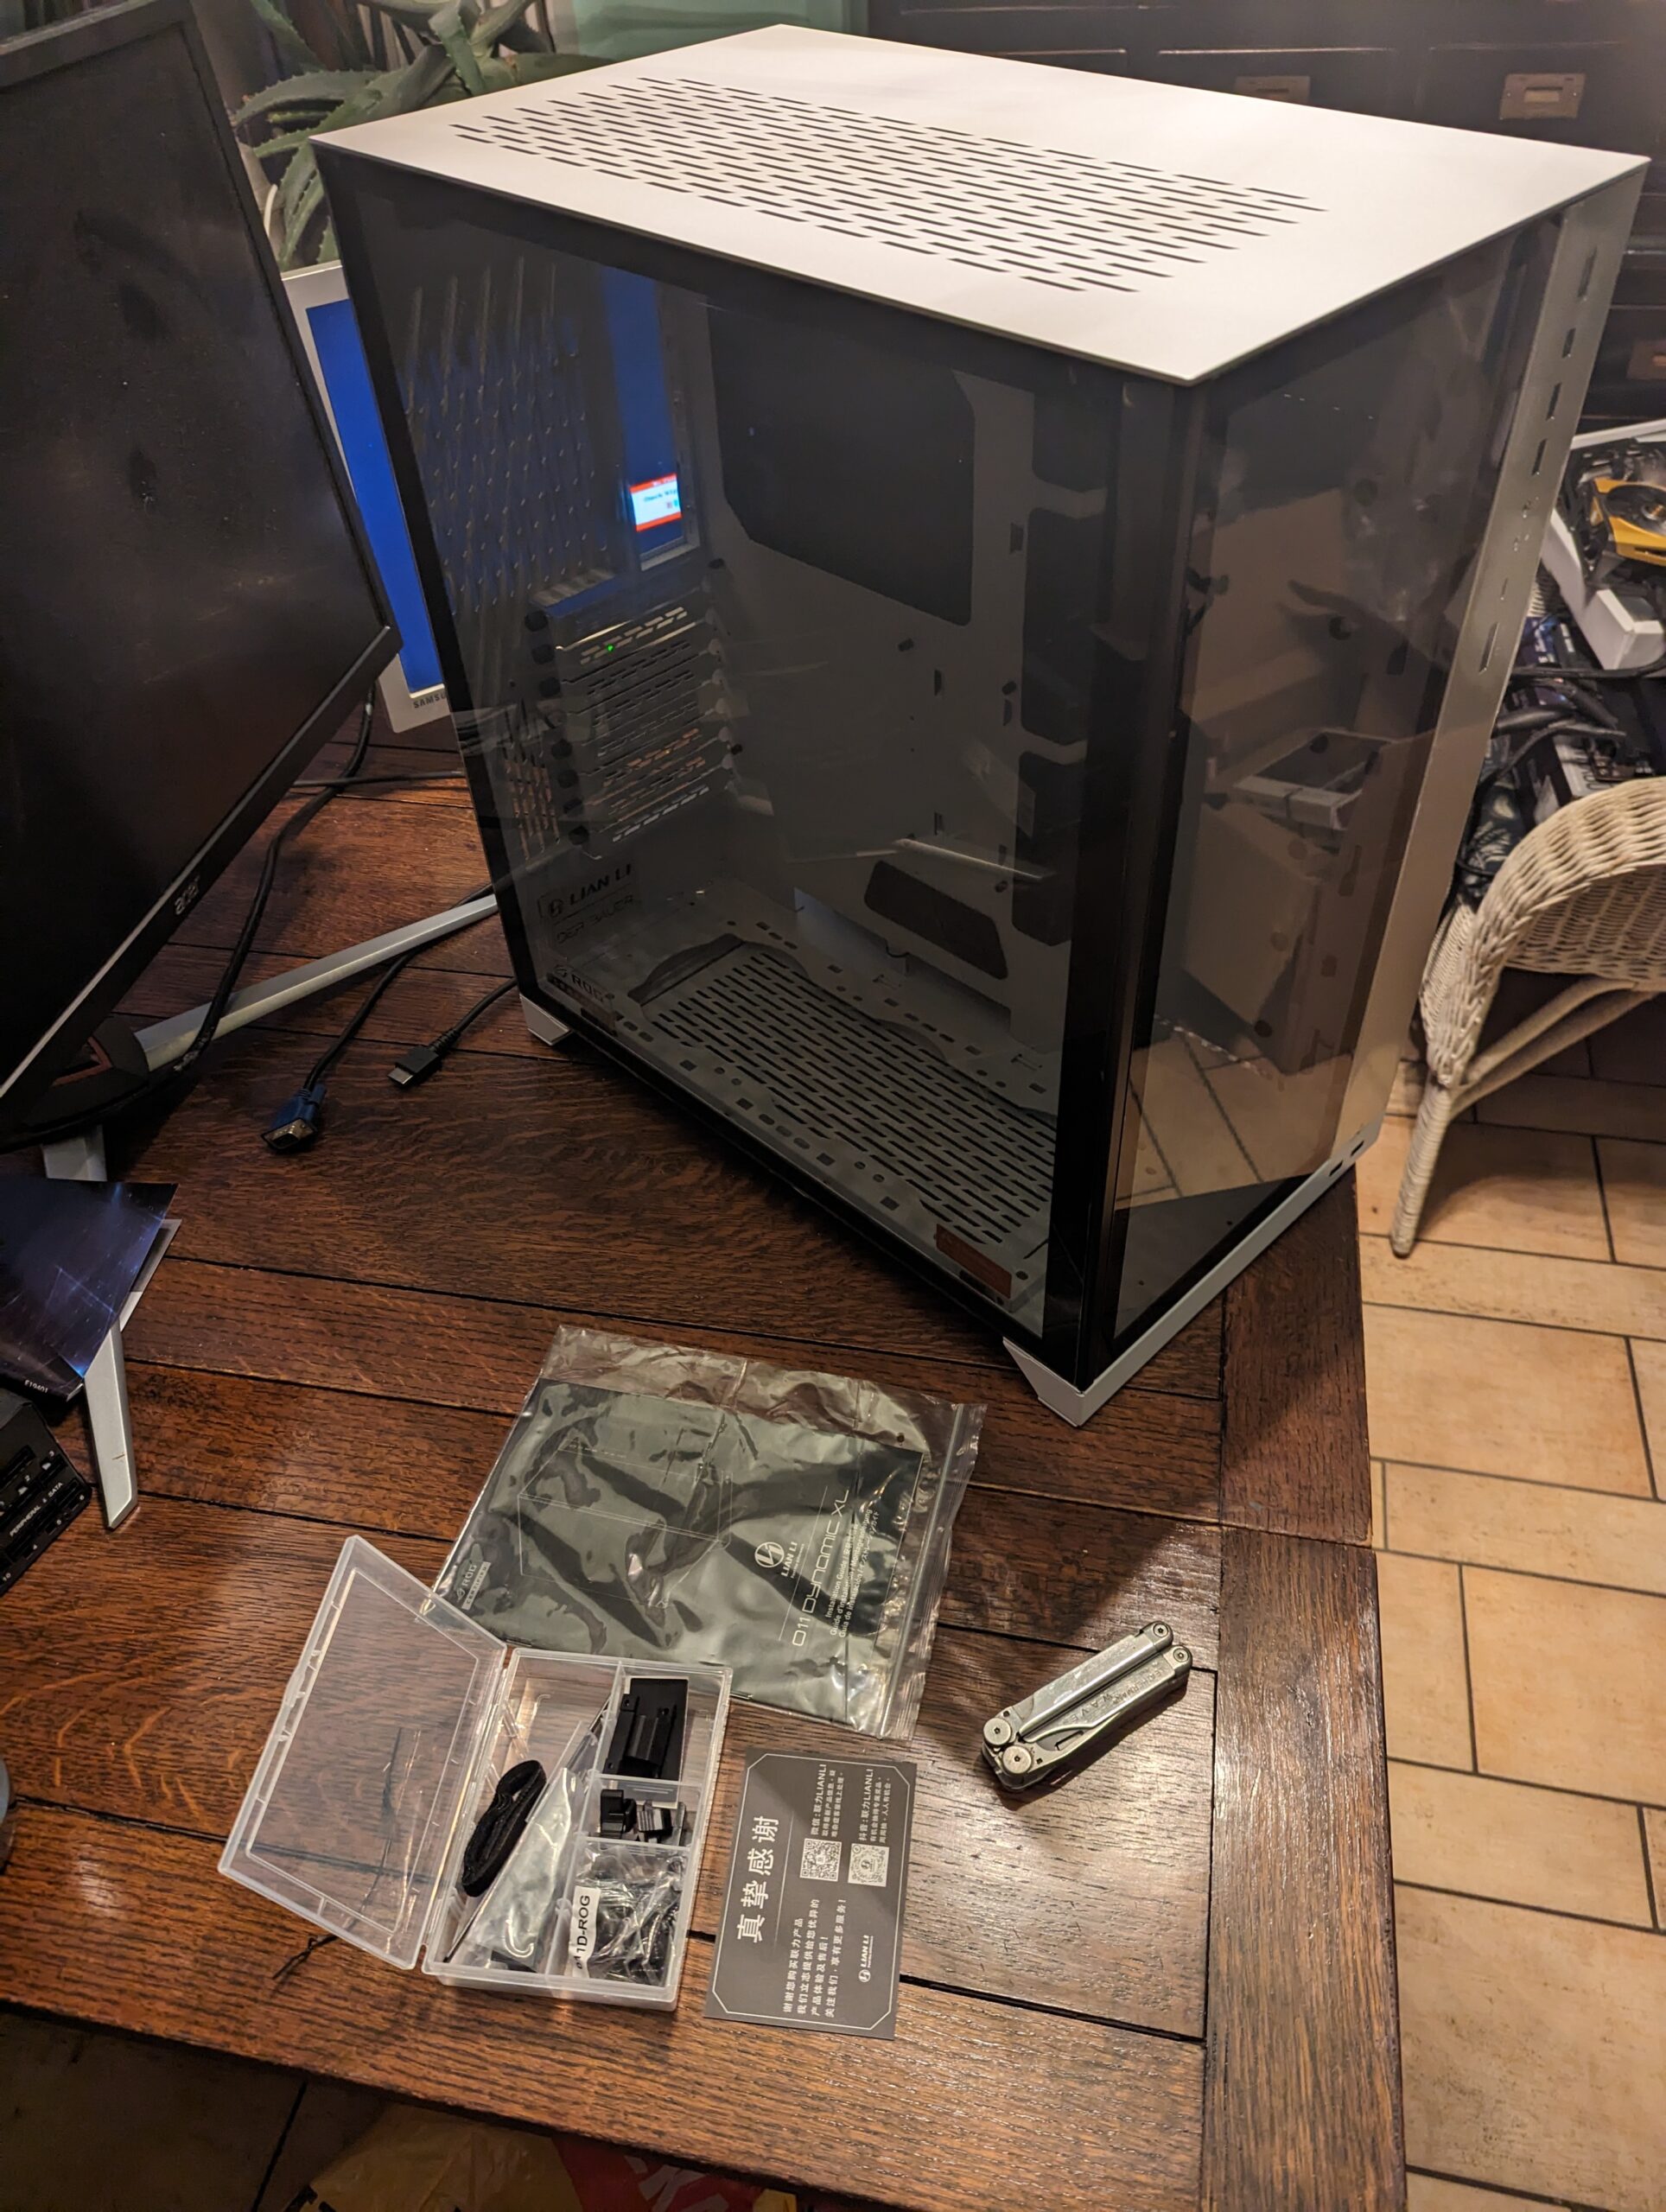
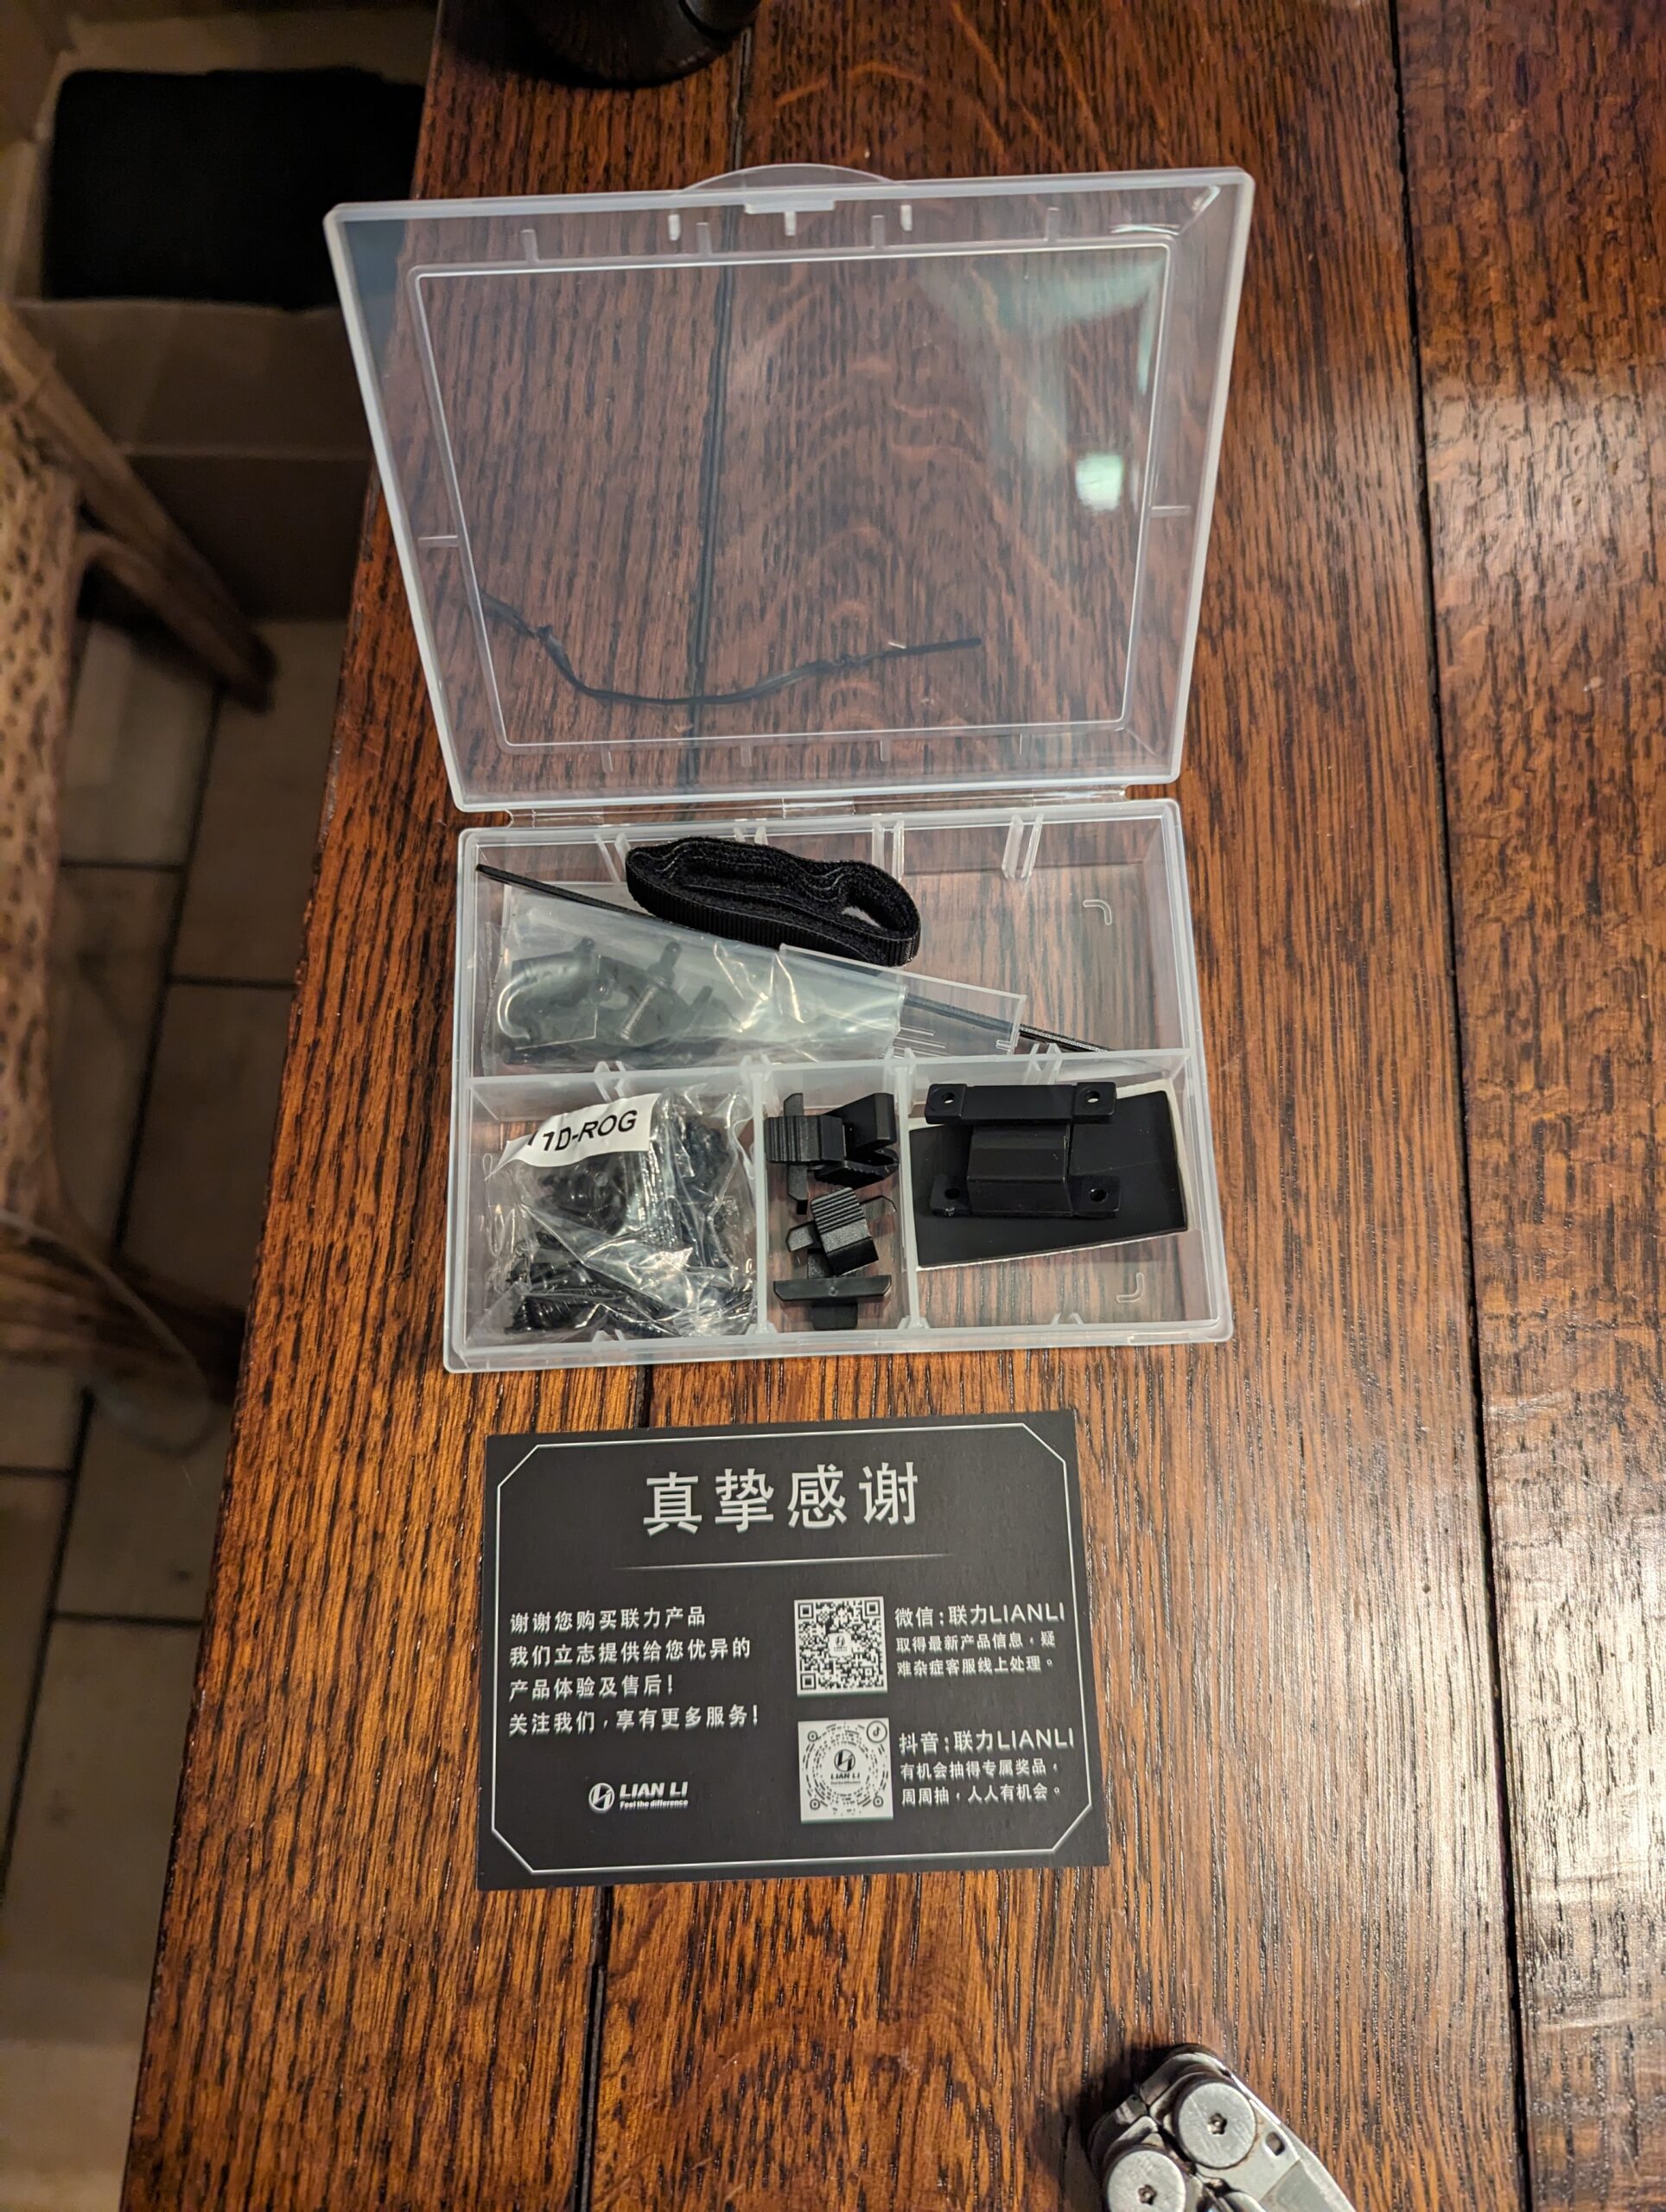
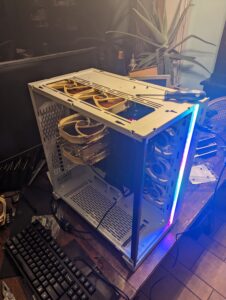
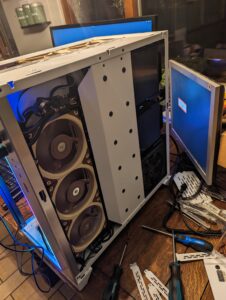
- Case: Lian Li O11 Dynamic XL [Link]
- Power supply: Corsair AX1600i [Link]
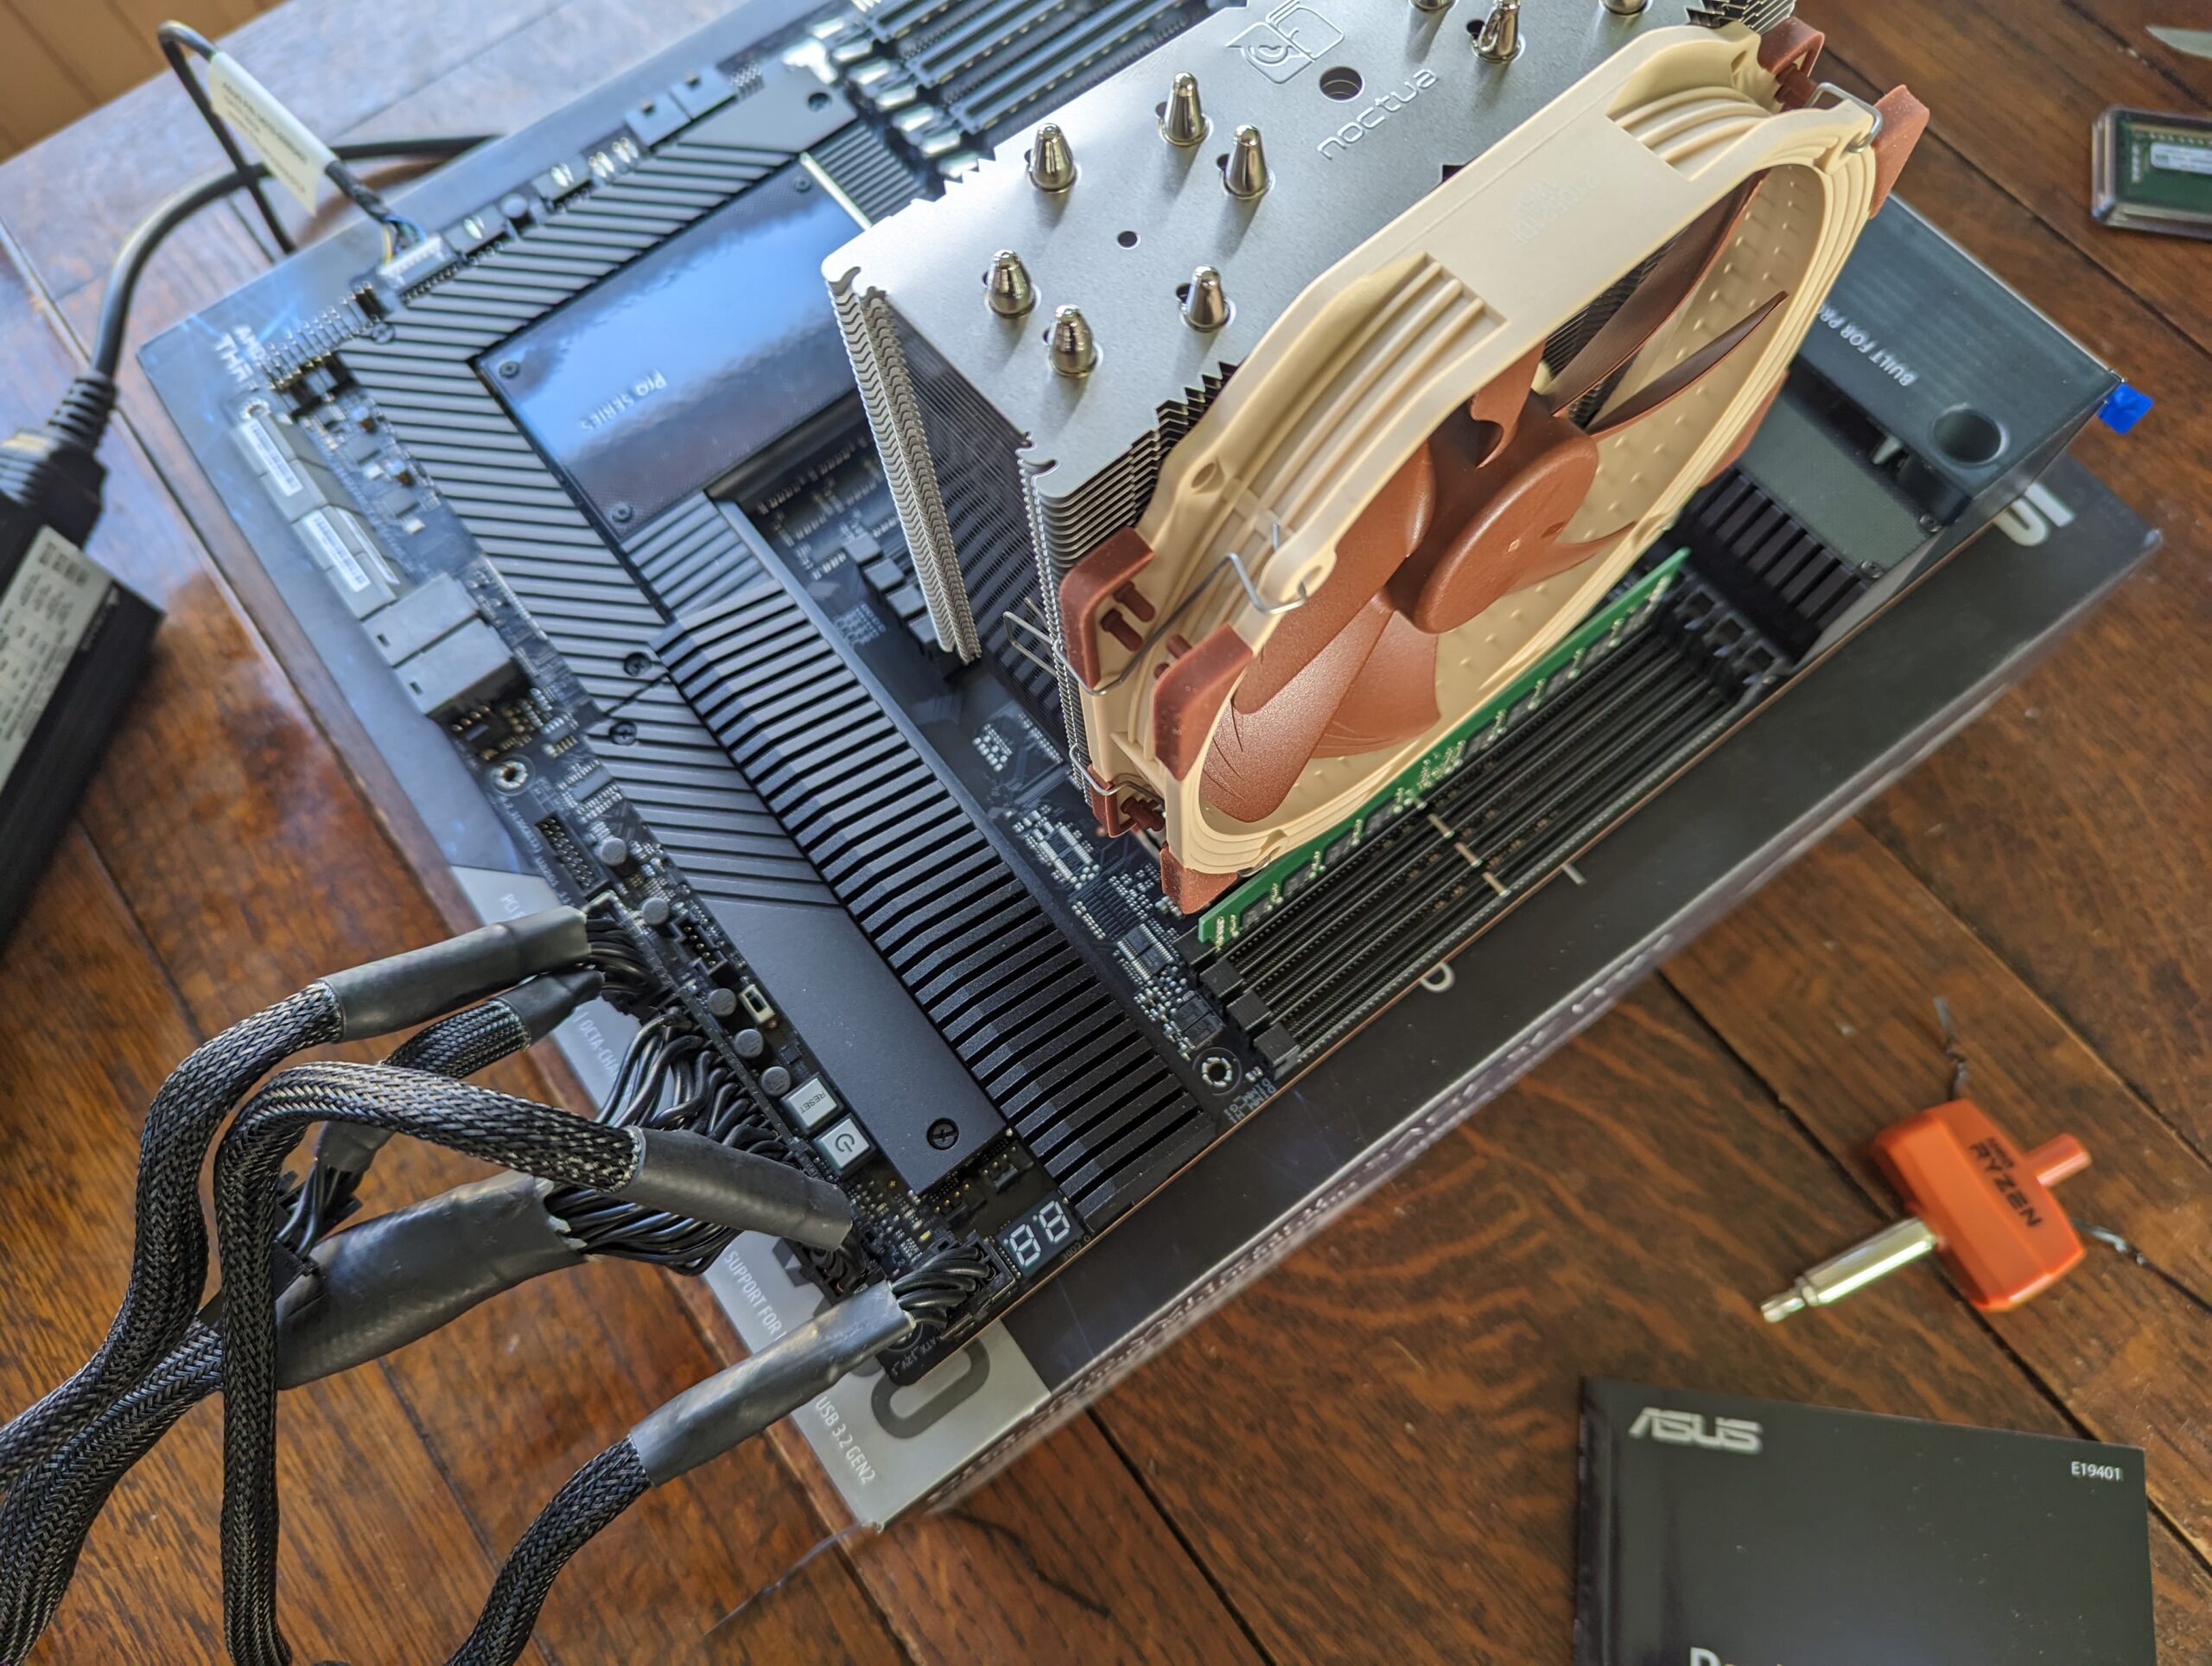
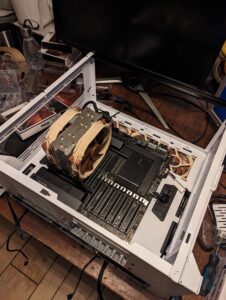
- CPU Cooler: Noctua NH-U14S TR4-SP3 [Link]
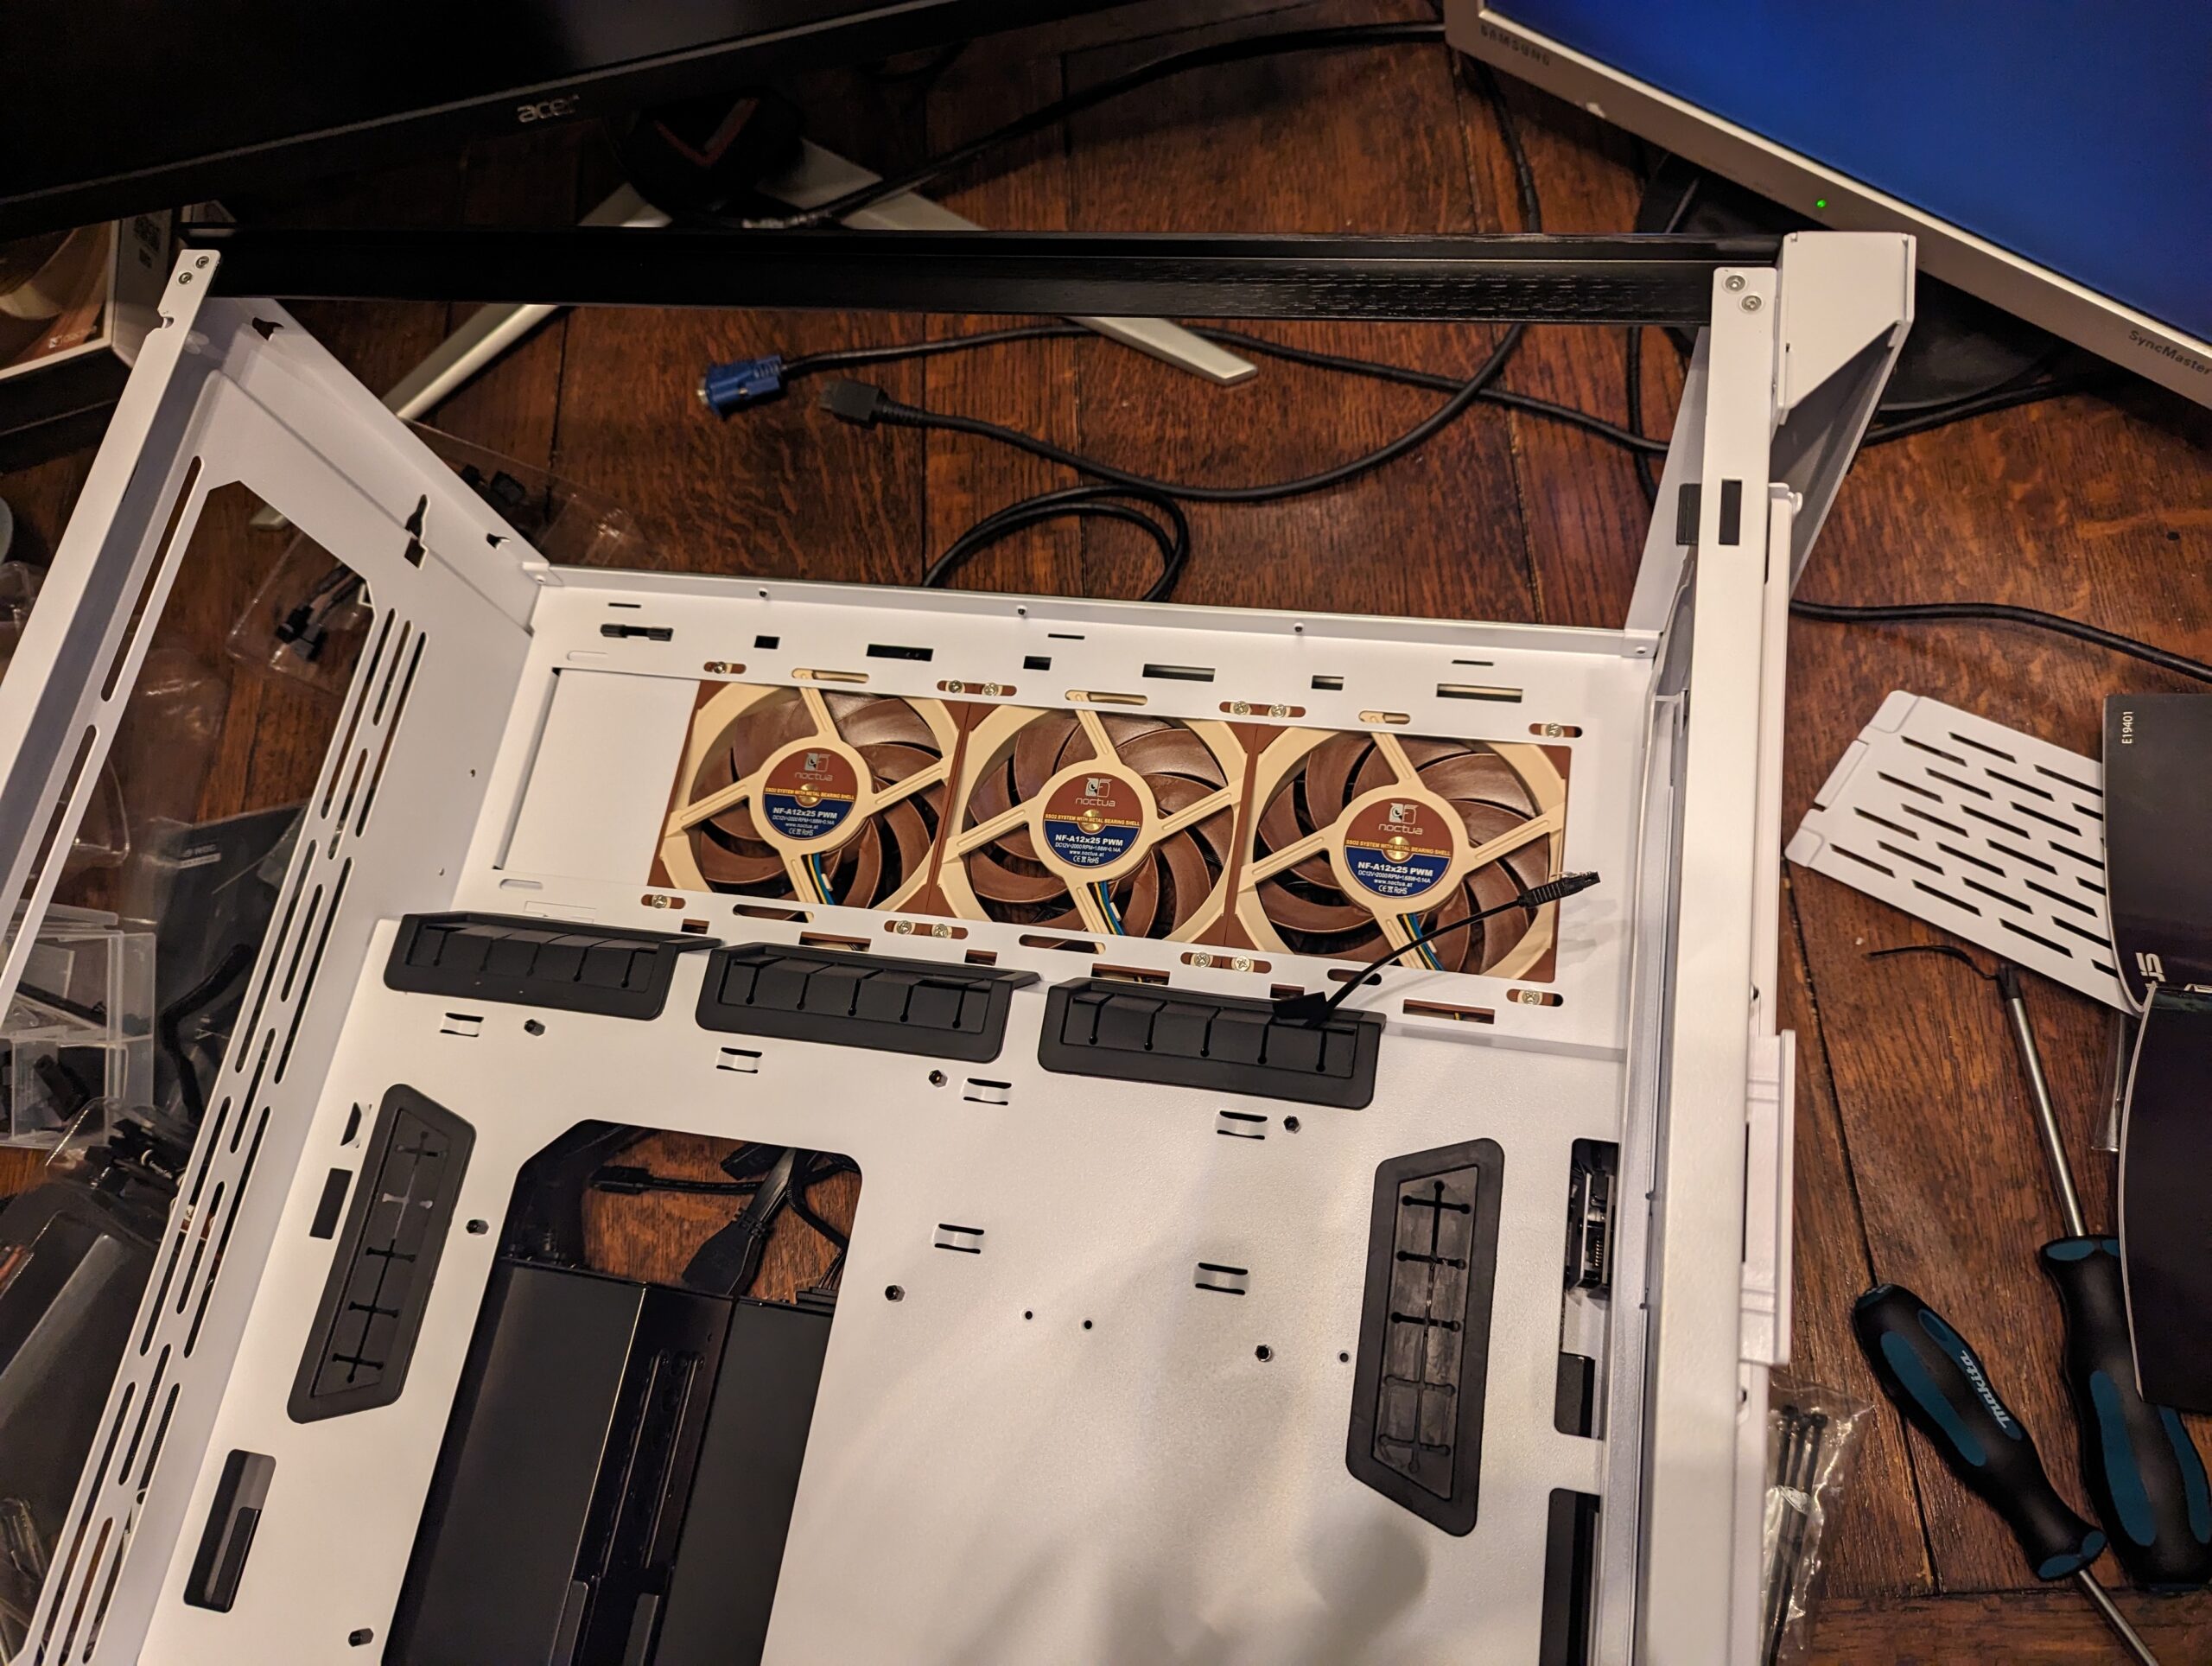
- Case fans: Noctua NF-A12x25 PWM [Link]
- Case fans: Noctua NF-A14 PWM [Link]
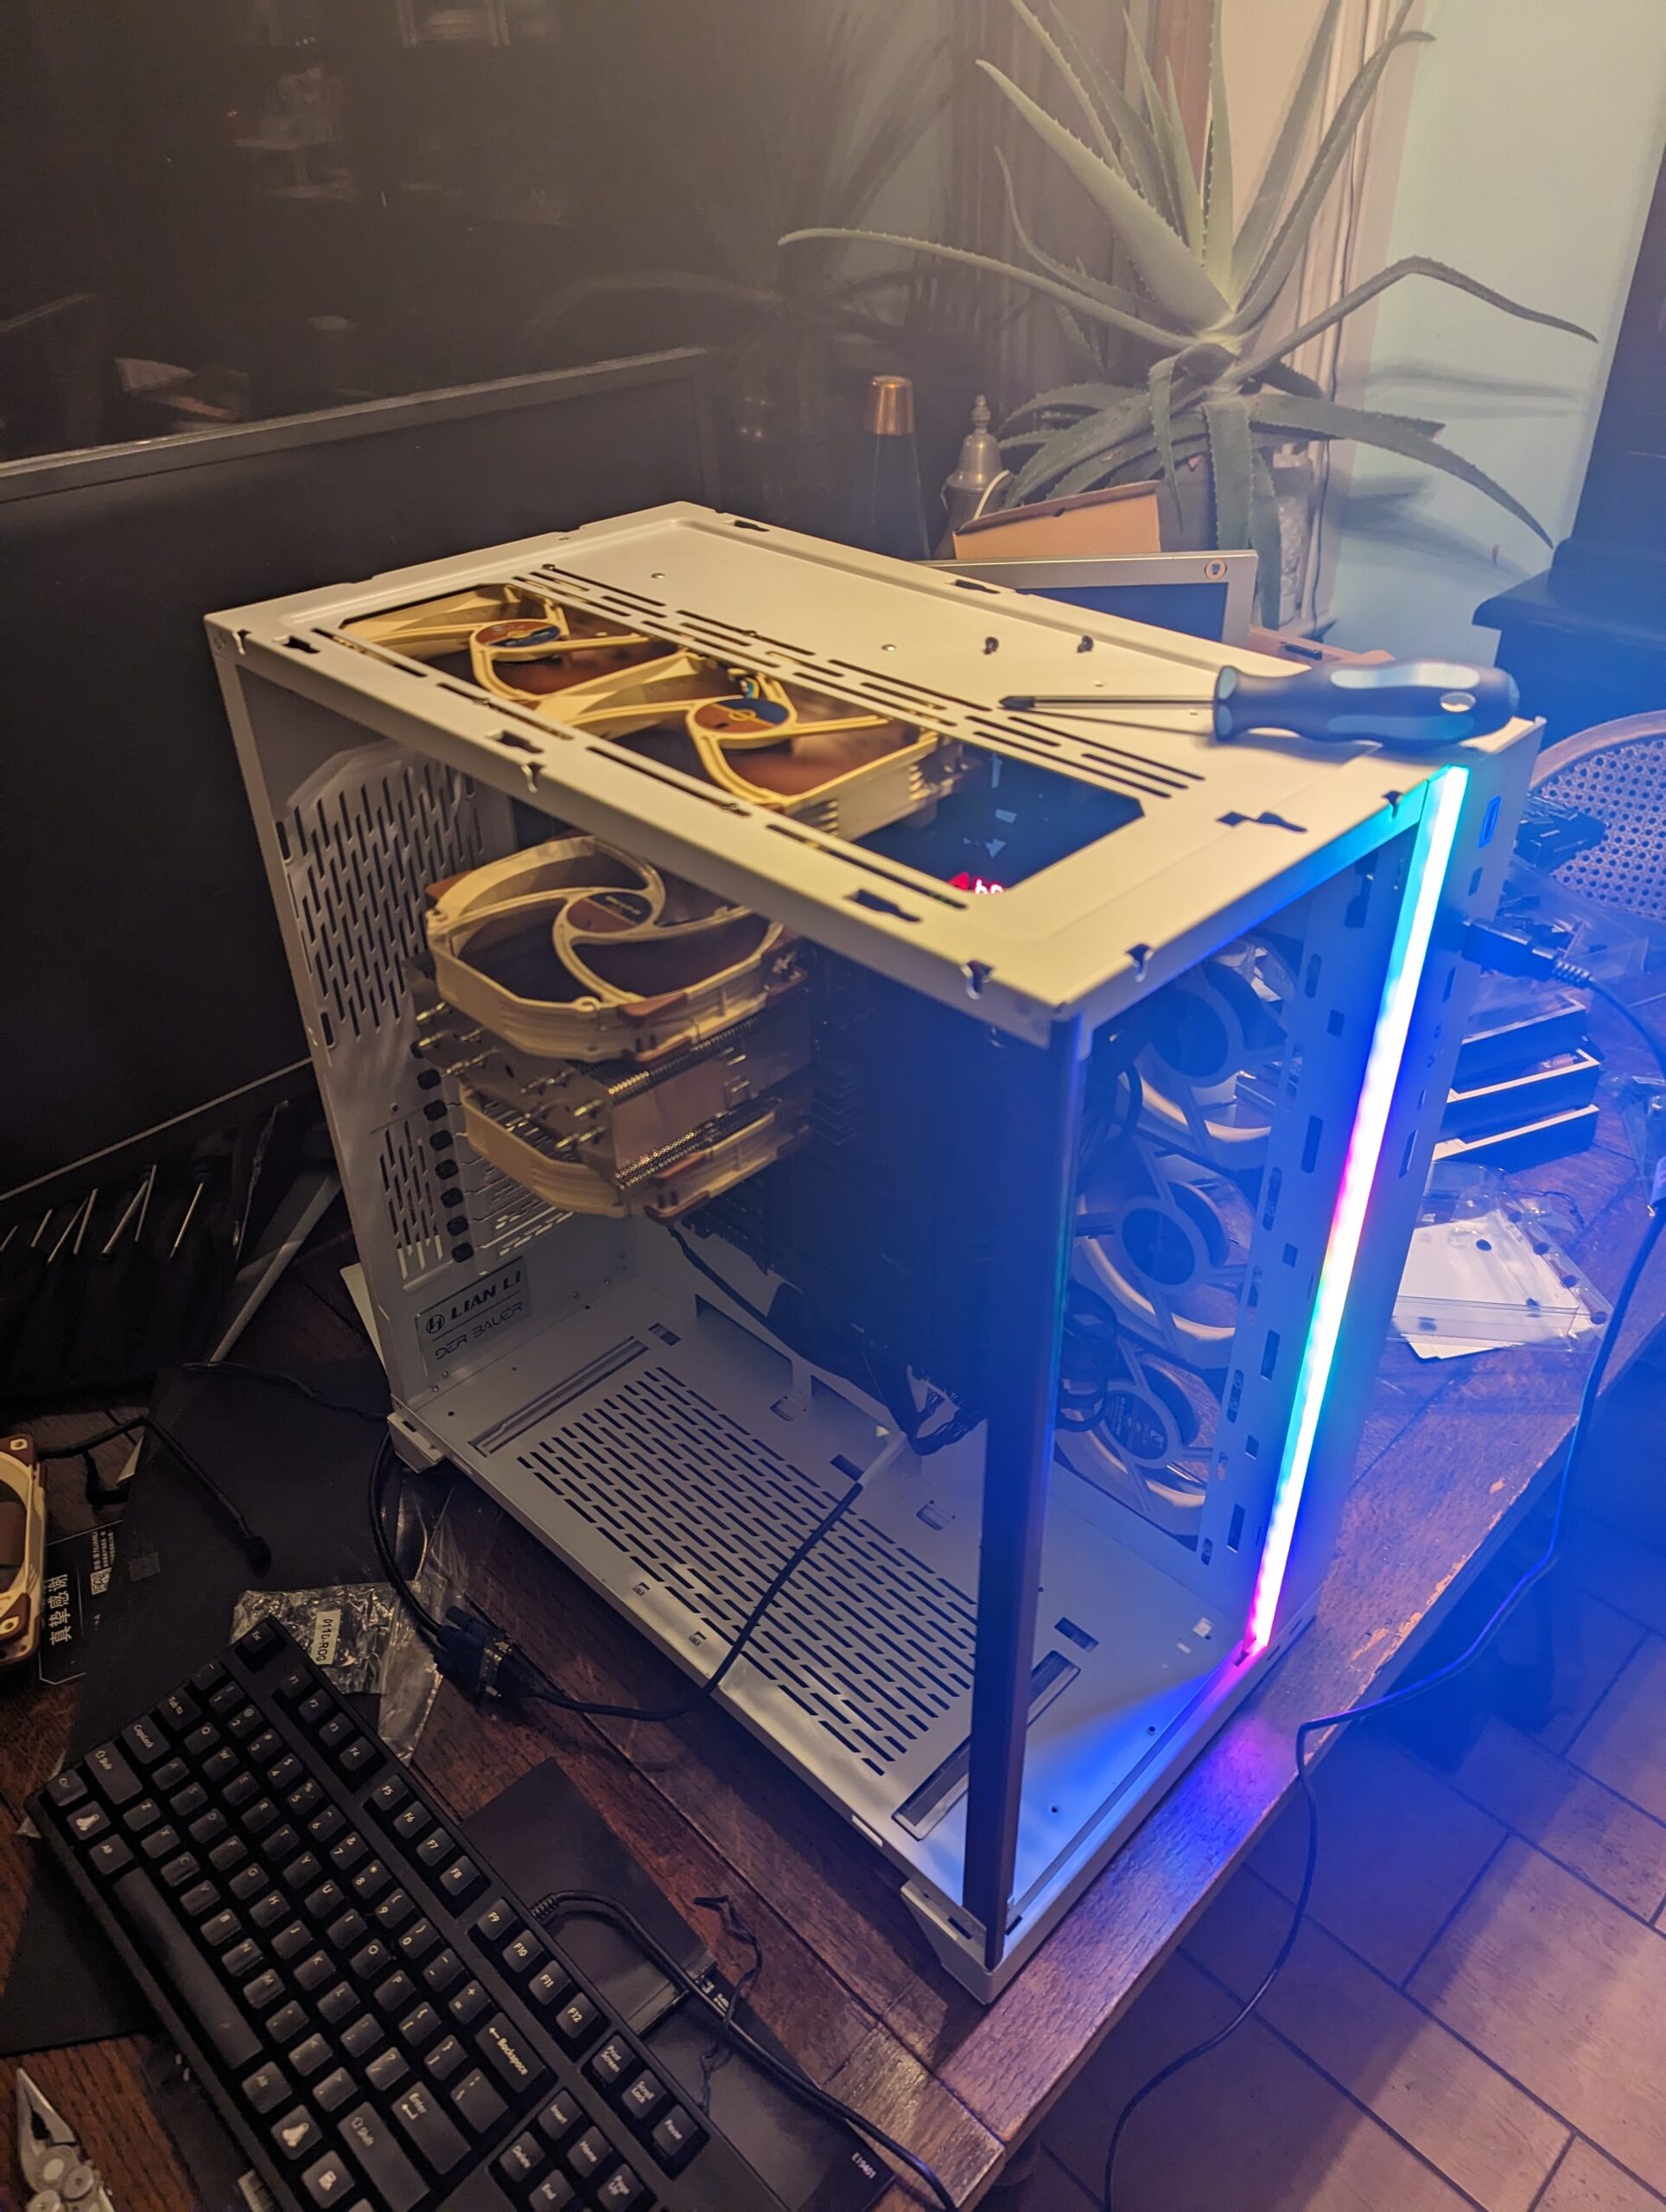
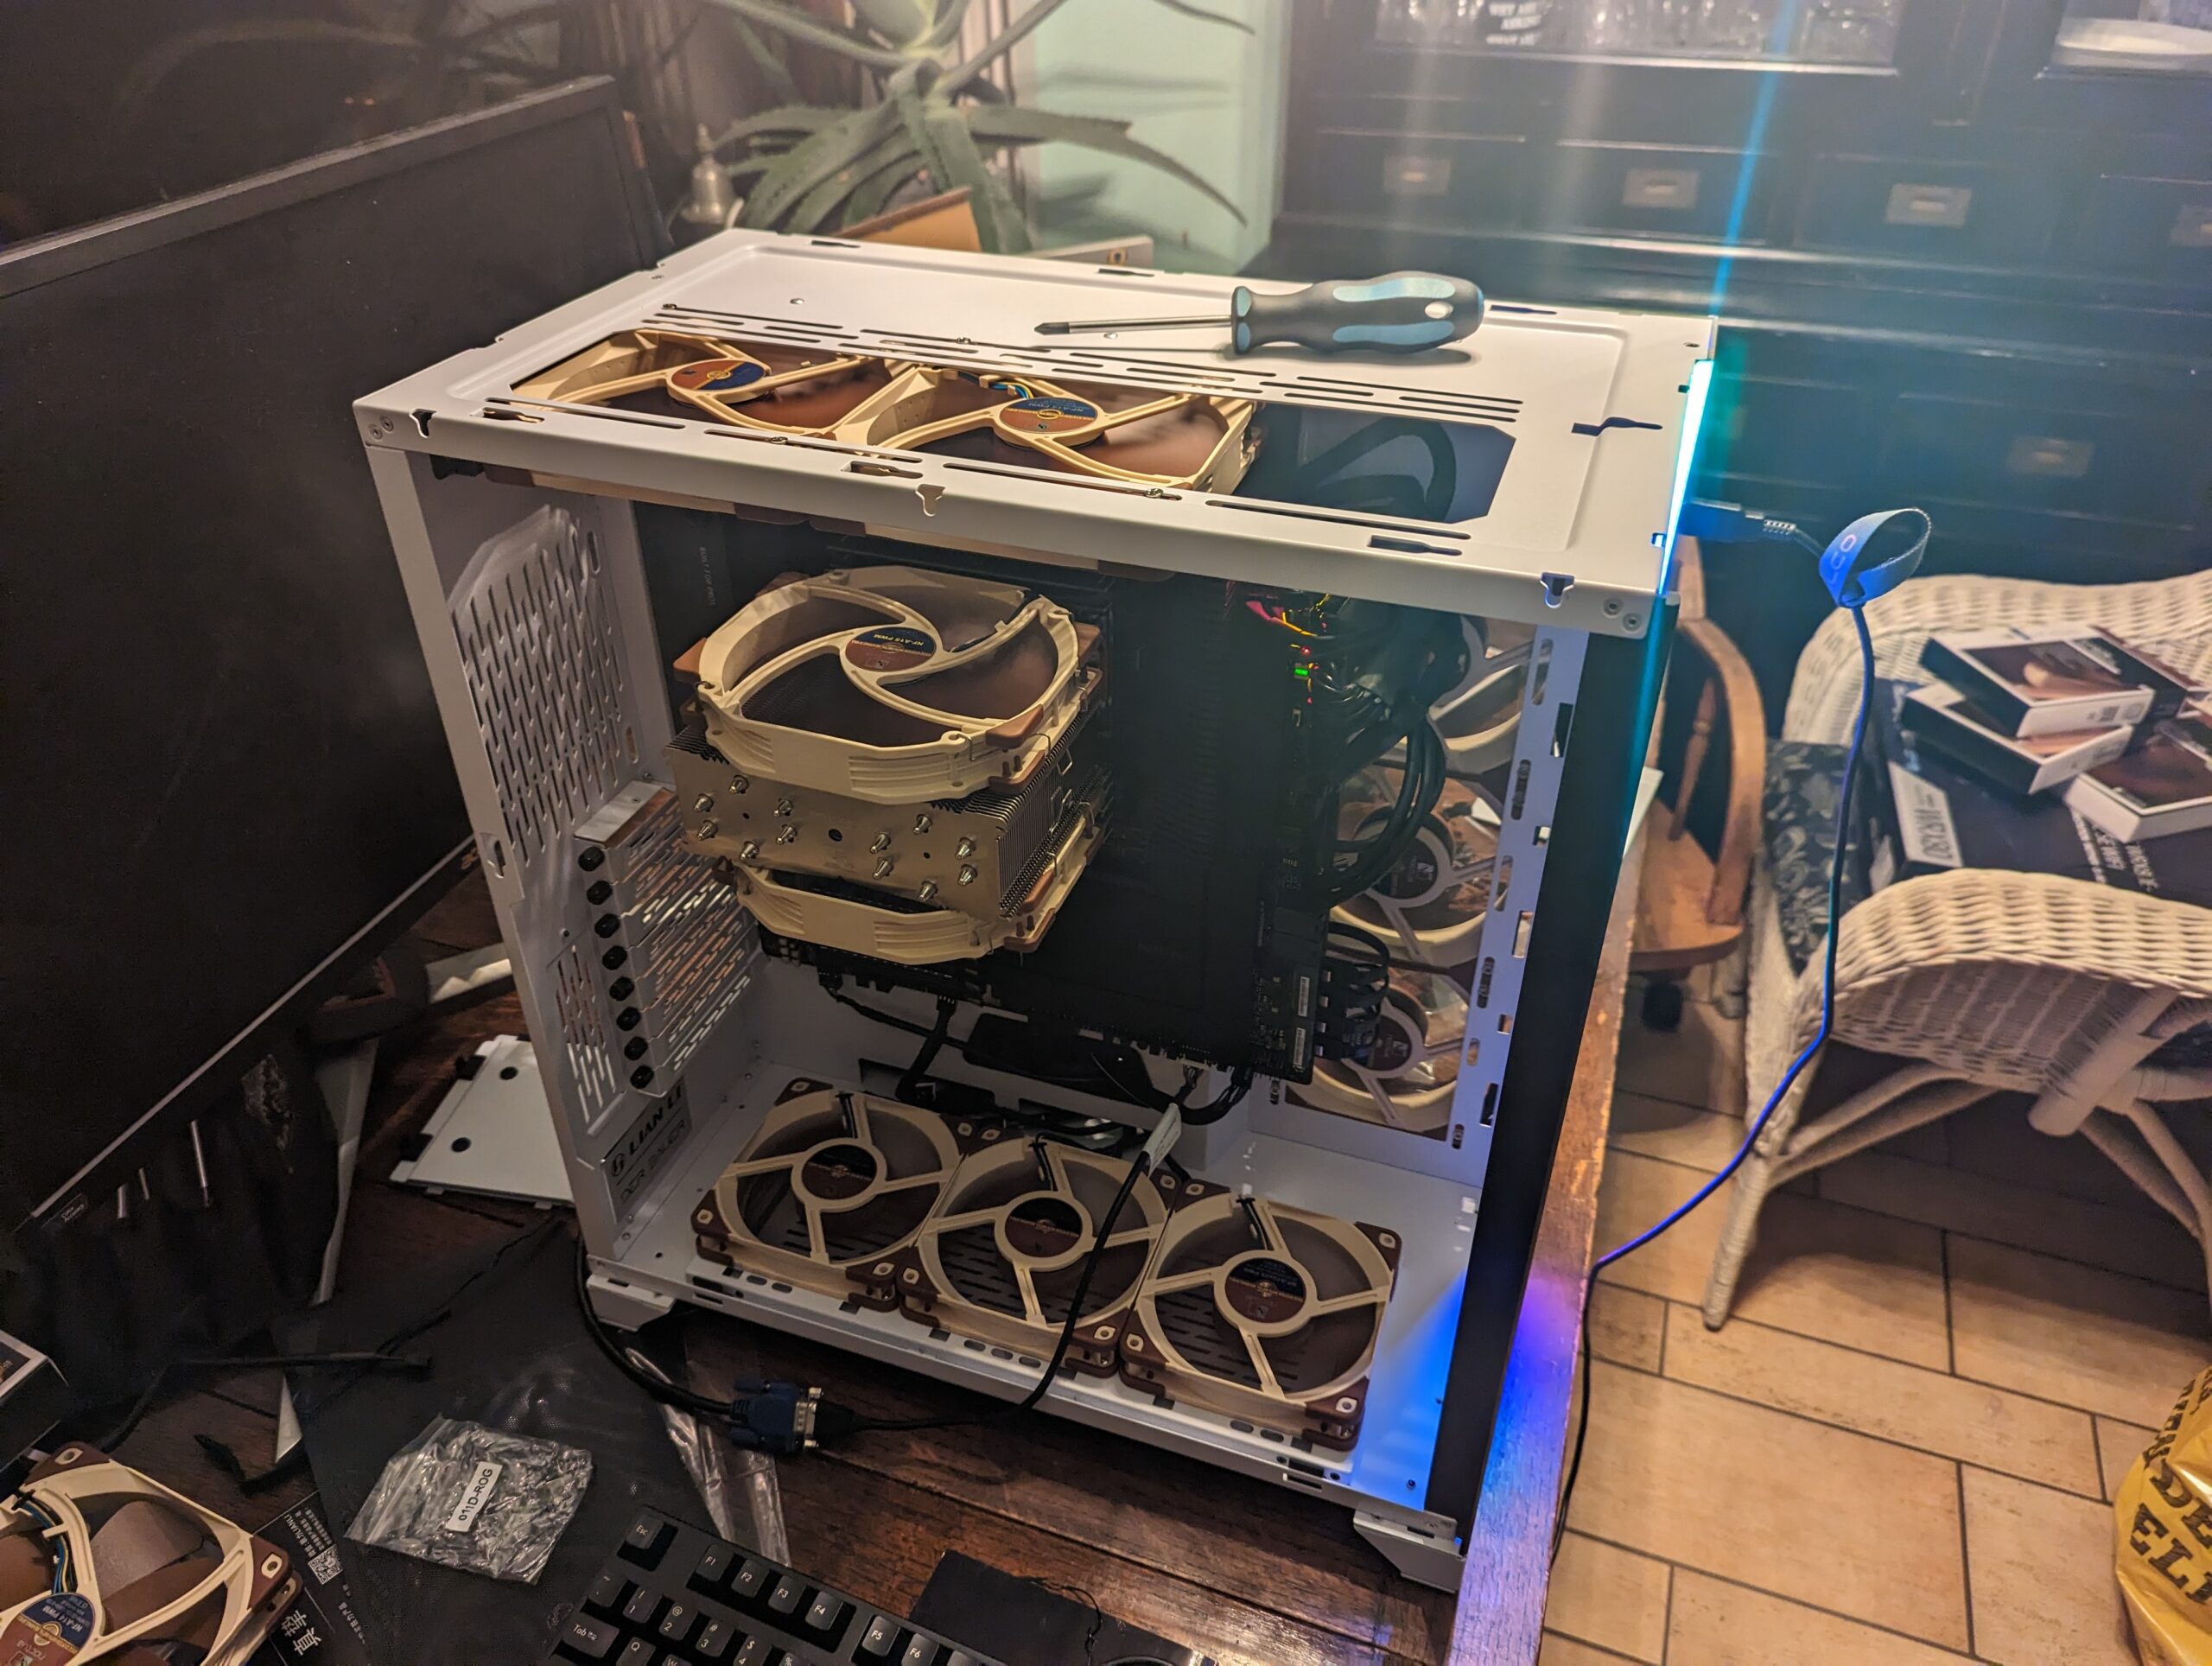
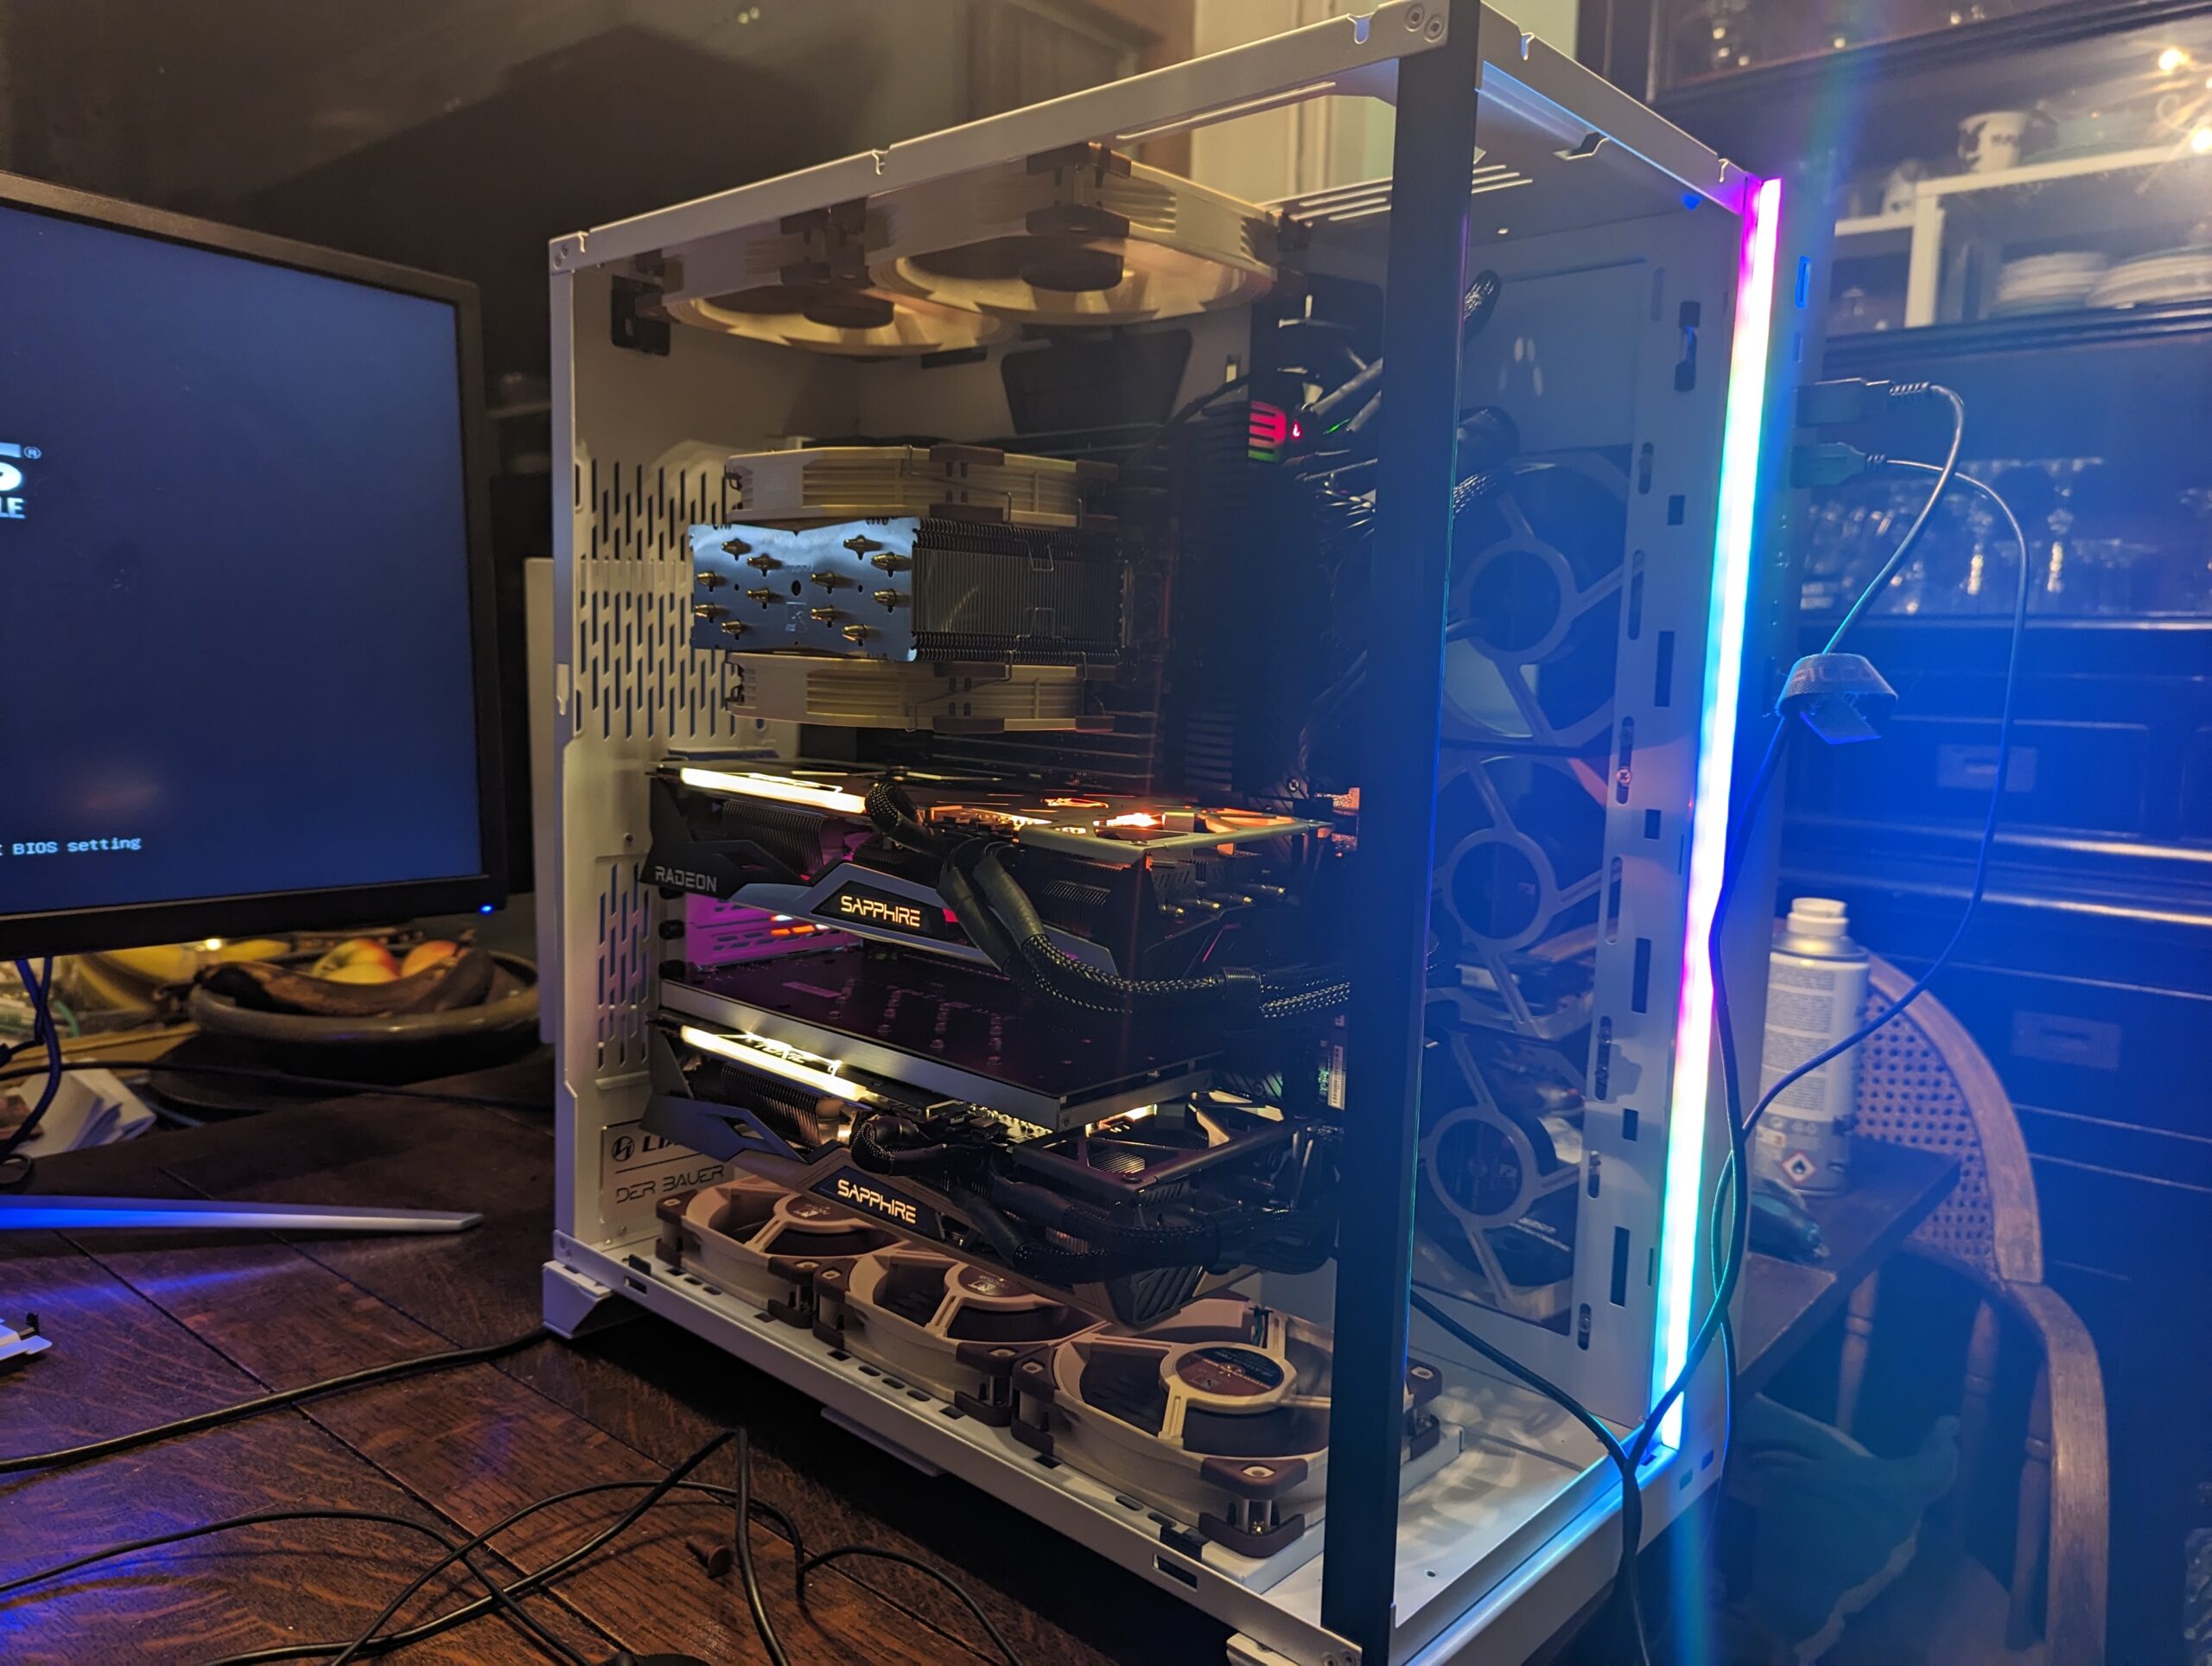
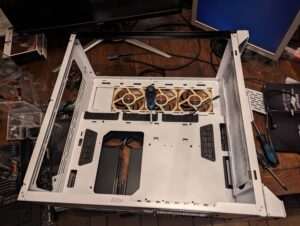
The main reason for picking the O11 Dynamic XL is that the power supply is on the side of the case. Due to this design choice there is space below the bottom PCIe slot for a card to overhang the motherboard. In turn, this lets me space out the two GPUs as much as possible, providing plenty of air flow for both cards.
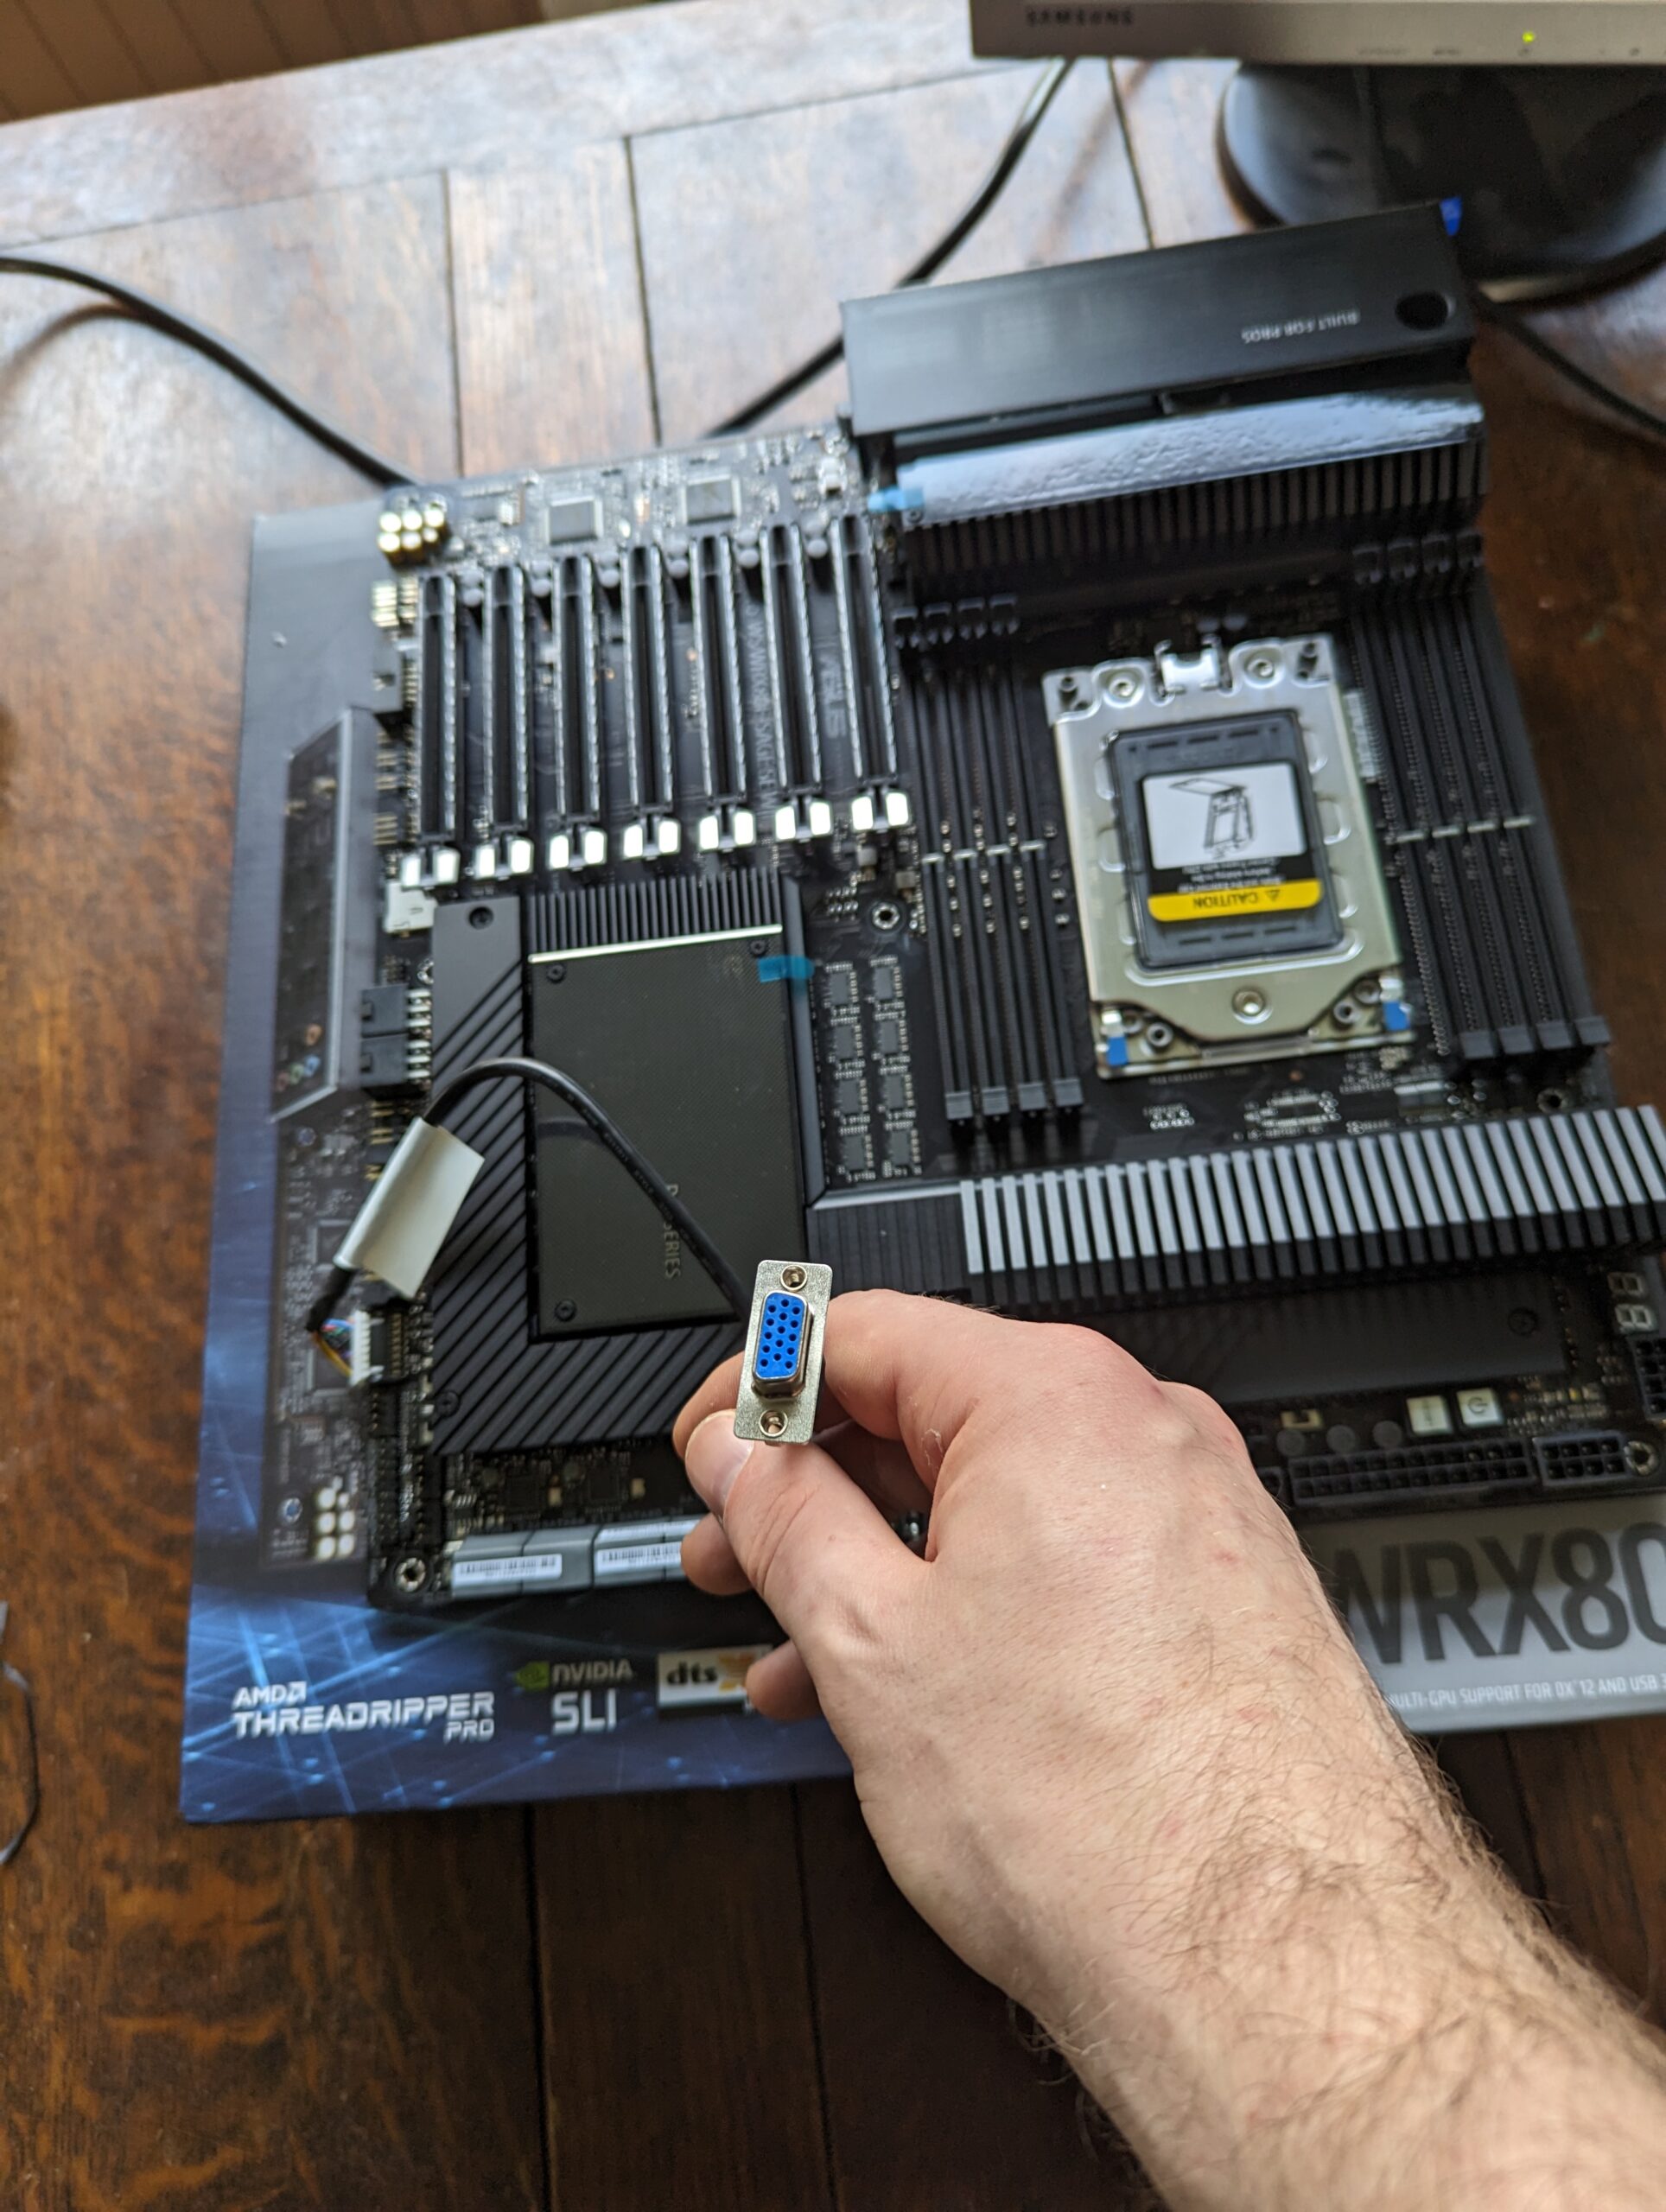
Prepping the motherboard and box testing
Whether it is 2001 or 2023, the best place to start is to just throw the motherboard on the supplied box and plug in some components to see if and how they work.


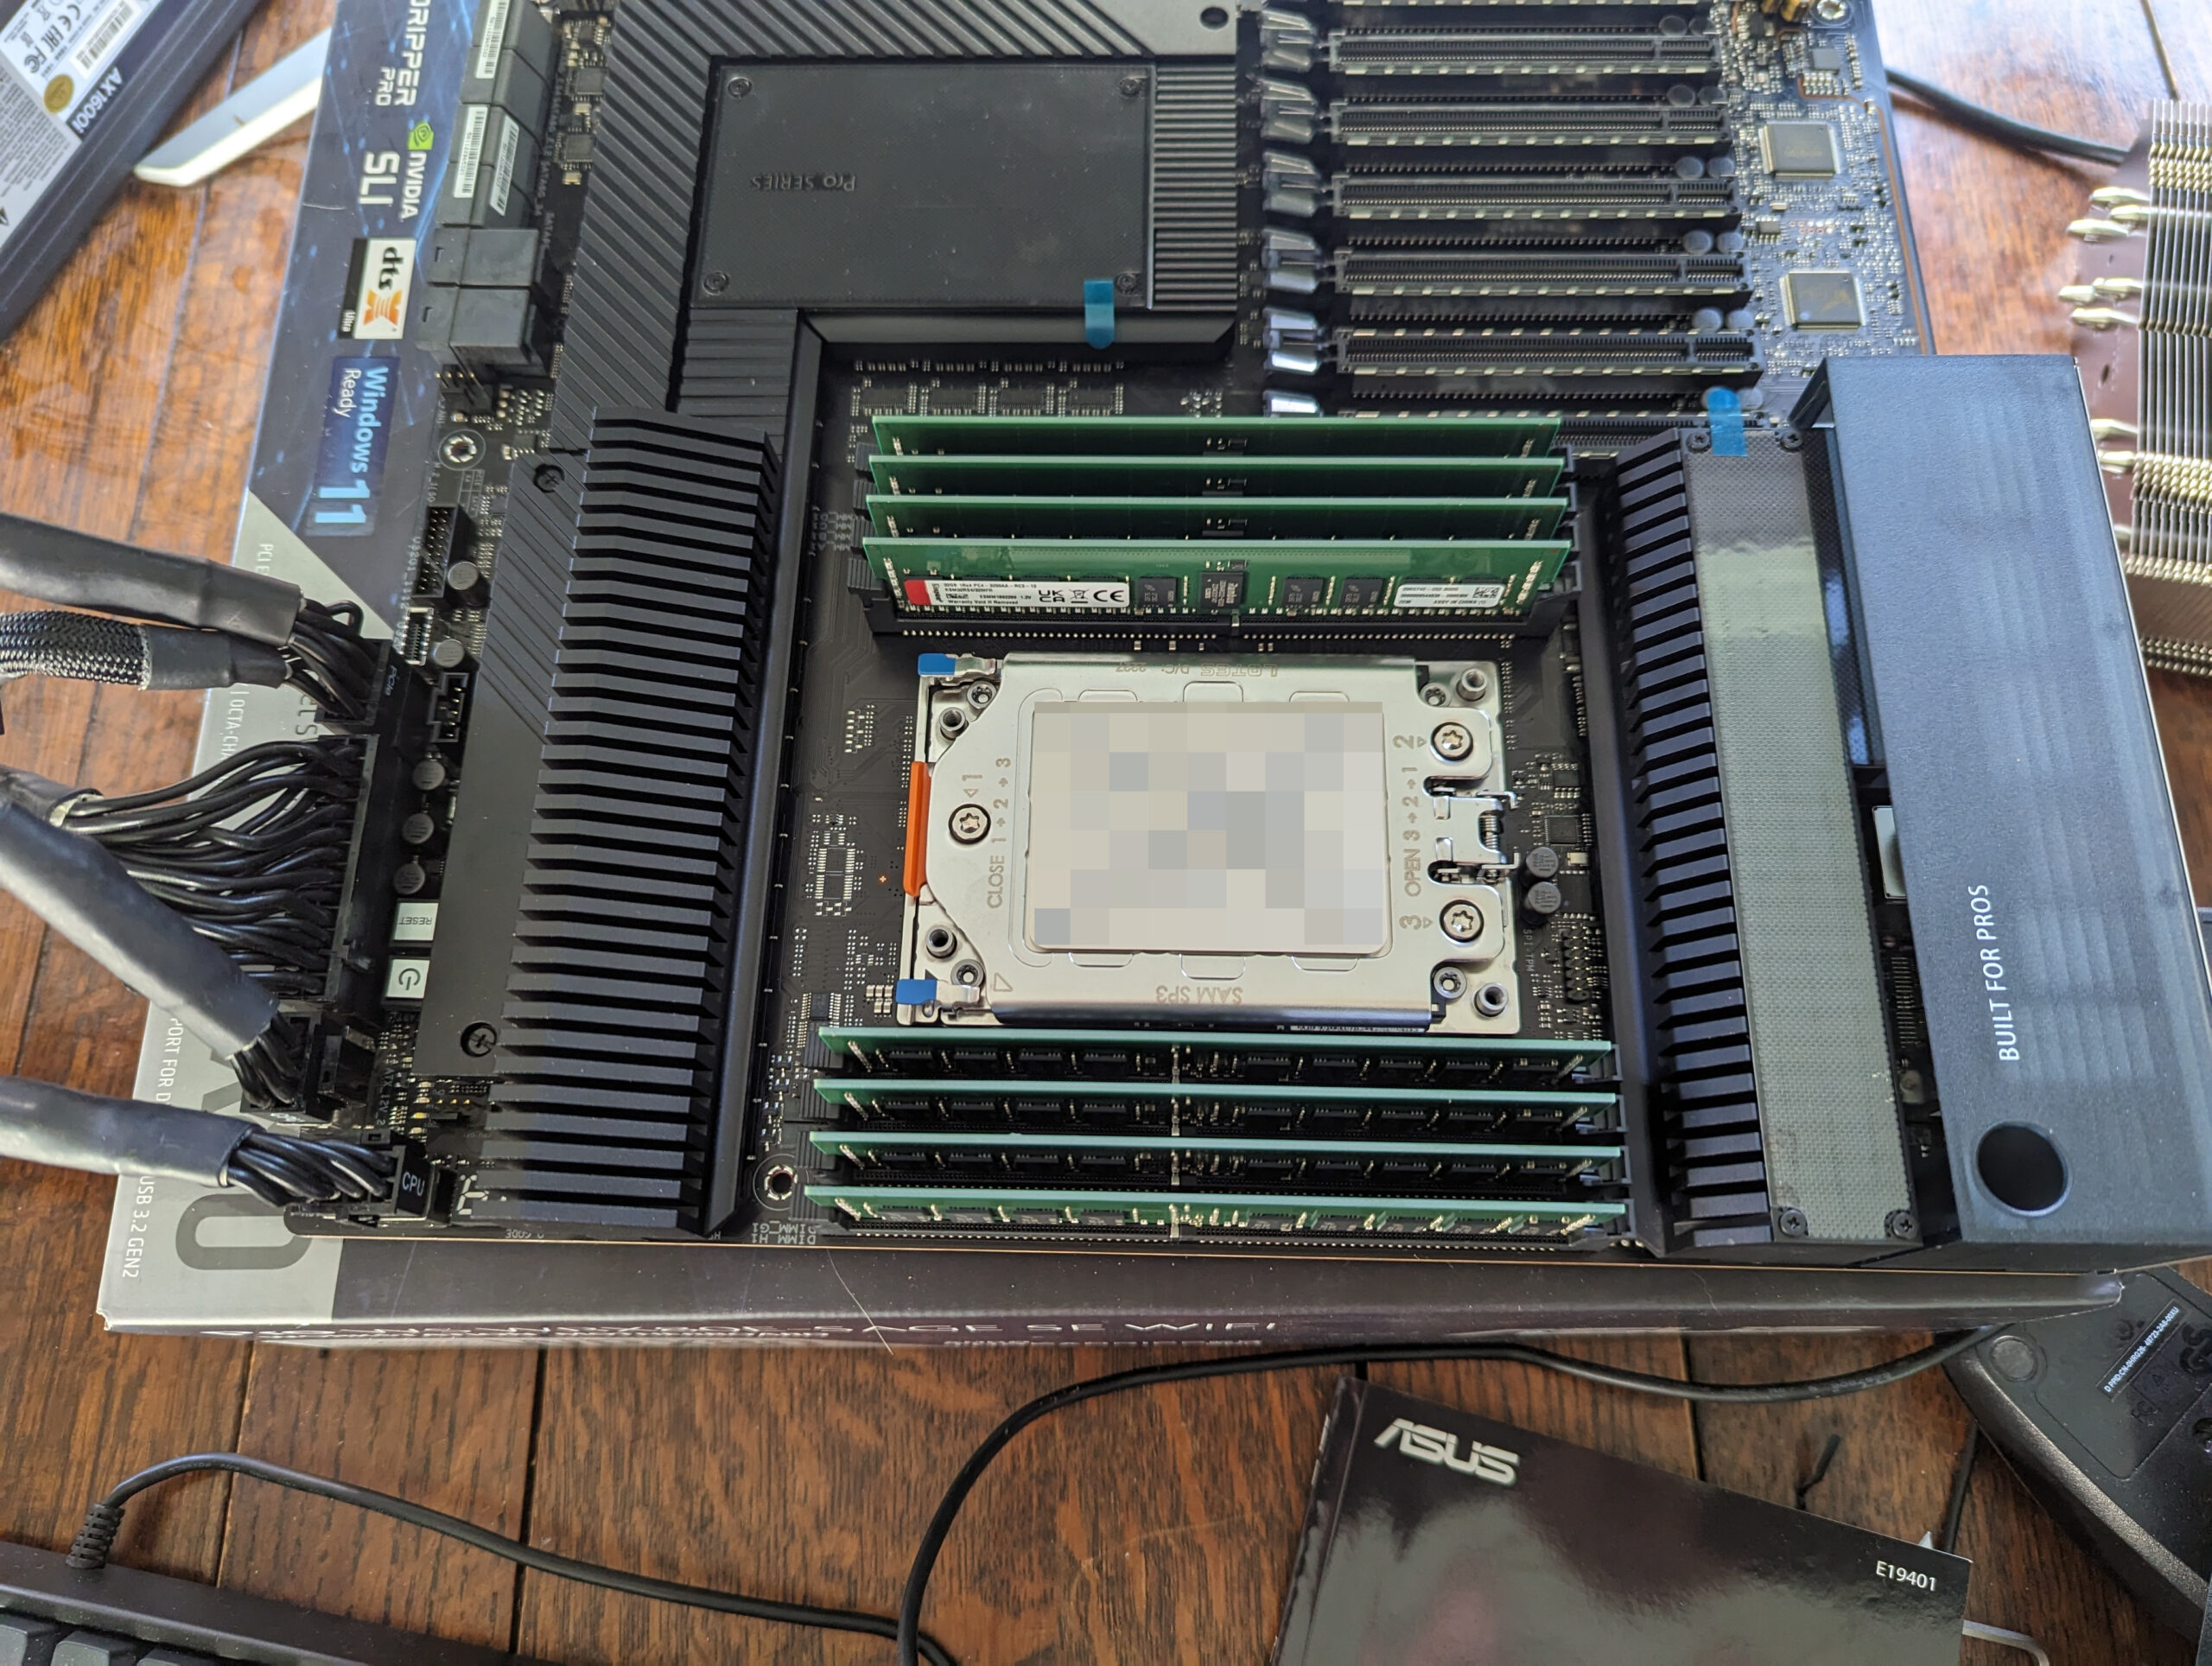

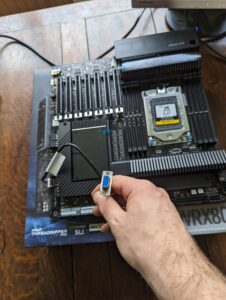
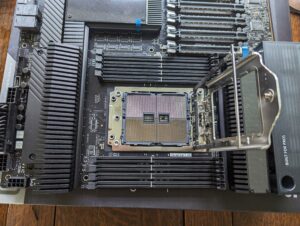


The computer gods are kind to me this time around and the computer boots at the first try. Although training the memory takes a frustratingly long time.
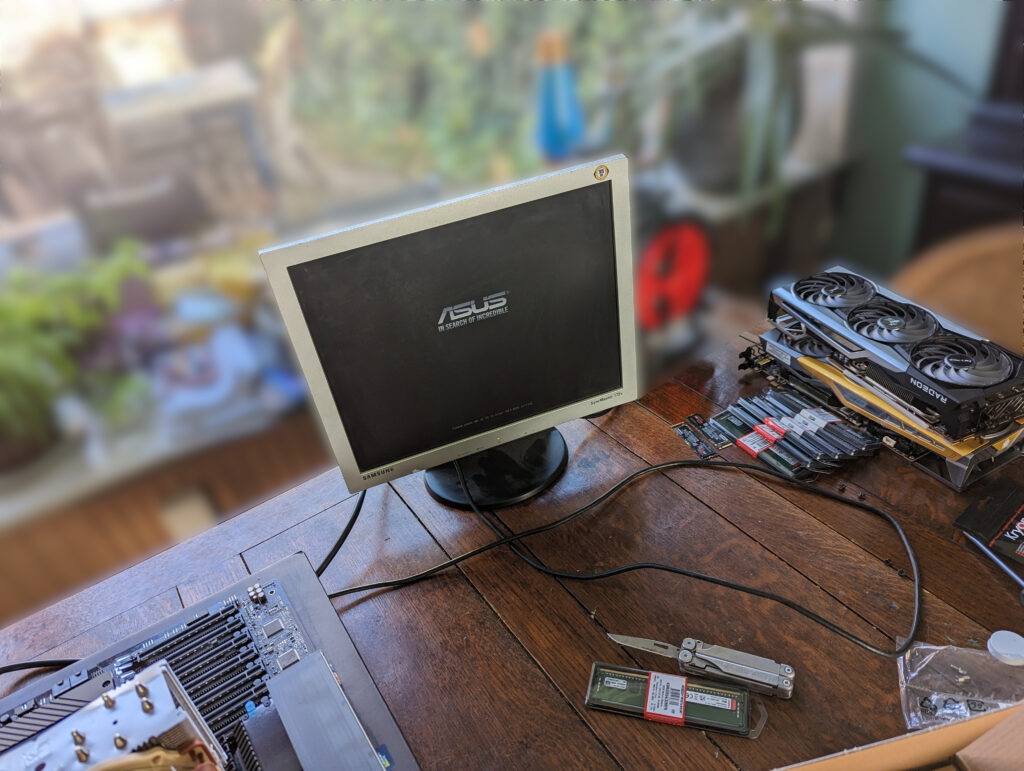
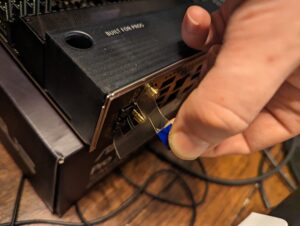
The motherboard comes with a built-in IPMI BMC which helpfully also includes a VGA header. Some time ago I bought this wonderful Samsung LCD from a thrift store which now comes in handy. “Why are you buying this crappy old monitor! Don’t you have several much better ones you’re also not using”… Well, who’s laughing now!
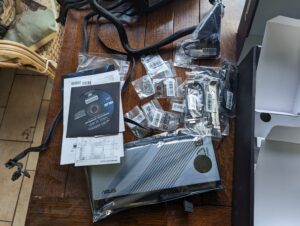
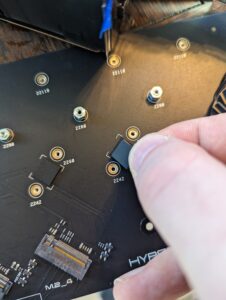
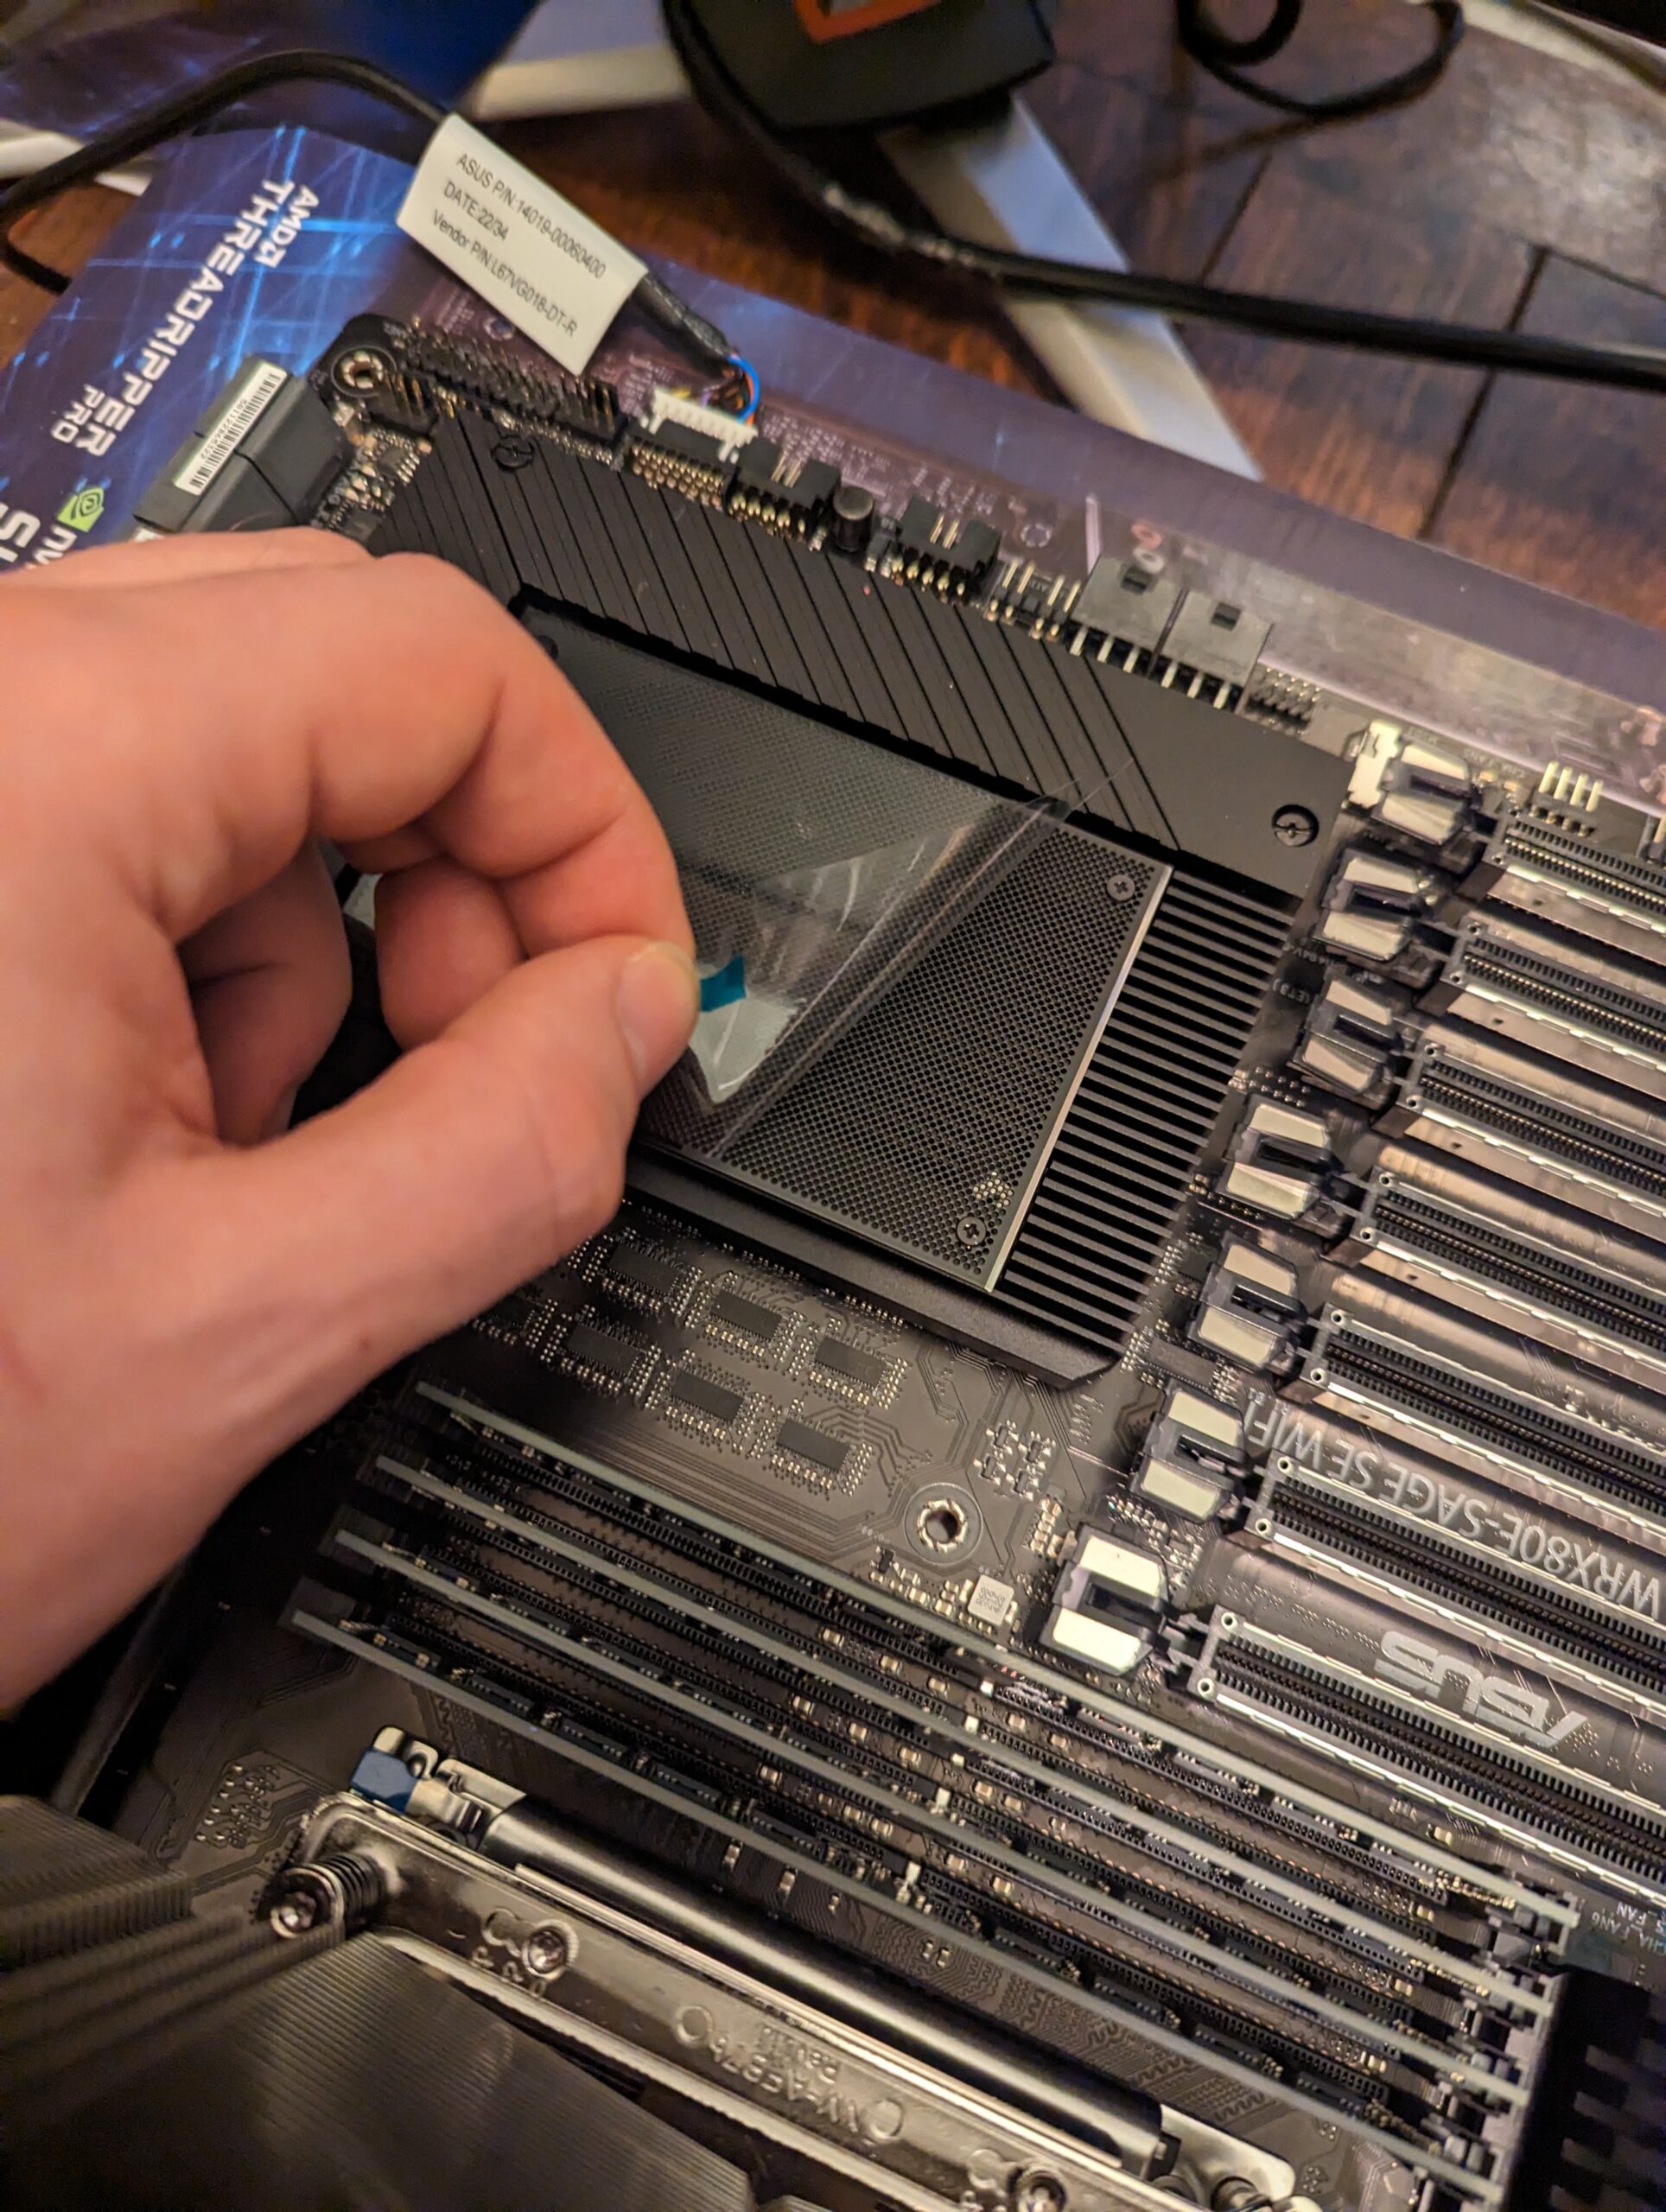
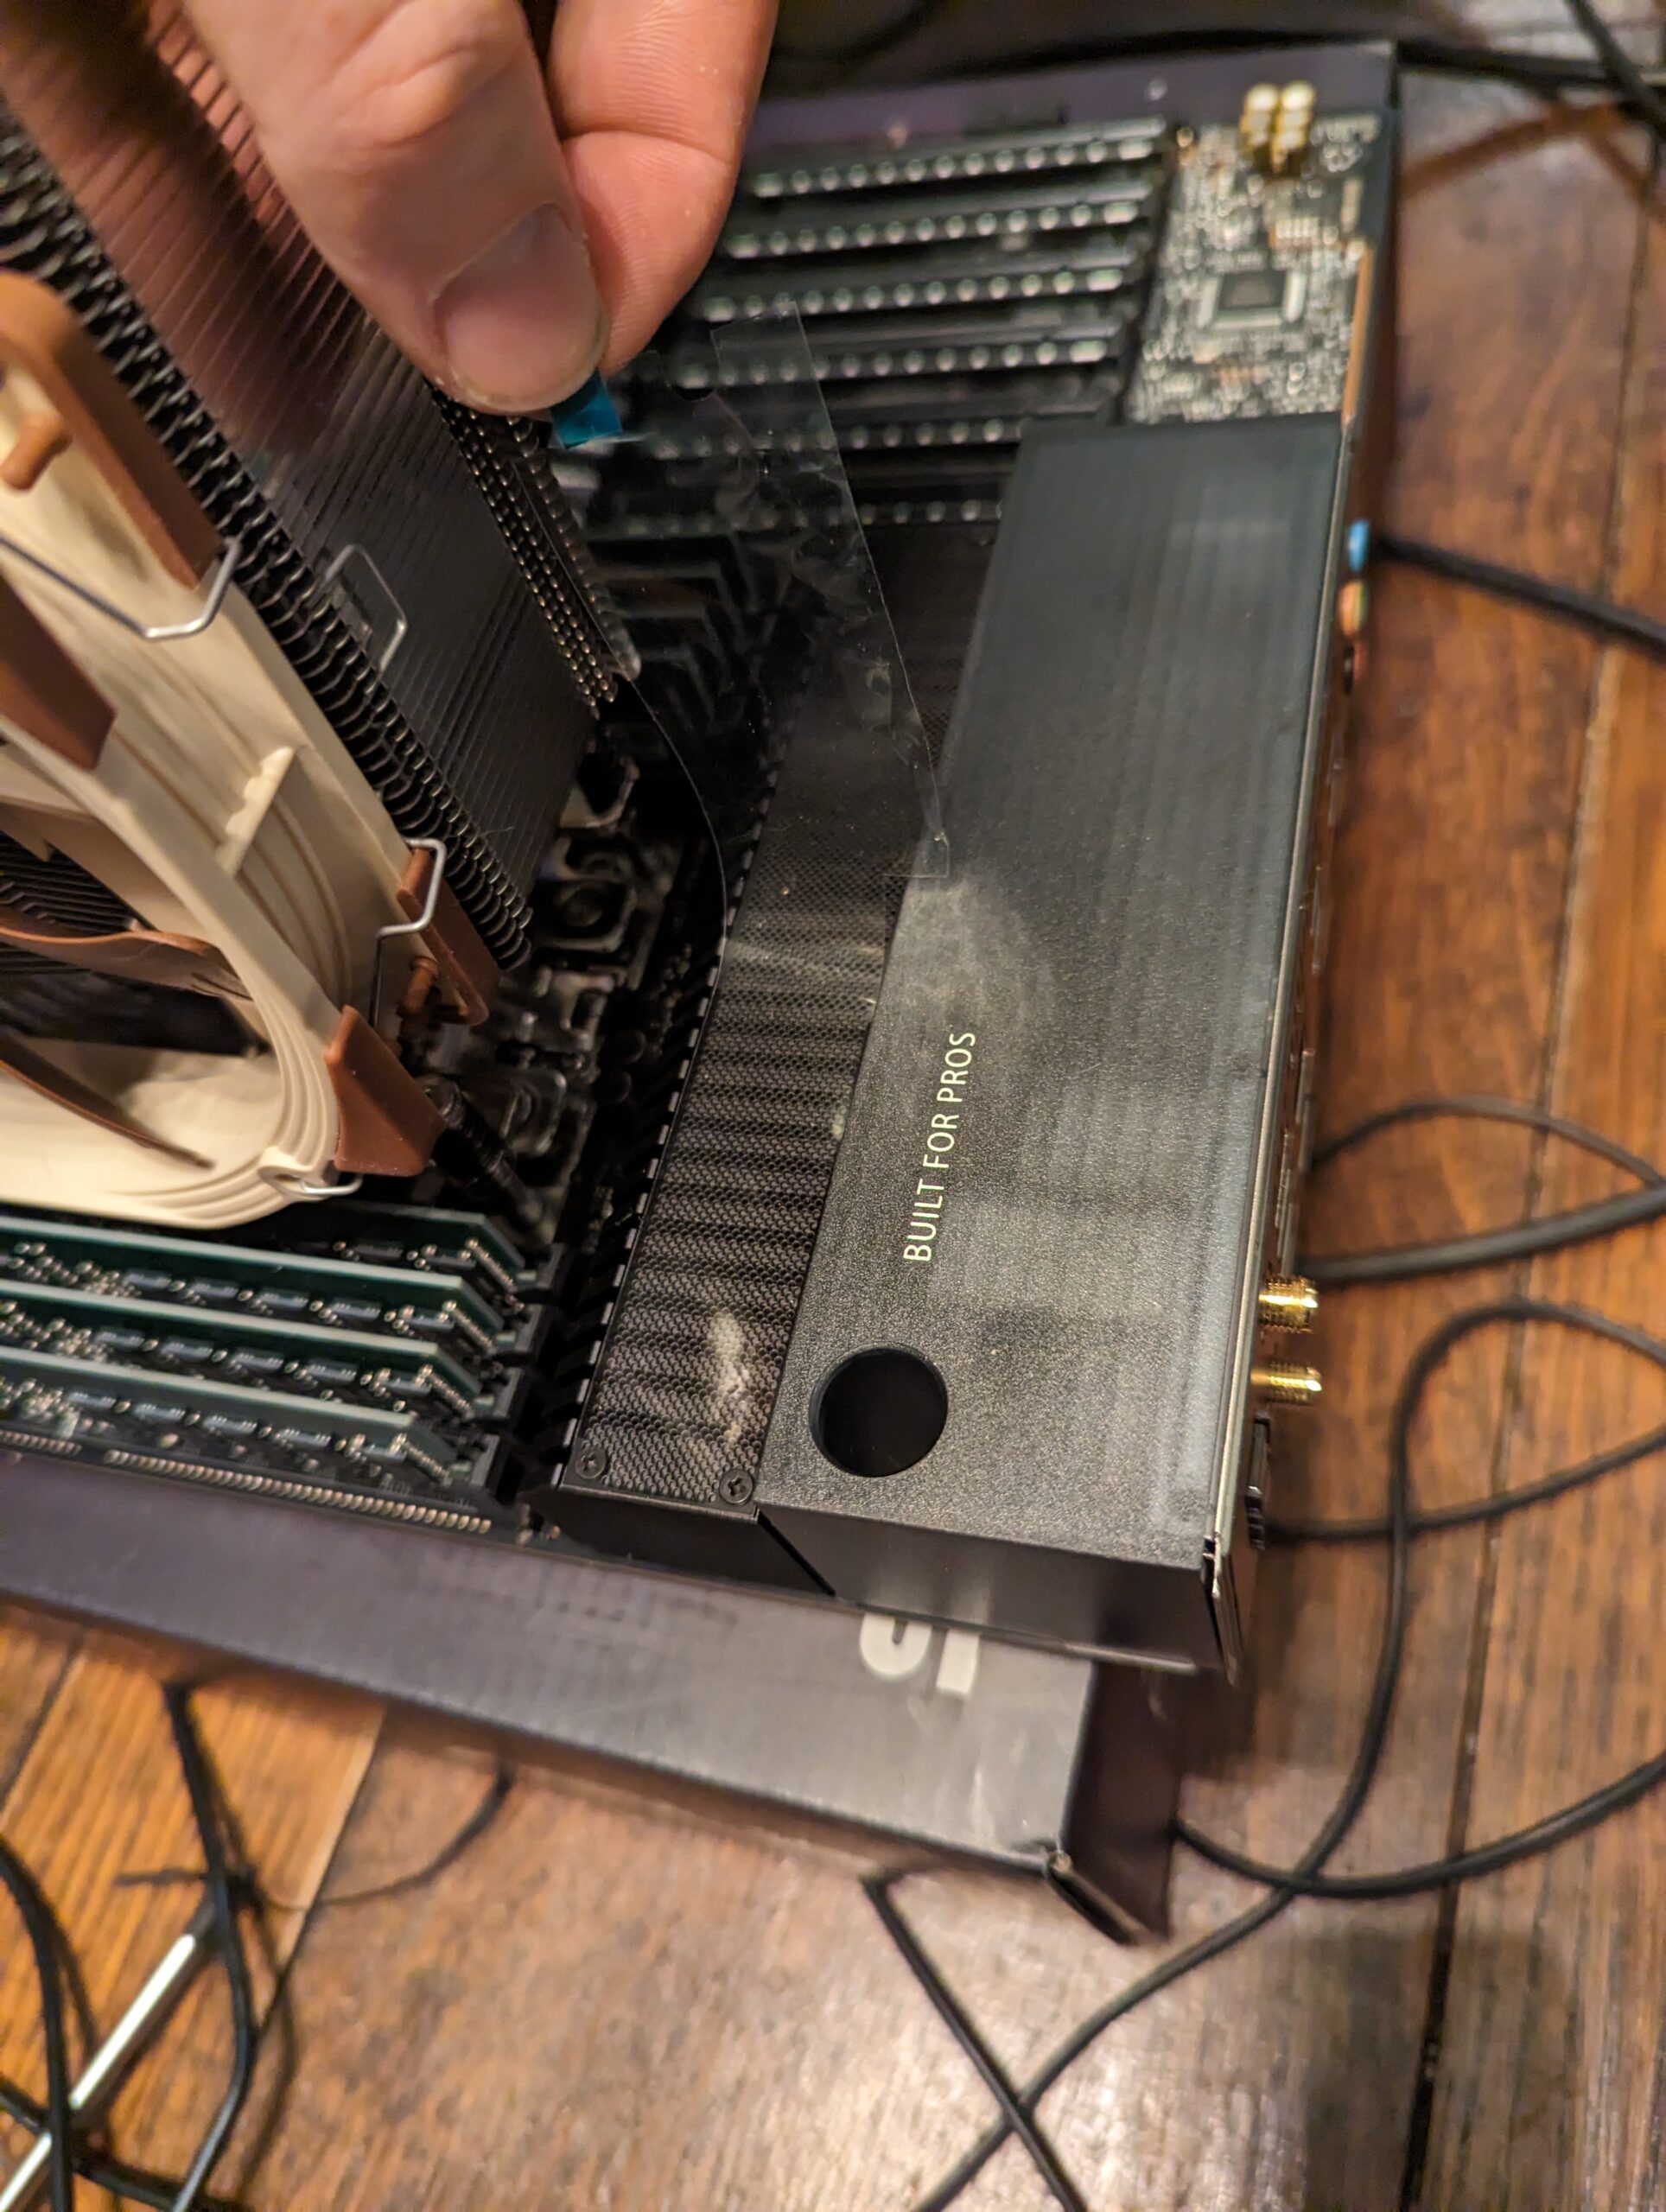
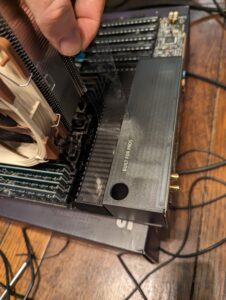
Since everything seems to be going so well lets copy over the old data from my previous drives onto the new ones using the included ASUS Hyper M.2 x16 Gen 4 Card.


This all worked beautifully! Let’s test both GPUs in the board and see what it does.

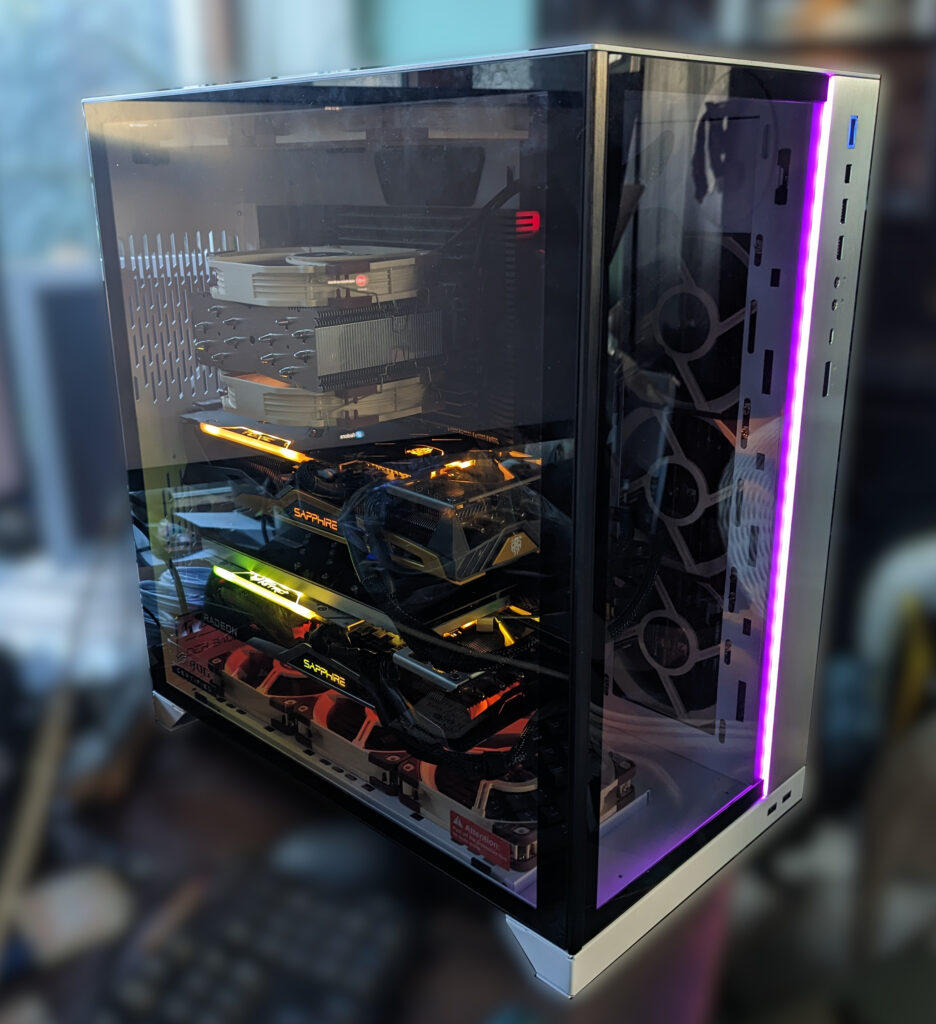
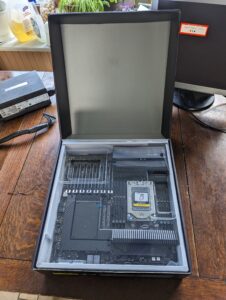
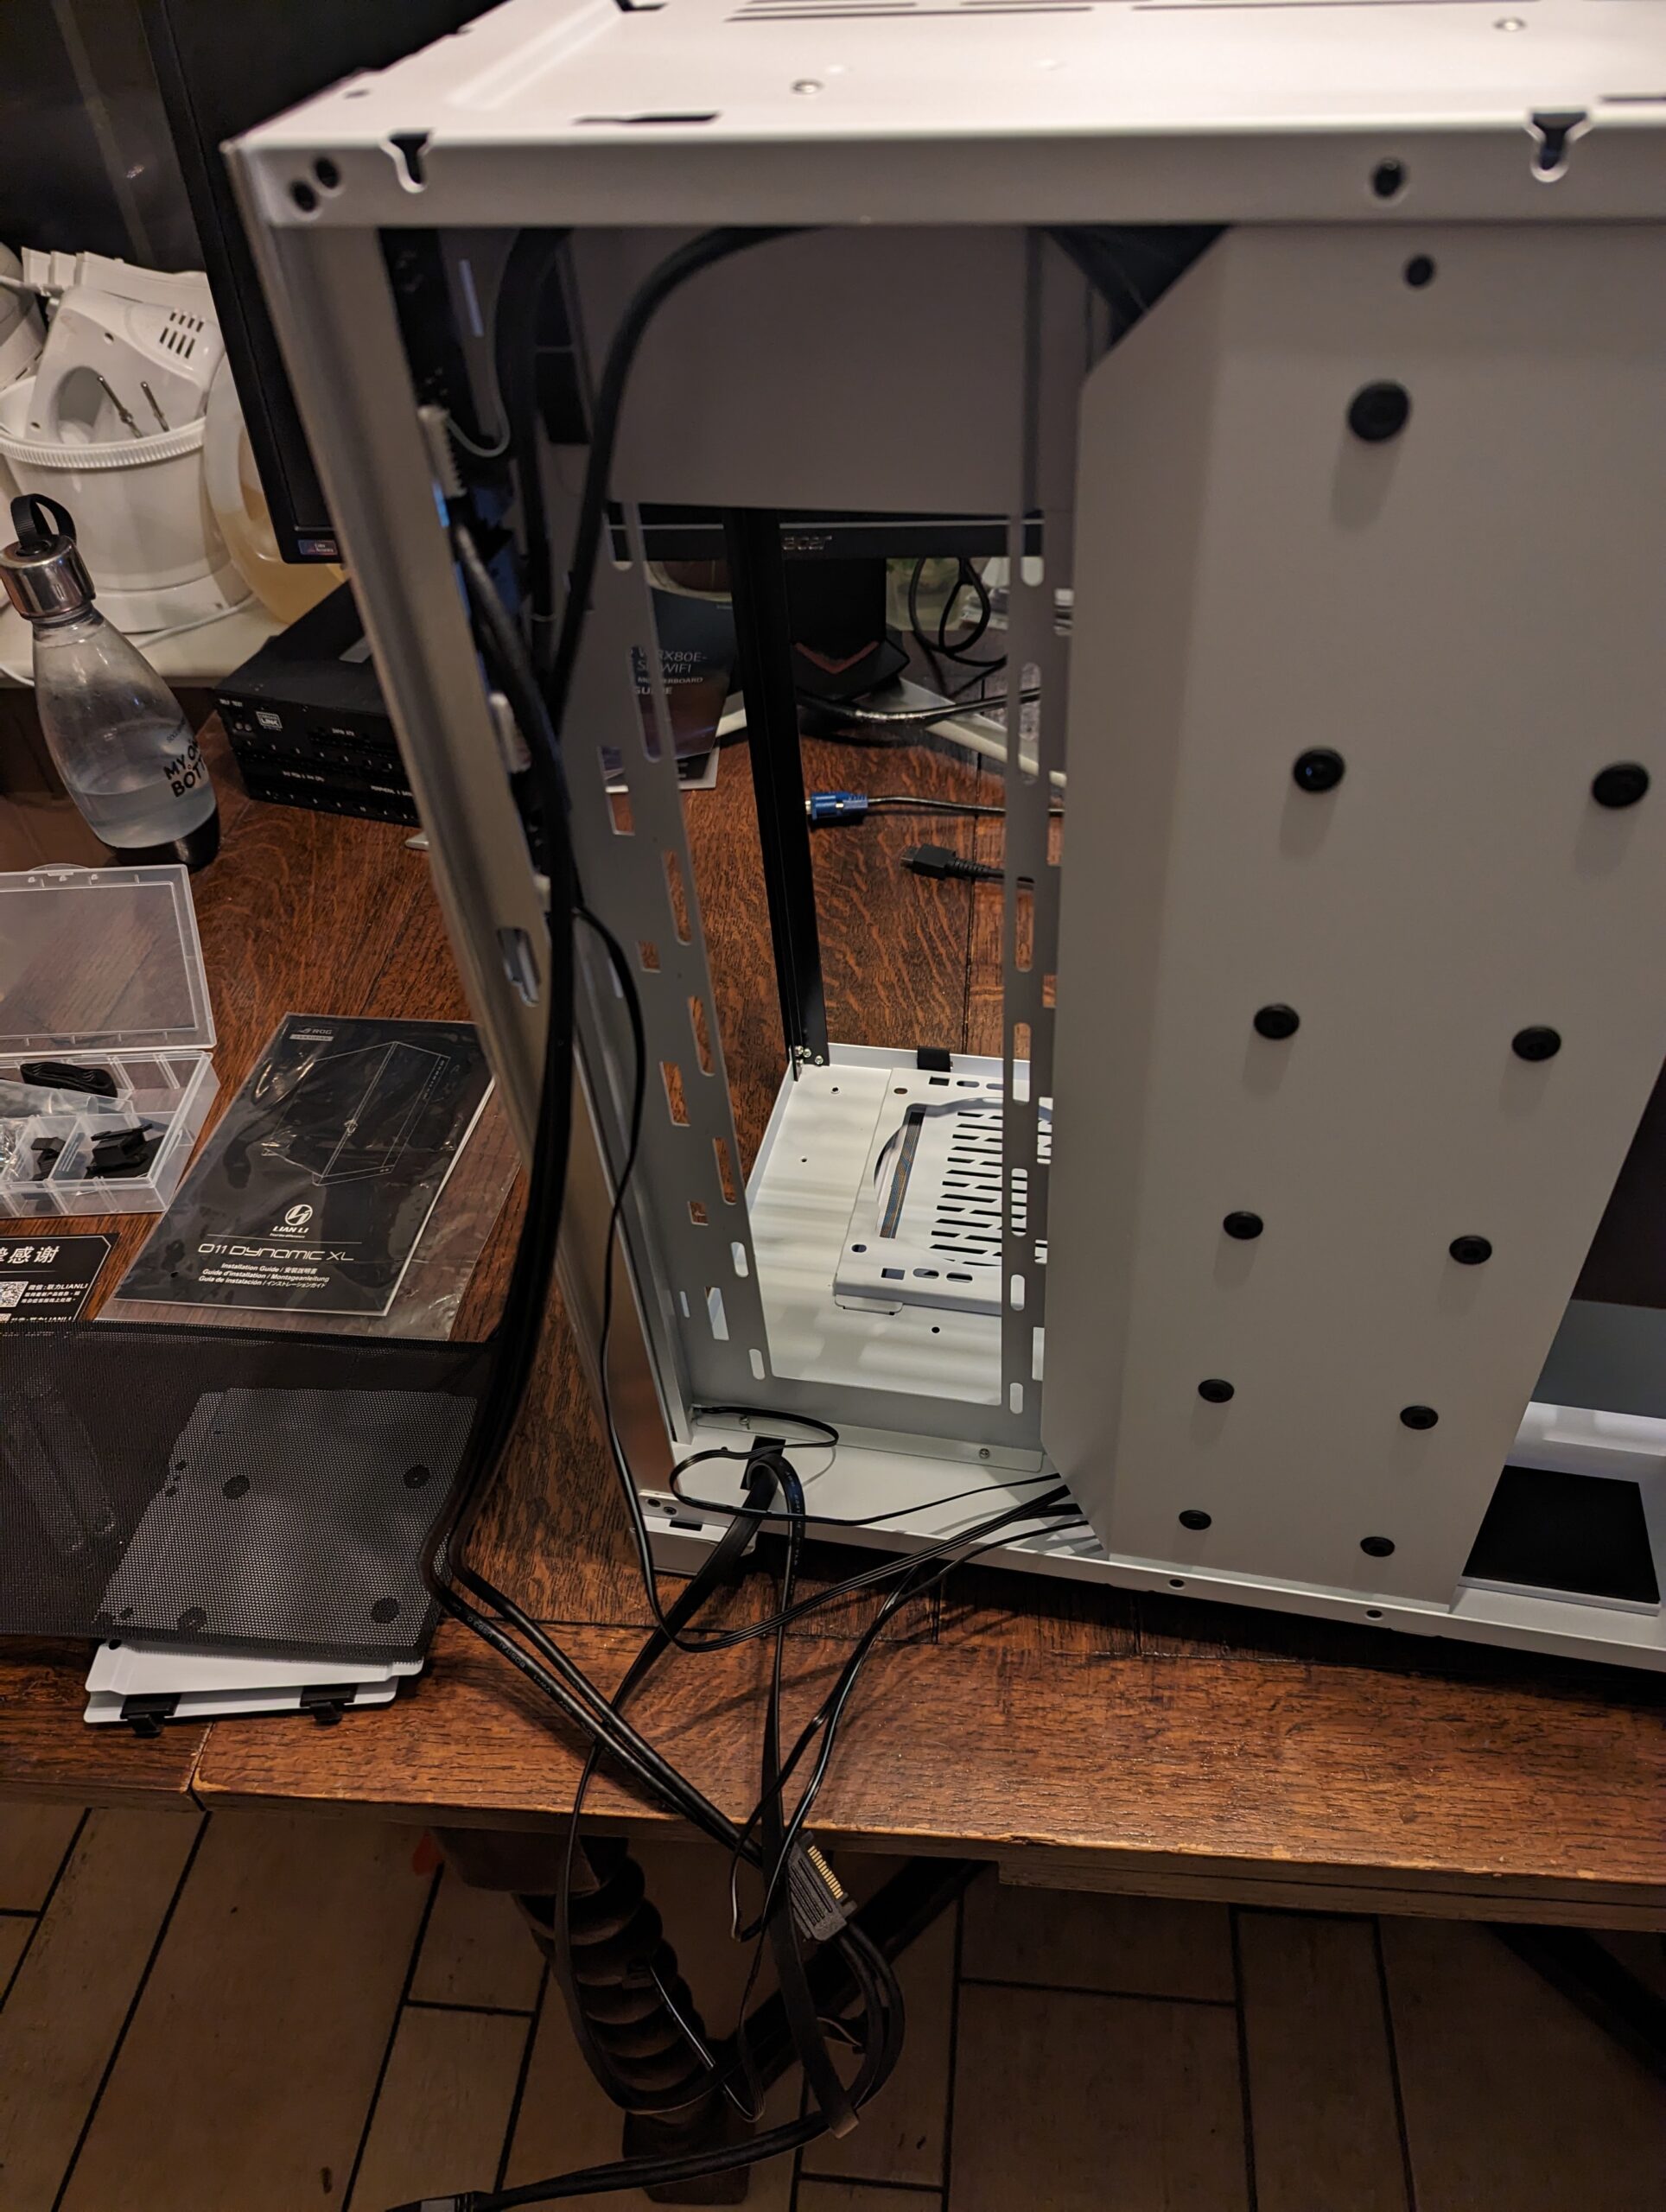
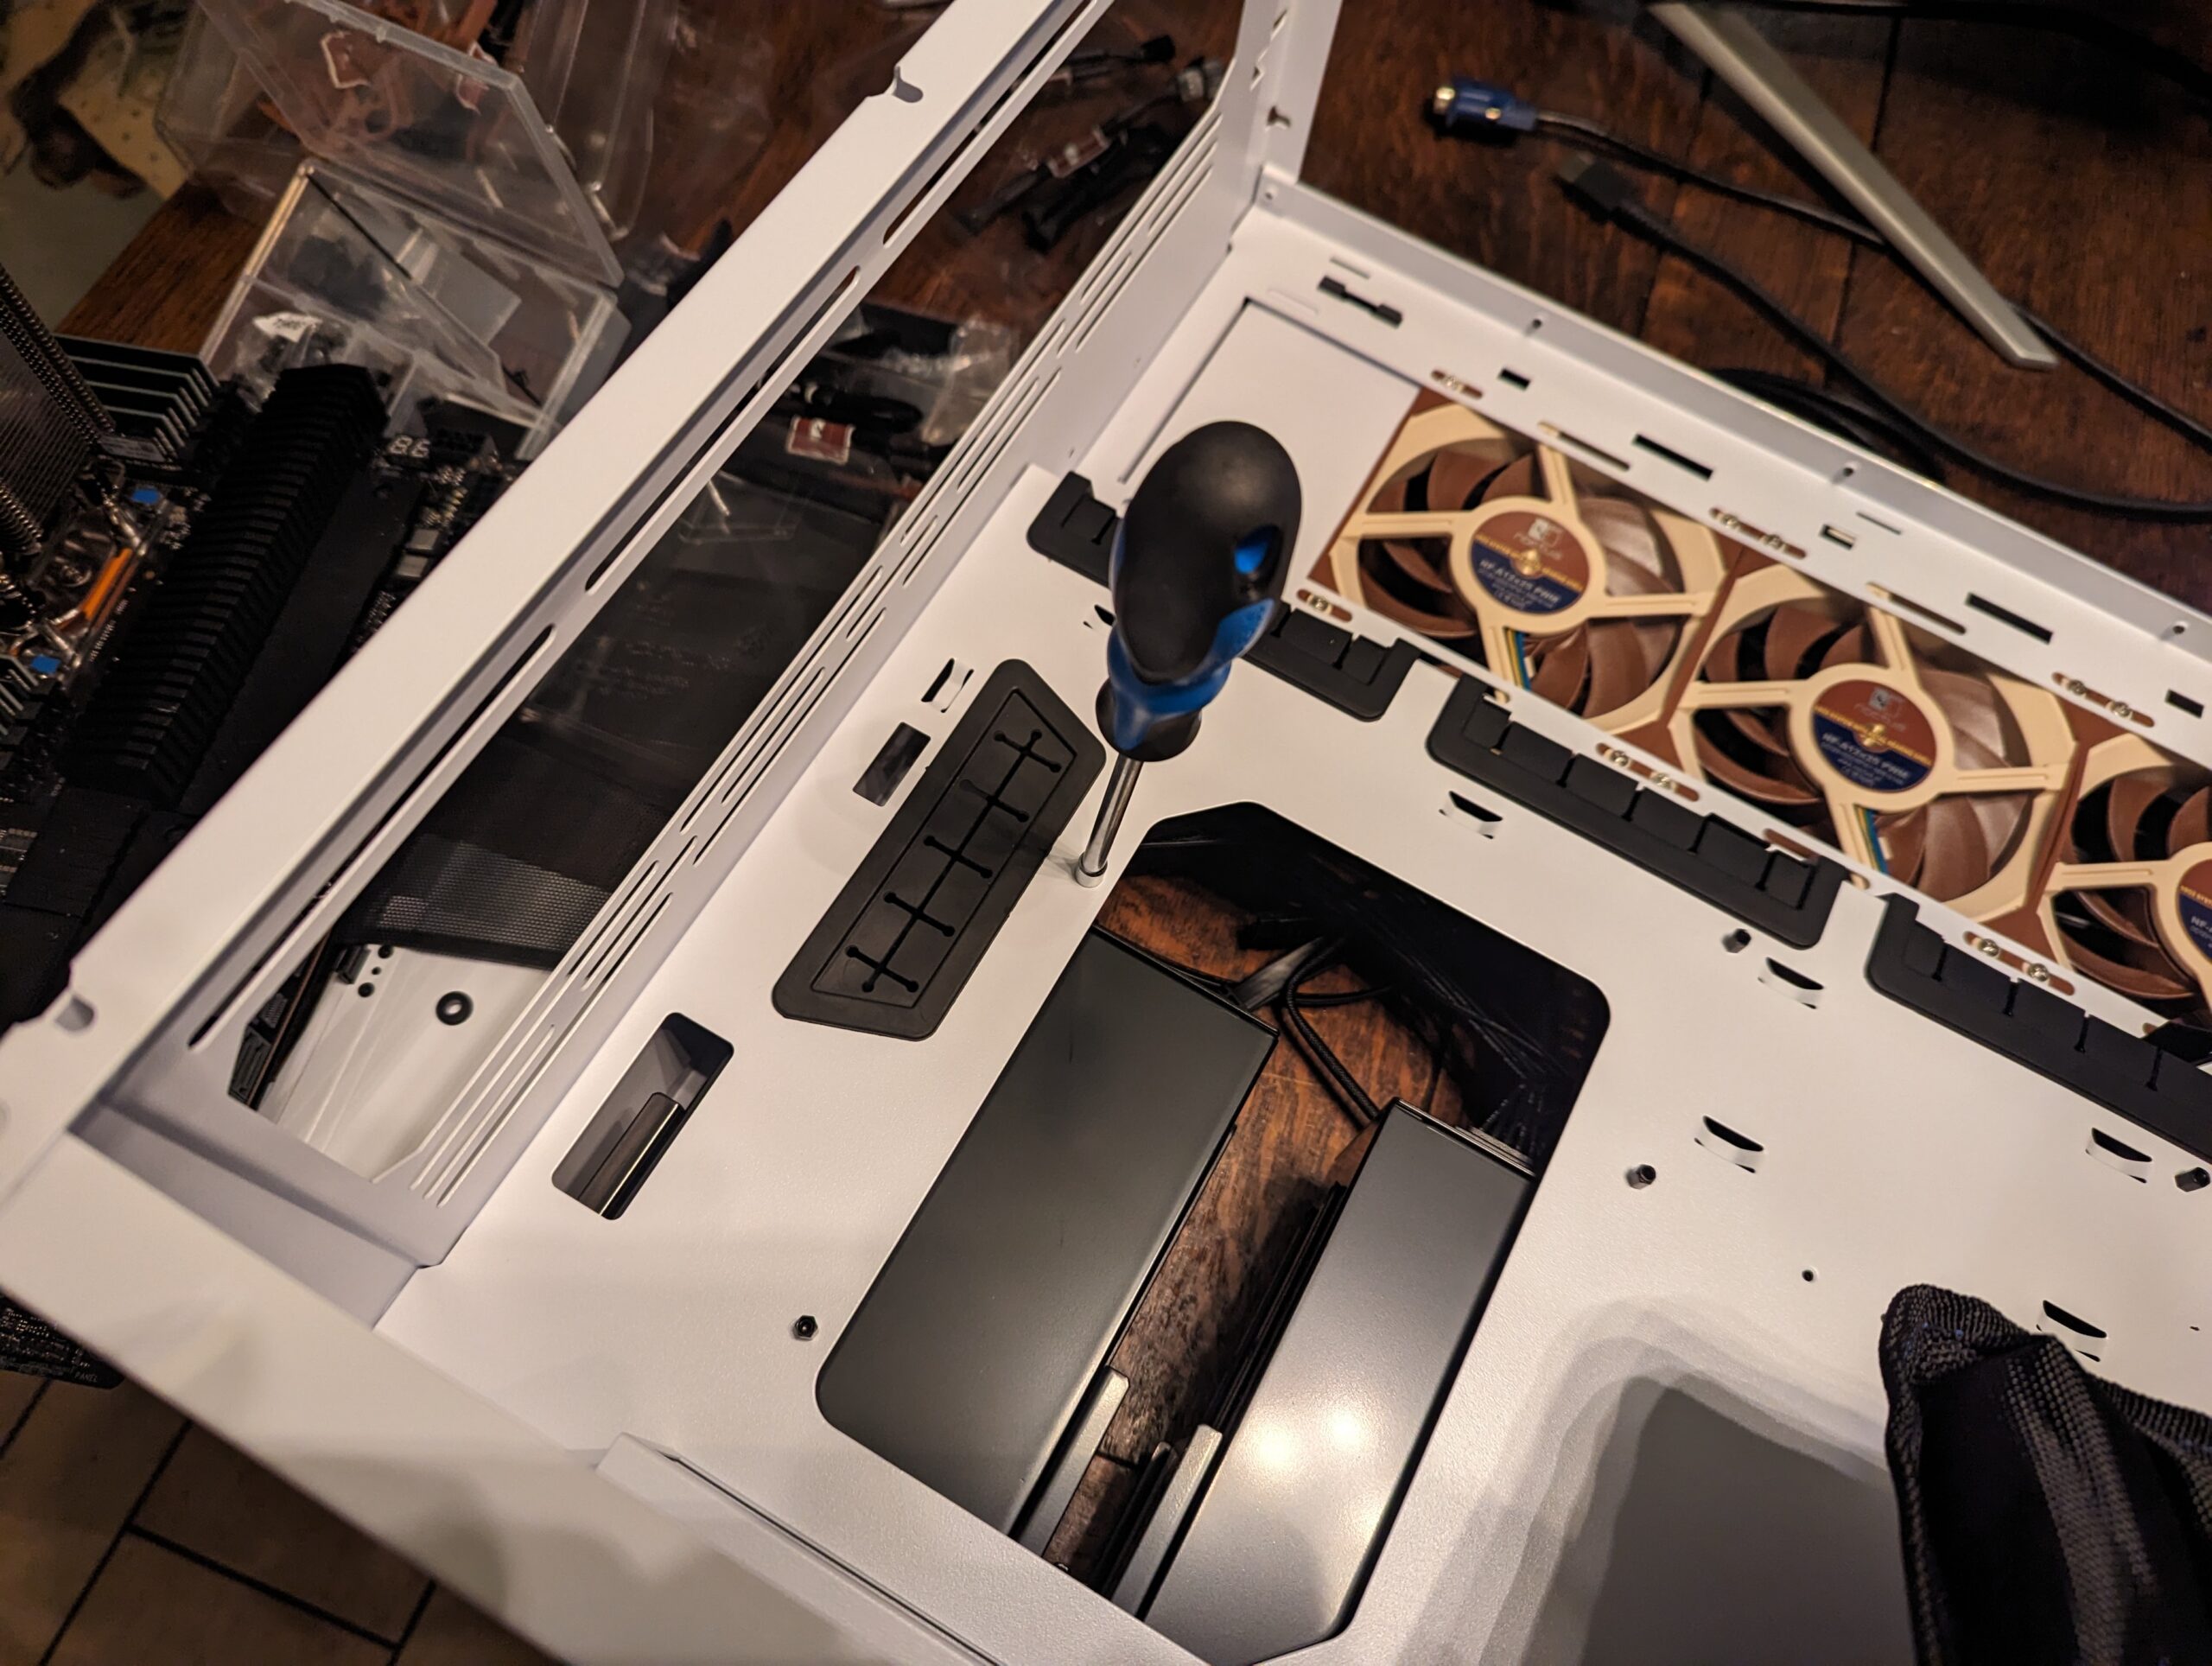
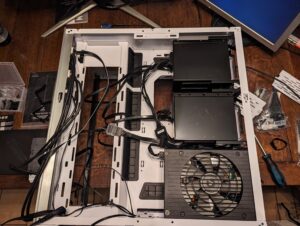
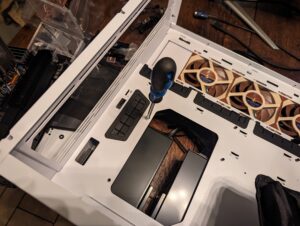
Installation in the case
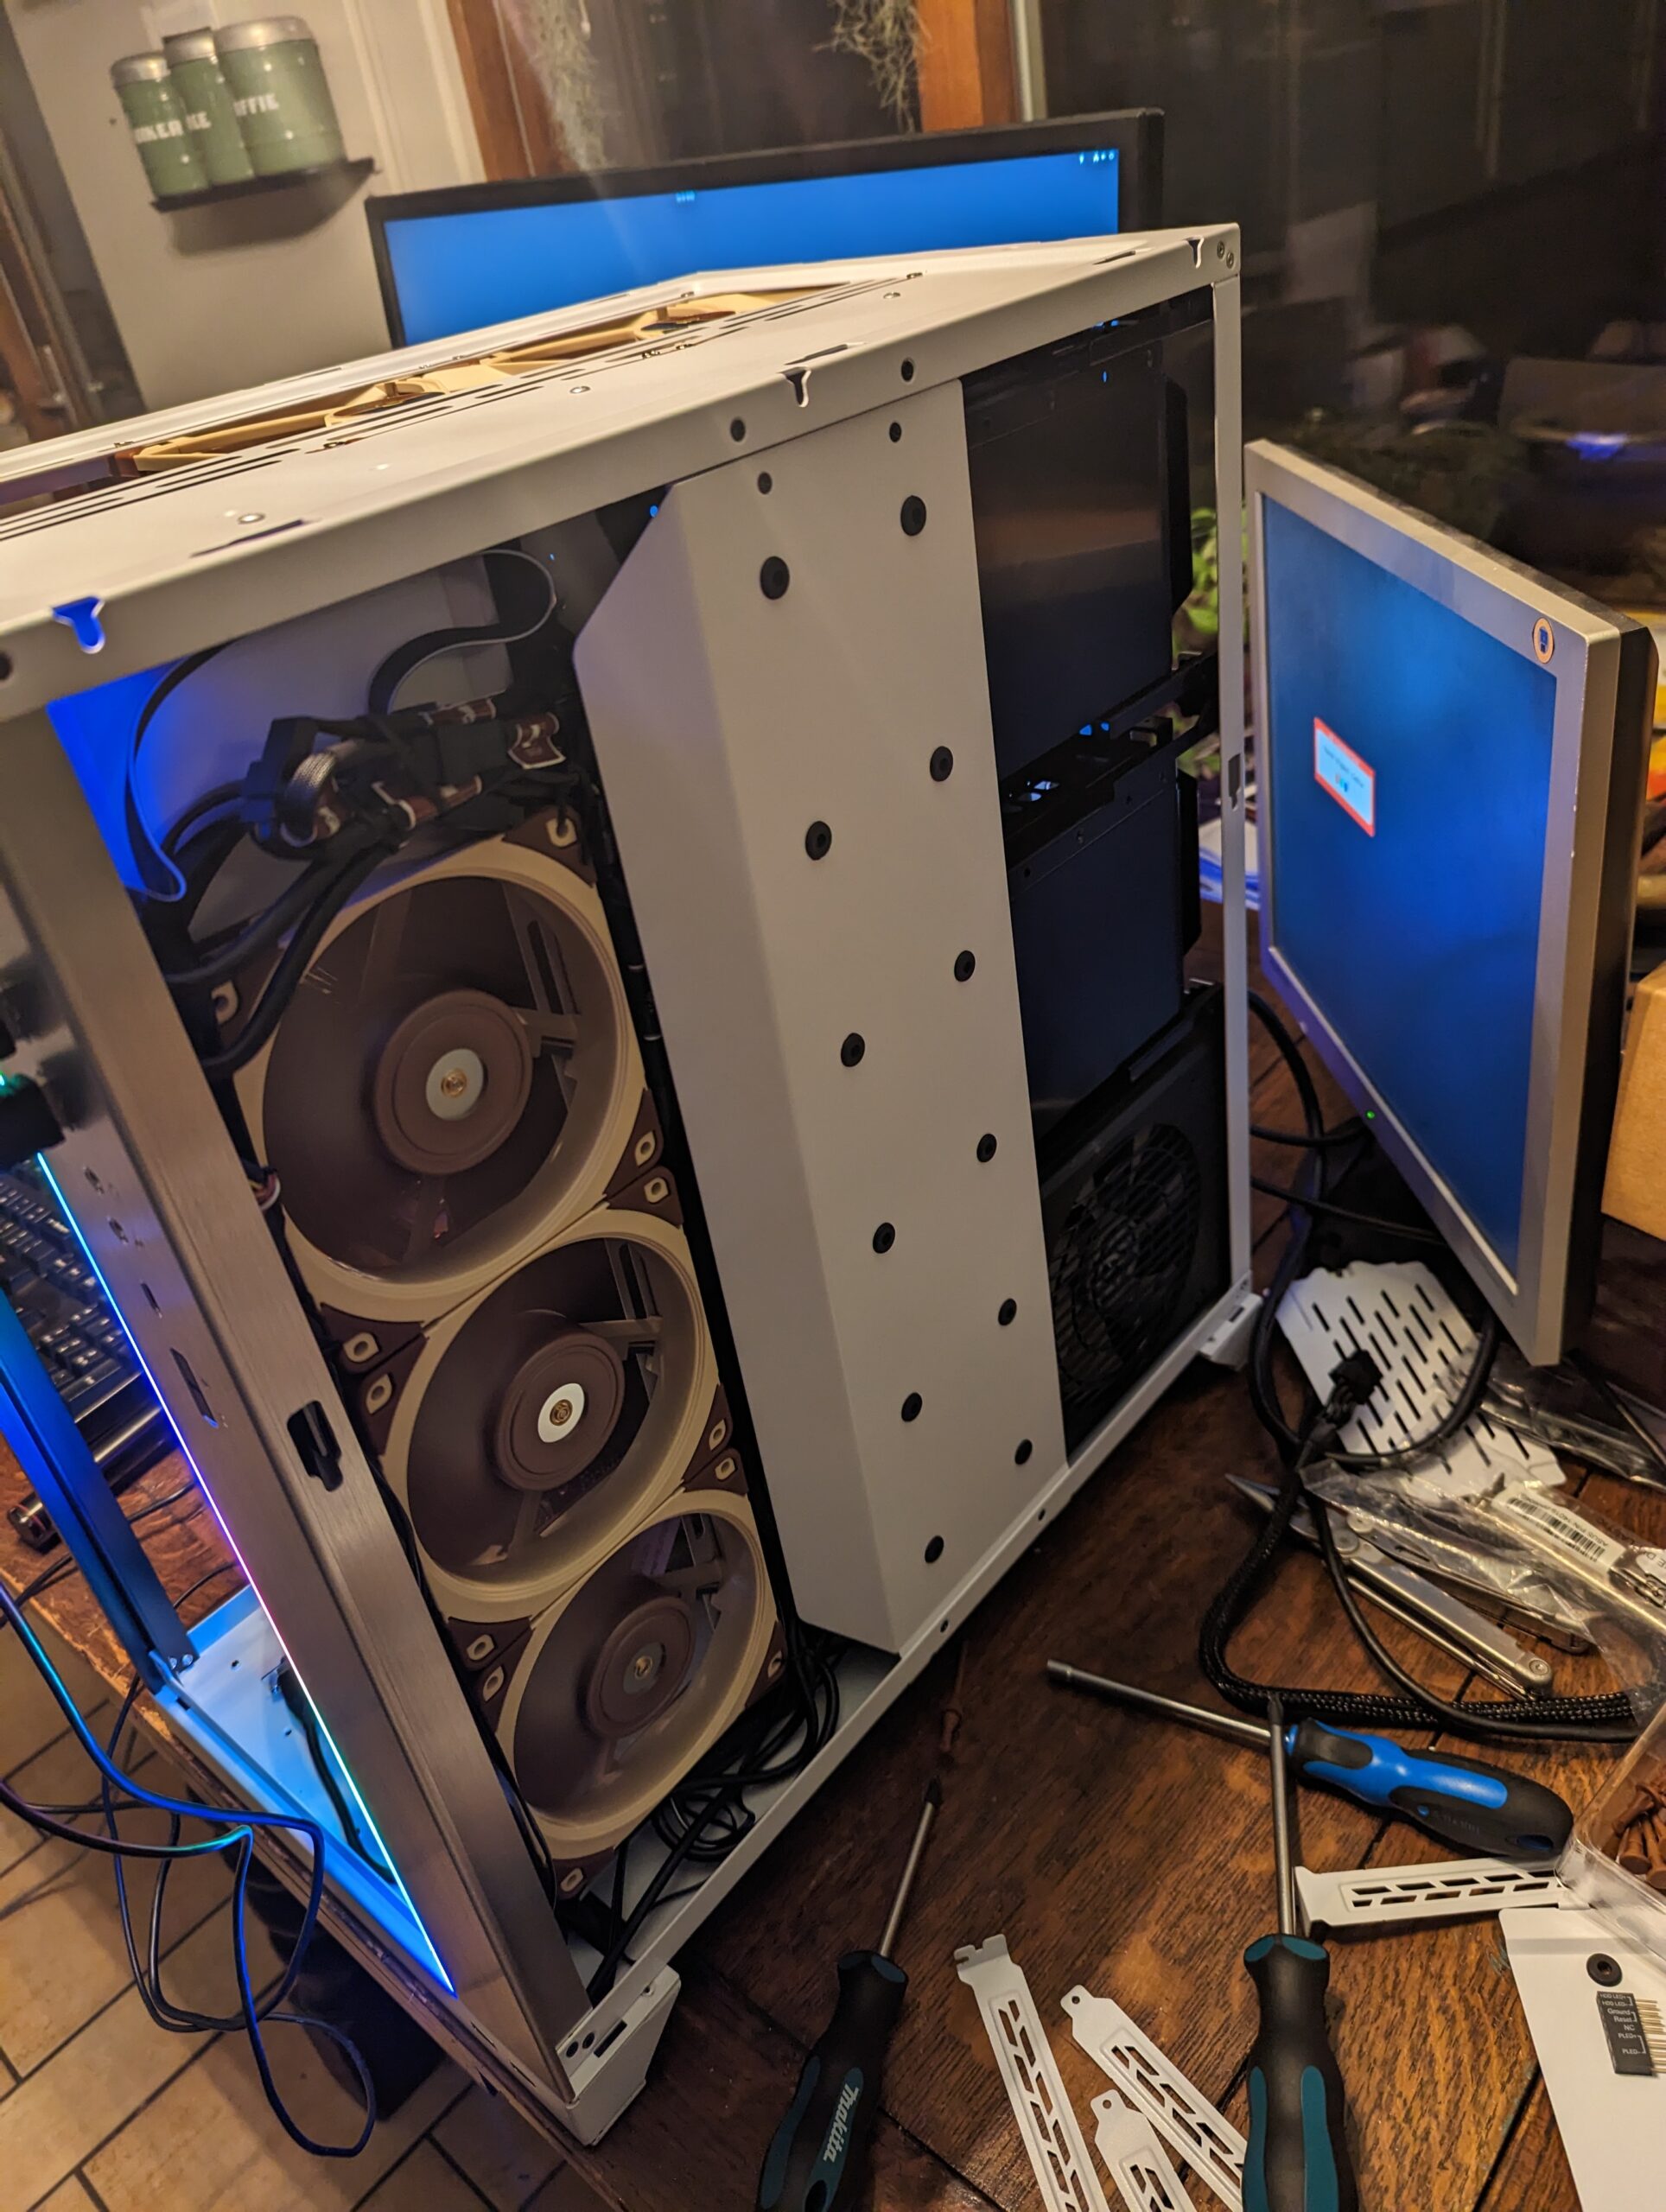
Installing all of the parts in the O11 Dynamic XL is very pleasant. There’s a lot of space to work and many little places to hide cables.


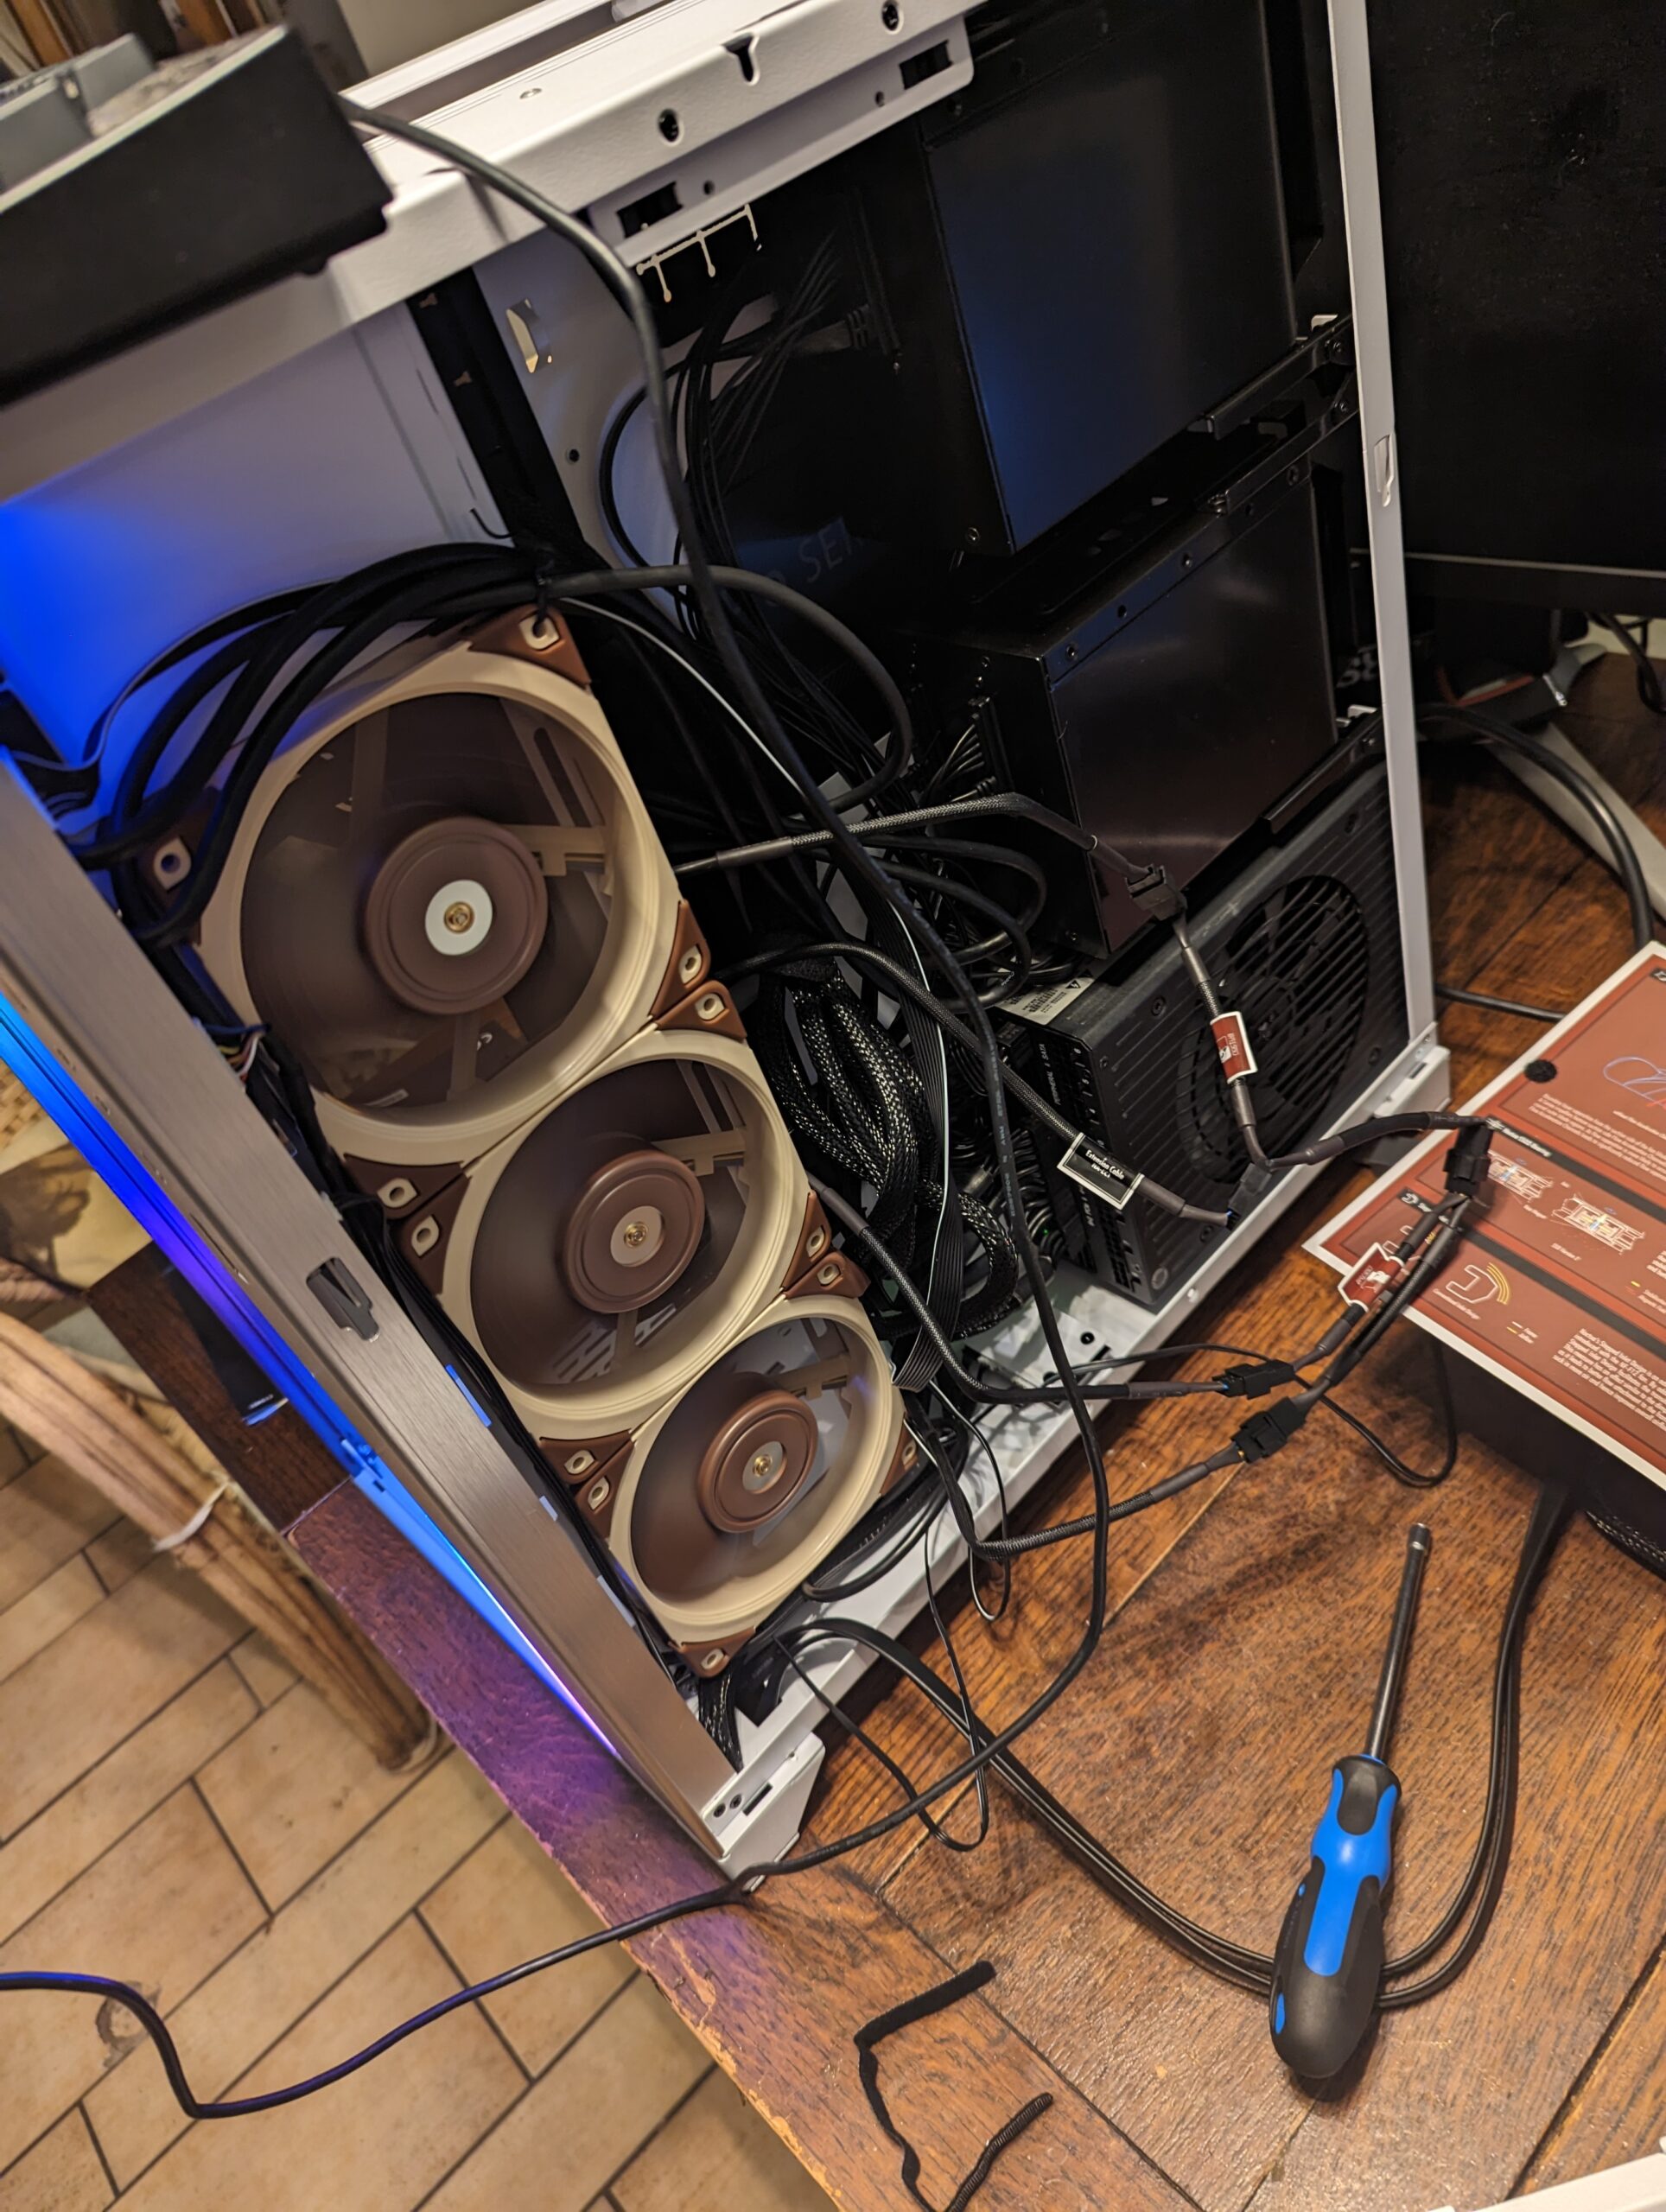


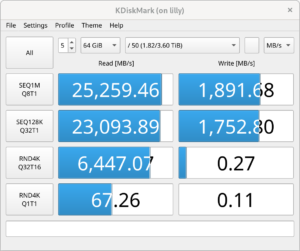
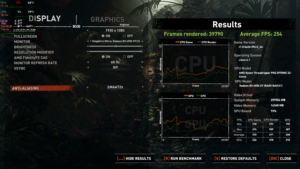
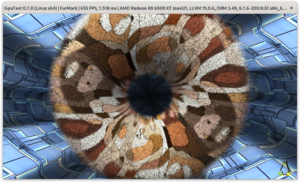
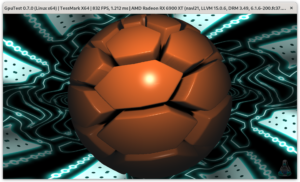
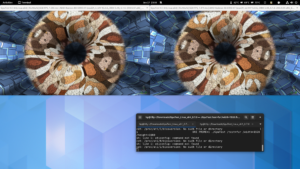
Testing
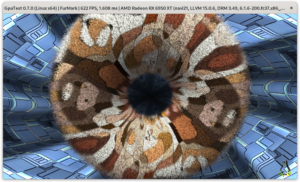
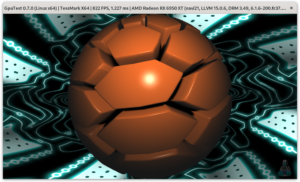
With the side panels installed I ran Furmark at 1080p, prime95 mixed stress test, and using dd reading from 6 NVMe SSDs simultaneously.
The PCIe AER errors have since been resolved by replacing two Samsung 980 pro drives with two Samsung 990 pro drives, see the troubleshooting section below.
Temperatures seem under control and stability is good. It appears that under very heave CPU load PCIe bandwidth suffers a little bit. 🙂 I suppose this is to be expected.
Performance
- OS: Fedora Workstation 37
- Root device: mdadm RAID10
- Boot device: mdadm RAID1
- Swap device: one partition per NVMe device. Linux will treat this as raid-0 automatically if all swap devices have the same priority.


Conclusion
While conclusions tend to go at the end, the rest of this article is mostly dedicated to configuration and some Linux specific issues.
Case: Very spacious to build in and clearly a lot of thought went into the placement of everything. I would recommend this case for builds like the one I did. However, do note that either the specs for the case or for the Noctua CPU cooler are wrong. It DOES fit, but it butts up against the glass lightly. If both specs were correct then I should have had at least 10mm of clearance between them.
Motherboard: Lacks support for AMD PBO (This was a bit of an unpleasant surprise), but it otherwise seems quite solid. The IPMI implementation is a little lacking in places, particular the Serial over LAN feature isn’t fully baked.
The documentation for the BIOS setup program available online suggests that there are quite a bit of advanced PCIe settings that can be done. However, in bios 1003 (the one required for the 5000 series) these options have all been removed. The beta BIOS I received from Asus also lacks these options.
Due to the IPMI quality and the lack of PBO the motherboard is the only part I have some mild regrets about. If I were to do it all over again I would likely try a different board. However, the accessories that come in the box are quite nice. I would likely purchase a ASUS Hyper M.2 x16 Gen 4 separately.
Having said all that, Asus support has been a high point while dealing with some of the technical issues.
Linux support: I’ve had very little trouble getting everything to work as it should. At least with Fedora workstation 37 it seems that everything just works.
Noise: With the fan configuration I did the computer is near silent when doing tasks that are not very CPU intensive. When under full load the system is quite audible but it is not an annoying sound. Lots of “whoosh” and very little whine.
GPU thermals: Moving the GPUs far apart means that both of them seem to perform quite well and they stay at around 65°C to 70°C. I was a little concerned about putting the NVMe drives directly against the back plate of the primary GPU but this all worked out fine. GPU load seems to not be affecting the NVMe temperatures.
CPU thermals: The Noctua NH-U14S does a good job of keeping CPU thermals under control. Even when under extended full CPU loads the temperatures stay in high 60s to low 70s while keeping clocks at around 4.2 – 4.3 GHz all core.
Final verdict: Despite some issues with the hardware (see below) I quite enjoy this machine. And, while entirely just a function of being the only case that has the overhang I wanted, I have to admit to being quite pleased with the “aquarium full of neat computer parts look.” 🙂
If you, dear reader, are interested in some more technical details read on!
IPMI configuration
Configuring the IPMI BMC can be done either through the EFI BIOS or ipmitool. Using ipmitool for setting up the network is pretty straightforward.
# ipmitool lan set 1 ipsrc dhcp
# ipmitool lan set 1 access on
Set Channel Access for channel 1 was successful.
# ipmitool lan print 1
....
IP Address Source       : DHCP Address
....
The network card is shared between the BMC and the motherboard. When a network cable is plugged in to the motherboard everything should “Just Work™.”
Note that the BMC has two LAN channels, creatively named “1” and “2”. These channels correspond to the network ports on the motherboard. The port closest to the bottom of the board is port 1.
Serial over LAN configuration
The IPMI BMC comes with Serial over LAN (SOL). SOL lets an administrator connect to a serial port on the computer over the network. This can be very useful when debugging a system that is not booting correctly. While some more professional systems will allow access to the BIOS setup through SOL; on this motherboard this doesn’t work. It appears that when applying the graphical skin to the setup program the text option was removed.
Things to know about the SOL implementation on this motherboard:
- The redirected port is /dev/ttyS1 (or COM2 in DOS parlance).
- There is no way to configure the baud rate on the BMC. It is locked to 57600 baud.
- It is possible to enable “Legacy console redirection” which combined with disabling the full screen splash will show the POST screen but nothing else.
Because of this there’s only three things to configure: GRUB, Linux, and a serial login terminal.
In /etc/default/grub we set a kernel command line option to add a serial console. While there we can also setup a serial output for GRUB itself. I have highlighted the relevant parts.
GRUB_TIMEOUT=5
GRUB_DISTRIBUTOR="$(sed 's, release .*$,,g' /etc/system-release)"
GRUB_DEFAULT=saved
GRUB_DISABLE_SUBMENU=true
GRUB_TERMINAL_OUTPUT="gfxterm serial"
GRUB_CMDLINE_LINUX="resume=UUID=7f82f66c-9553-46e1-9451-af3cd0ecf4bb rd.md.uuid=649ca99c:e74c38f5:d8c179ae:62df038f rd.md.uuid=2a25969d:409addc4:b8455a83:8b81a084 rd.md.uuid=2eef962a:0b78ad81:d0d9805c:ba12461a rd.plymouth=0 plymouth.enable=0 amd_iommu=on iommu=pt console=ttyS1,57600 console=tty0"
GRUB_DISABLE_RECOVERY="true"
GRUB_ENABLE_BLSCFG=true
GRUB_SERIAL_COMMAND="serial --unit=1 --speed=57600"
Don’t forget to regenerate the GRUB configuration with grub2-mkconfig -o /etc/grub2-efi.cfg
Enabling a serial getty on a systemd based system is simple: Linux will keep the serial port configured to whatever baud rate was specified on the kernel command line so we only need to enable and start a serial getty: systemctl enable --now serial-getty@ttyS1.service
Now that it is all running it is possible to login to the serial console using ipmitool.
$ ipmitool -I lanplus -H ipaddress -U admin -P password sol activate
[SOL Session operational. Use ~? for help]

lilly login: hp
Password:
Last login: Tue Jan 17 22:47:52 from 192.168.1.195
[hp@lilly ~]$
Don’t forget that the getty will not automatically log out when disconnecting from the IPMI SOL session. Linux does not know anything about the SOL session as it is handled by the BMC! Before disconnecting from SOL first log out of the getty session.
Fan configuration
Due to the BMC fan control on this motherboard works a little bit differently. The fan speed of the machine can not be controlled through Linux hwmon, nor can it be configured through the BIOS setup program. When querying the nct6798 controller all fans report 0 RPM.
nct6798-isa-0290
Adapter: ISA adapter
....
fan1:                     0 RPM  (min =    0 RPM)
fan2:                     0 RPM  (min =    0 RPM)
fan3:                     0 RPM  (min =    0 RPM)
fan4:                     0 RPM  (min =    0 RPM)
fan5:                     0 RPM  (min =    0 RPM)
fan6:                     0 RPM  (min =    0 RPM)
fan7:                     0 RPM  (min =    0 RPM)
....
Asus hooked up the fan controls directly to the BMC. When logging into the web interface of the BMC fan controls are available there.
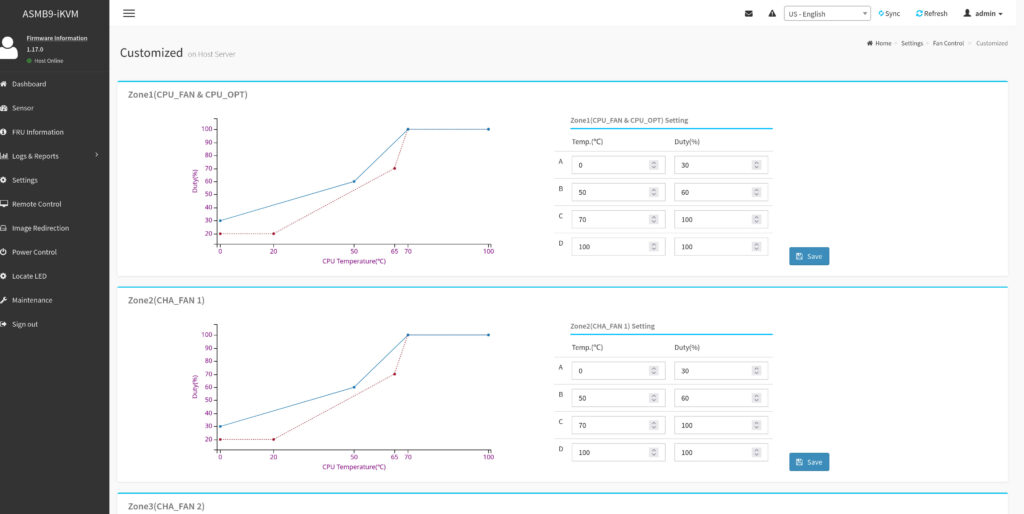
Since I do not have a Windows installation on this machine I cannot say whether this is also the only way to configure fan profiles on Windows. However, the fans all respond as configured in the BMC. This means that there’s no need to run fancontrol or something similar. A downside to this is that the only temperature source the BMC has is the CPU temperature. This means I cannot ramp the bottom intake fans up when GPU temperatures rise.
It is however still possible to read fan speeds from Linux using ipmitool:
# ipmitool sdr
...
CPU_FAN                  | 700 RPM           | ok
CPU_OPT                  | 800 RPM           | ok
CHA_FAN1                 | 1000 RPM          | ok
CHA_FAN2                 | disabled          | ns
CHA_FAN3                 | disabled          | ns
CHA_FAN4                 | disabled          | ns
CHA_FAN5                 | 1300 RPM          | ok
CHA_FAN6                 | disabled          | ns
SOC_FAN                  | 2400 RPM          | ok
CHIPSET_FAN              | 1300 RPM          | ok
...
Troubleshooting
As is typical for computers, there were several problems with this combination of hardware. We should never have taught sand to think.
PCIe AER corrected errors from the Samsung 980 PRO NVMe SSDs
When first built the system had 2x Samsung 990 PRO and 2x Samsung 980 PRO drives installed. With this configuration I got streams of PCIe AER corrected errors in the kernel log from just the 980 PROs. It appears the 980 PRO drives either do not like the motherboard or the Asus hyper m.2 card.
After trying several options-turning AER off in Linux, turning ASPM off, disabling APST, and setting increasingly more exotic kernel parameters-I made a support request at Asus. The very friendly technician suggested I re-seat the CPU. This did not help. They then offered me a beta BIOS, but this also did not solve the problem. I eventually bought two more 990 PRO drives and the AER corrected errors have gone away.
The reason for eventually just swapping out the drives was twofold: I was unsure whether or not the errors were merely cosmetic or if they could cause stability issues, and the sheer amount of errors made the serial console completely unusable.
GPU device ordering
The motherboard labels the PCIe slots from 1 to 7. All seven are full PCIe x16 4.0 slots. The BIOS enumerates any device from slot 1 down to slot 7. However the PCIe device IDs go the opposite direction, this is with the 6950XT installed in slot 7 and the 6900XT installed in slot 1:
03:00.0 VGA compatible controller: Advanced Micro Devices, Inc. [AMD/ATI] Navi 21 [Radeon RX 6950 XT] (rev c0)
43:00.0 VGA compatible controller: Advanced Micro Devices, Inc. [AMD/ATI] Navi 21 [Radeon RX 6800/6800 XT / 6900 XT] (rev c0)
Because of this ordering in Linux DRM the primary GPU ended up being the card in slot 7. Swapping the cards around fixed this issue and the 6950XT is now the primary GPU according to mesa. However, when enabling CSM only the GPU in slot 1 gets enabled. This threw me for a loop when trying to use FreeDOS to poke at the IPMI BMC as the screen on what I consider my primary GPU remained blank.
Annoyingly in AMD RoCM the GPU order is in BIOS order so RoCM device 0 is the 6900XT, not the 6950XT.
Weirdness when logged into a graphical session
Things such as resolution changes not applying until done twice, occassional stutters when using the shell, and green screen crashes from amdgpu that could not be recovered.
It turned out that most of this was due to the VGA controller on the motherboard. There is a switch to disable the VGA chip, it is located next to the VGA header. After disabling the on board VGA the problem went away.
Note however that this also kills the IPMI iKVM functionality. I use serial consoles for troubleshooting and not graphical ones so for me this is a very minor inconvenience.
IPMI SOL baud rate stuck at 57600 in the ASMB9-iKVM
This turned out not to be solvable with the current BMC firmware. I tried using ipmitool, ASMC8.EXE, and digging through the UEFI setup program to no avail. I did find out that the supplied CD with the motherboard is bootable in the process though. So there’s that.
Nerdy stuff
Serial port boot of the system captured using asciinema
Lspci output
00:00.0 Host bridge: Advanced Micro Devices, Inc. [AMD] Starship/Matisse Root Complex
00:00.2 IOMMU: Advanced Micro Devices, Inc. [AMD] Milan IOMMU (rev 01)
00:01.0 Host bridge: Advanced Micro Devices, Inc. [AMD] Starship/Matisse PCIe Dummy Host Bridge
00:02.0 Host bridge: Advanced Micro Devices, Inc. [AMD] Starship/Matisse PCIe Dummy Host Bridge
00:03.0 Host bridge: Advanced Micro Devices, Inc. [AMD] Starship/Matisse PCIe Dummy Host Bridge
00:03.1 PCI bridge: Advanced Micro Devices, Inc. [AMD] Starship/Matisse GPP Bridge
00:04.0 Host bridge: Advanced Micro Devices, Inc. [AMD] Starship/Matisse PCIe Dummy Host Bridge
00:05.0 Host bridge: Advanced Micro Devices, Inc. [AMD] Starship/Matisse PCIe Dummy Host Bridge
00:07.0 Host bridge: Advanced Micro Devices, Inc. [AMD] Starship/Matisse PCIe Dummy Host Bridge
00:07.1 PCI bridge: Advanced Micro Devices, Inc. [AMD] Starship/Matisse Internal PCIe GPP Bridge 0 to bus[E:B]
00:08.0 Host bridge: Advanced Micro Devices, Inc. [AMD] Starship/Matisse PCIe Dummy Host Bridge
00:08.1 PCI bridge: Advanced Micro Devices, Inc. [AMD] Starship/Matisse Internal PCIe GPP Bridge 0 to bus[E:B]
00:14.0 SMBus: Advanced Micro Devices, Inc. [AMD] FCH SMBus Controller (rev 61)
00:14.3 ISA bridge: Advanced Micro Devices, Inc. [AMD] FCH LPC Bridge (rev 51)
00:18.0 Host bridge: Advanced Micro Devices, Inc. [AMD] Milan Data Fabric; Function 0
00:18.1 Host bridge: Advanced Micro Devices, Inc. [AMD] Milan Data Fabric; Function 1
00:18.2 Host bridge: Advanced Micro Devices, Inc. [AMD] Milan Data Fabric; Function 2
00:18.3 Host bridge: Advanced Micro Devices, Inc. [AMD] Milan Data Fabric; Function 3
00:18.4 Host bridge: Advanced Micro Devices, Inc. [AMD] Milan Data Fabric; Function 4
00:18.5 Host bridge: Advanced Micro Devices, Inc. [AMD] Milan Data Fabric; Function 5
00:18.6 Host bridge: Advanced Micro Devices, Inc. [AMD] Milan Data Fabric; Function 6
00:18.7 Host bridge: Advanced Micro Devices, Inc. [AMD] Milan Data Fabric; Function 7
01:00.0 PCI bridge: Advanced Micro Devices, Inc. [AMD/ATI] Navi 10 XL Upstream Port of PCI Express Switch (rev c0)
02:00.0 PCI bridge: Advanced Micro Devices, Inc. [AMD/ATI] Navi 10 XL Downstream Port of PCI Express Switch
03:00.0 VGA compatible controller: Advanced Micro Devices, Inc. [AMD/ATI] Navi 21 [Radeon RX 6950 XT] (rev c0)
03:00.1 Audio device: Advanced Micro Devices, Inc. [AMD/ATI] Navi 21/23 HDMI/DP Audio Controller
04:00.0 Non-Essential Instrumentation [1300]: Advanced Micro Devices, Inc. [AMD] Starship/Matisse PCIe Dummy Function
05:00.0 Non-Essential Instrumentation [1300]: Advanced Micro Devices, Inc. [AMD] Starship/Matisse Reserved SPP
05:00.3 USB controller: Advanced Micro Devices, Inc. [AMD] Starship USB 3.0 Host Controller
20:00.0 Host bridge: Advanced Micro Devices, Inc. [AMD] Starship/Matisse Root Complex
20:00.2 IOMMU: Advanced Micro Devices, Inc. [AMD] Milan IOMMU (rev 01)
20:01.0 Host bridge: Advanced Micro Devices, Inc. [AMD] Starship/Matisse PCIe Dummy Host Bridge
20:01.1 PCI bridge: Advanced Micro Devices, Inc. [AMD] Starship/Matisse GPP Bridge
20:02.0 Host bridge: Advanced Micro Devices, Inc. [AMD] Starship/Matisse PCIe Dummy Host Bridge
20:03.0 Host bridge: Advanced Micro Devices, Inc. [AMD] Starship/Matisse PCIe Dummy Host Bridge
20:04.0 Host bridge: Advanced Micro Devices, Inc. [AMD] Starship/Matisse PCIe Dummy Host Bridge
20:05.0 Host bridge: Advanced Micro Devices, Inc. [AMD] Starship/Matisse PCIe Dummy Host Bridge
20:07.0 Host bridge: Advanced Micro Devices, Inc. [AMD] Starship/Matisse PCIe Dummy Host Bridge
20:07.1 PCI bridge: Advanced Micro Devices, Inc. [AMD] Starship/Matisse Internal PCIe GPP Bridge 0 to bus[E:B]
20:08.0 Host bridge: Advanced Micro Devices, Inc. [AMD] Starship/Matisse PCIe Dummy Host Bridge
20:08.1 PCI bridge: Advanced Micro Devices, Inc. [AMD] Starship/Matisse Internal PCIe GPP Bridge 0 to bus[E:B]
21:00.0 PCI bridge: Advanced Micro Devices, Inc. [AMD] Matisse Switch Upstream
22:01.0 PCI bridge: Advanced Micro Devices, Inc. [AMD] Matisse PCIe GPP Bridge
22:02.0 PCI bridge: Advanced Micro Devices, Inc. [AMD] Matisse PCIe GPP Bridge
22:03.0 PCI bridge: Advanced Micro Devices, Inc. [AMD] Matisse PCIe GPP Bridge
22:04.0 PCI bridge: Advanced Micro Devices, Inc. [AMD] Matisse PCIe GPP Bridge
22:05.0 PCI bridge: Advanced Micro Devices, Inc. [AMD] Matisse PCIe GPP Bridge
22:08.0 PCI bridge: Advanced Micro Devices, Inc. [AMD] Matisse PCIe GPP Bridge
23:00.0 USB controller: ASMedia Technology Inc. ASM3242 USB 3.2 Host Controller
24:00.0 Ethernet controller: Intel Corporation Ethernet Controller X550 (rev 01)
24:00.1 Ethernet controller: Intel Corporation Ethernet Controller X550 (rev 01)
25:00.0 Network controller: Intel Corporation Wi-Fi 6 AX200 (rev 1a)
26:00.0 SATA controller: ASMedia Technology Inc. ASM1062 Serial ATA Controller (rev 02)
27:00.0 SATA controller: ASMedia Technology Inc. ASM1062 Serial ATA Controller (rev 02)
28:00.0 Non-Essential Instrumentation [1300]: Advanced Micro Devices, Inc. [AMD] Starship/Matisse Reserved SPP
28:00.1 USB controller: Advanced Micro Devices, Inc. [AMD] Matisse USB 3.0 Host Controller
28:00.3 USB controller: Advanced Micro Devices, Inc. [AMD] Matisse USB 3.0 Host Controller
29:00.0 Non-Essential Instrumentation [1300]: Advanced Micro Devices, Inc. [AMD] Starship/Matisse PCIe Dummy Function
2a:00.0 Non-Essential Instrumentation [1300]: Advanced Micro Devices, Inc. [AMD] Starship/Matisse Reserved SPP
2a:00.1 Encryption controller: Advanced Micro Devices, Inc. [AMD] Starship/Matisse Cryptographic Coprocessor PSPCPP
2a:00.3 USB controller: Advanced Micro Devices, Inc. [AMD] Starship USB 3.0 Host Controller
2a:00.4 Audio device: Advanced Micro Devices, Inc. [AMD] Starship/Matisse HD Audio Controller
40:00.0 Host bridge: Advanced Micro Devices, Inc. [AMD] Starship/Matisse Root Complex
40:00.2 IOMMU: Advanced Micro Devices, Inc. [AMD] Milan IOMMU (rev 01)
40:01.0 Host bridge: Advanced Micro Devices, Inc. [AMD] Starship/Matisse PCIe Dummy Host Bridge
40:01.1 PCI bridge: Advanced Micro Devices, Inc. [AMD] Starship/Matisse GPP Bridge
40:02.0 Host bridge: Advanced Micro Devices, Inc. [AMD] Starship/Matisse PCIe Dummy Host Bridge
40:03.0 Host bridge: Advanced Micro Devices, Inc. [AMD] Starship/Matisse PCIe Dummy Host Bridge
40:03.1 PCI bridge: Advanced Micro Devices, Inc. [AMD] Starship/Matisse GPP Bridge
40:03.2 PCI bridge: Advanced Micro Devices, Inc. [AMD] Starship/Matisse GPP Bridge
40:03.3 PCI bridge: Advanced Micro Devices, Inc. [AMD] Starship/Matisse GPP Bridge
40:03.4 PCI bridge: Advanced Micro Devices, Inc. [AMD] Starship/Matisse GPP Bridge
40:04.0 Host bridge: Advanced Micro Devices, Inc. [AMD] Starship/Matisse PCIe Dummy Host Bridge
40:05.0 Host bridge: Advanced Micro Devices, Inc. [AMD] Starship/Matisse PCIe Dummy Host Bridge
40:07.0 Host bridge: Advanced Micro Devices, Inc. [AMD] Starship/Matisse PCIe Dummy Host Bridge
40:07.1 PCI bridge: Advanced Micro Devices, Inc. [AMD] Starship/Matisse Internal PCIe GPP Bridge 0 to bus[E:B]
40:08.0 Host bridge: Advanced Micro Devices, Inc. [AMD] Starship/Matisse PCIe Dummy Host Bridge
40:08.1 PCI bridge: Advanced Micro Devices, Inc. [AMD] Starship/Matisse Internal PCIe GPP Bridge 0 to bus[E:B]
41:00.0 PCI bridge: Advanced Micro Devices, Inc. [AMD/ATI] Navi 10 XL Upstream Port of PCI Express Switch (rev c0)
42:00.0 PCI bridge: Advanced Micro Devices, Inc. [AMD/ATI] Navi 10 XL Downstream Port of PCI Express Switch
43:00.0 VGA compatible controller: Advanced Micro Devices, Inc. [AMD/ATI] Navi 21 [Radeon RX 6800/6800 XT / 6900 XT] (rev c0)
43:00.1 Audio device: Advanced Micro Devices, Inc. [AMD/ATI] Navi 21/23 HDMI/DP Audio Controller
44:00.0 Non-Volatile memory controller: Samsung Electronics Co Ltd Device a80c
45:00.0 Non-Volatile memory controller: Samsung Electronics Co Ltd Device a80c
46:00.0 Non-Volatile memory controller: Samsung Electronics Co Ltd Device a80c
47:00.0 Non-Volatile memory controller: Samsung Electronics Co Ltd Device a80c
48:00.0 Non-Essential Instrumentation [1300]: Advanced Micro Devices, Inc. [AMD] Starship/Matisse PCIe Dummy Function
49:00.0 Non-Essential Instrumentation [1300]: Advanced Micro Devices, Inc. [AMD] Starship/Matisse Reserved SPP
60:00.0 Host bridge: Advanced Micro Devices, Inc. [AMD] Starship/Matisse Root Complex
60:00.2 IOMMU: Advanced Micro Devices, Inc. [AMD] Milan IOMMU (rev 01)
60:01.0 Host bridge: Advanced Micro Devices, Inc. [AMD] Starship/Matisse PCIe Dummy Host Bridge
60:02.0 Host bridge: Advanced Micro Devices, Inc. [AMD] Starship/Matisse PCIe Dummy Host Bridge
60:03.0 Host bridge: Advanced Micro Devices, Inc. [AMD] Starship/Matisse PCIe Dummy Host Bridge
60:04.0 Host bridge: Advanced Micro Devices, Inc. [AMD] Starship/Matisse PCIe Dummy Host Bridge
60:05.0 Host bridge: Advanced Micro Devices, Inc. [AMD] Starship/Matisse PCIe Dummy Host Bridge
60:07.0 Host bridge: Advanced Micro Devices, Inc. [AMD] Starship/Matisse PCIe Dummy Host Bridge
60:07.1 PCI bridge: Advanced Micro Devices, Inc. [AMD] Starship/Matisse Internal PCIe GPP Bridge 0 to bus[E:B]
60:08.0 Host bridge: Advanced Micro Devices, Inc. [AMD] Starship/Matisse PCIe Dummy Host Bridge
60:08.1 PCI bridge: Advanced Micro Devices, Inc. [AMD] Starship/Matisse Internal PCIe GPP Bridge 0 to bus[E:B]
61:00.0 Non-Essential Instrumentation [1300]: Advanced Micro Devices, Inc. [AMD] Starship/Matisse PCIe Dummy Function
62:00.0 Non-Essential Instrumentation [1300]: Advanced Micro Devices, Inc. [AMD] Starship/Matisse Reserved SPP
Hey there, I’m doing a very similar build, with an older gen TR pro, and different fans for case and CPU.
Ive hit a bit of a stumbling block, where I can’t work out what’s wrong with the standoffs. I’ve removed two of them, and installed the extension bracket for the extended motherboard, but it seems like the motherboard isn’t flush with the standoffs. Any idea? Did you buy custom ones and install? Any help would be much appreciated. Cheers
Thank you for posting your experience with the Asus Pro WS WRX80E-SAGE SE WIFI. A few weeks ago, I started building a system using the same motherboard and plan on posting my experiences on REDACTED.
You’re not alone with the PCIe AER corrected errors. I have four different PCIe NVMe x4 cards and get those same errors when one of the cards is loaded with 4 NVMe drives. With fewer drives, it doesn’t seem to throw the errors. It makes me not want to use that card in a production machine.
Once again, this was a great write-up!
I haven’t had issues with the card since switching to the 990 drives. I’m not entirely sure if the issue is the card or the motherboard. I hope your build went well! I removed the link you posted as it seems that there’s no blog there.